Pumpkin seeds: how to cook and fry. How to fry sunflower seeds in a frying pan
Over the past couple of years, we have been experiencing a boom in sales of bagged seeds. If 5 years ago you could only buy 200 grams of seeds from street vendors, now in every supermarket, shop or kiosk you can find a multi-colored bag with the coveted inscription.
Moreover, there are these bags for different tastes: white, yellow, black, transparent, 100 grams, 200, 500 - choose whatever you like. And what’s surprising is that, despite such an abundant supply, demand does not fall: the bags sell out with enviable consistency, and in return, like mushrooms after rain, new manufacturers and new packaging appear.
Seeing such a stir, only the lazy did not think about starting the production of packaged roasted sunflower seeds. But how to fry it on an industrial scale? In fact, everything is quite simple.
Methods for frying seeds
The seeds are fried in special frying ovens, which come in two types: periodic loading and continuous loading. Accordingly, there are only two ways to fry seeds. Some, however, also consider heating options for frying ovens, such as gas, electric heating elements or microwave, as frying methods. But, in our opinion, these are just heating options, perhaps affecting the frying speed and its economy, but not the method of obtaining the finished product.
Periodic loading of seeds
This method involves frying the seeds according to the frying pan principle, i.e. poured it into the oven, stirred it, fried it, tasted it, poured it out of the oven. Naturally, this method of frying seeds, as in the situation with a household frying pan, requires maximum human participation. The operator must pour the seed into the oven, which is usually several tens of kilograms or a couple of bags, constantly monitor the process of frying the seeds, tasting it, and, having achieved the desired quality, pour the seed out of the oven. If a person lets his guard down, the entire loaded batch of product can be ruined.
The human factor is the key disadvantage of batch loading. The advantages include the low cost of the frying oven due to the simplicity of its design. Actually, thanks to their low cost, batch-feed frying ovens retain their popularity - the consumer principle works: “simple, cheap, reliable.”
Pass-through method of frying seeds
The second method of frying seeds minimizes human participation in the frying process. The seeds are roasted in a special drum, on one side of which the original product is fed, and on the other, the finished product is poured out. The seed essentially “passes” through the drum, frying along the way, which is why the oven and method are called pass-through.
Used in equipment:
Electric frying oven PZhP-70
. Automated line for frying and packaging seeds ALZHUS-70
In this case, the operator is required to only set operating parameters one-time (product feed rate and frying temperature) and in the future the oven can independently continue frying the seeds. The human factor does not play such an important role as in periodic loading - the quality of frying is guaranteed not by the attentiveness of the operator, but by the consistency of the process.
But such obvious advantages are compensated by the price: continuous-type furnaces are much more expensive than batch furnaces.
Our choice
After a long time weighing all the pros and cons, we ultimately decided on the pass-through method - and for about 5 years now we have been producing exclusively electric feed-through ovens. We also recommend that our clients, despite the price, give preference to continuous-type ovens. What caused this decision?
- Roasting speed of seeds. In batch ovens, the average speed of frying seeds is about 20-25 minutes, while in continuous-type ovens it is only 10. In addition to the banal productivity, the increased speed of frying seeds has a number of other advantages. Firstly, 20 minutes in the oven is no longer frying, but rather drying. As the seed dries out, like any other product, it loses its taste. This does not happen in continuous ovens and the seeds are actually fried, maintaining optimal taste. Secondly, 20 minutes of being in a hot environment leads to charring of the outer cover of the seed and the formation of ash, which then, when the seed spills out, stains everything it touches: hands, clothes, packaging. Moreover, it gets so dirty that it is sometimes quite difficult to get rid of black spots. In a continuous oven, the seed does not have time to char.
- Stability of quality. The notorious human factor in batch furnaces leads to the fact that simple inattention, fatigue or poor health of the operator leads to damage to a significant amount of the product. Anything put into the oven may either be undercooked or overcooked. Therefore, the operator is forced to constantly taste the product and monitor its stirring and uniform frying. In pass-through ovens, the influence of the human factor is minimized - the seed passes through the drum at a given speed. The operator only needs to set the necessary parameters once to constantly receive an equally fried product, without the risk of spoilage.
- Cooling problem. Anyone who has ever fried sunflower seeds in a frying pan at home knows very well that this product has the ability to “cook.” Those. continue to fry even when removed from the pan. To stop this process, the seed is cooled, usually by laying it out in a thin layer on a flat surface (table), where air circulation extinguishes the roasting process. If you neglect this point and simply pour the seed into a pile, you are guaranteed to get a burnt product. Now imagine roasting several bags of sunflower seeds in a batch oven. When all this mass is ready, it needs to be poured out and cooled. Moreover, cool everything at once, not allowing it to remain in the general mass. And at this time you still need to pour a new portion into the oven (after all, the oven is working) and control its frying. In continuous ovens the situation is simpler: the seed is not poured out in large volumes, but flows in a small constant flow, so to speak, in a “thin stream”, and therefore cooling it is not difficult.
- Versatility. Pass-through ovens, due to the ability to independently support the frying process, seeds can be easily integrated into automated lines for frying and packaging seeds. These lines are capable, in the absence of direct human intervention, to provide a full cycle of packaging roasted seeds: from receiving the raw material (calibrated seeds) to issuing individually packaged portions. For batch furnaces, the question of inclusion in the line does not even arise: a significant proportion of manual labor makes it simply pointless. Thus, continuous-type frying ovens are more versatile than batch ovens and can function both independently and as part of production lines.
Used in equipment:
The above factors, in our opinion, are significant enough to justify the price of continuous furnaces and give preference to them. Moreover, having created our first line for frying seeds in 2006, we decided that the design of continuous ovens was not entirely optimal and worked for several years to modernize it.
Our innovations
Realizing that we can compete with cheap batch furnaces only through clear superiority in quality and performance, we persistently tried, and are still trying, to improve the efficiency of the continuous furnace. As of the current moment, we can add to our credit the following achievements in this field.
- The design of the frying drum and heating elements has been changed, resulting in reduced frying time (less than 10 minutes) and increased efficiency. This made it possible not only to increase productivity to 70 kg per hour, but also to obtain the most optimal taste of the fried seeds. We can say that we have found the only case when, as productivity increases, quality does not fall, but rather strives for perfection.
- Effective thermal insulation of the internal space of the drum is organized, which reduces heat loss and reduces energy costs. In other words, we are gradually moving towards a highly effective but economical product.
- An uninterruptible power supply (UPS) has been introduced into the standard equipment of the frying oven, the task of which is not only to equalize the “jumping” voltage of the electrical networks, but also to prevent the seeds from burning when the power supply is cut off. Those. in the event of a power failure, the UPS ensures the operation of the drum's electric drive and allows the seed poured into the drum to finish frying due to the residual heat and spill out of it.
- A frequency regulator has been added to the design, allowing the operator to regulate the drum rotation speed and, accordingly, the seed frying time. This point is important when using raw materials of different humidity or changing the product being fried: for more humid (dense) ones, you can increase the frying time, and for less humid ones, reduce it. Thus, we, in fact, made the oven even more versatile.
- Feedback has been created on the voltage of the vibrating feeder that supplies the seed to the drum, which is why it maintains a stable vibration amplitude during any “jumps” in voltage. The seed will always be supplied in the same and uniform flow. In our opinion, this is especially true for manufacturers located outside large cities.
But, probably, the most important thing is that when modernizing the furnace, we are constantly working to simplify its design, eliminate unnecessary elements and optimize the manufacture of parts. Thanks to this, we can afford to keep stove prices at least a third lower than our competitors. And this despite the fact that the advantages listed above are included as standard, while competitors, at best, have some of them installed for an additional fee.
And lastly, in the production of frying ovens we are faced with another important point - the more expedient it is to heat the oven.
Electricity or gas?
As mentioned at the beginning of this material, there are at least three ways to heat a frying oven: gas, electric heating element and microwave. The first two are the most common, the third is more exotic than reality (although some consider it quite promising). Accordingly, there are two energy sources suitable for heating the furnace: gas and electricity. Which one to choose and which one will be optimal?
In the race to increase demand, many manufacturers equip their furnaces with gas heating, motivating this decision by the consumer’s familiarity with this type of energy carrier, its availability and low cost. However, in our opinion, this is not entirely true and trying to get a cheap stove can have negative consequences.
Firstly, gas availability is a relative thing. It’s good when production workshops are already equipped with a gas main and the only question is about connecting a separate installation, but if there is no gas supply to the room where the furnace is located or gas is supplied for domestic needs, saving loses all meaning. After all, the cost of the furnace is in no way comparable to the cost of the project and the physical connection of the industrial gas main.
Secondly, the price of gas is a variable value and very much depends on various conditions: the political situation, quotes on world markets, exceeding the limit, etc. In this connection, sharp and hardly predictable jumps are possible.
AND, Thirdly, sunflower seeds are a product prone to absorption. The seed, although not strongly, absorbs gas combustion products, which leads to a change in its taste and, perhaps, is not entirely useful for the end consumer. Absorption can be avoided by using a heat exchanger in the design of the furnace, but in this case the cost of the furnace increases greatly and the main advantage is lost - low cost.
Therefore, our ovens are exclusively electric. We do not strive for mythical cheapness and do not incline our clients towards it; it is much more important for us to make a high-quality product that is justified in price. Electricity is supplied to almost every building, and if not, then the cost of connection is significantly lower than that of gas. The price for electricity consumption is more or less stable, and the combustion process, as such, is absent in principle - the seed simply has nothing to absorb.
There is nothing easier than roasting seeds with salt in the oven if you like such a snack. You can buy raw sunflower seeds at the market or in a special store, shop, or supermarket section. However, you should not think that everything is as simple as it seems: the snack can burn in an instant, and then the seeds will be bitter. To avoid this, follow the step-by-step recommendations in the recipe and trust your sense of smell: as soon as you feel the aroma that they are fried, remove from the oven.
Ingredients

- 1 cup raw seeds
- 4 pinches of salt
Frying process
 1. In the market, seeds are often sold in glasses, so for convenience, we will focus the recipe on this volume (standard glass, 200 ml). We will go through the seeds to remove damaged ones and any stray debris.
 2. Pour the selected mass into a container, add water and mix thoroughly to wash the seeds from dust and impurities. Add water and rinse several more times.
 3. Salt the wet seeds and mix. The salt will remain on them and will be absorbed during frying. But you can add salt to the appetizer after frying.
 4. Pour the mixture of seeds into a baking dish and place it in an oven preheated to 100 degrees. We will not close the oven door: we need the mass to dry rather than bake, so the air must circulate. We will stir the seeds every 5–10 minutes. Drying will take about 20–30 minutes, depending on the size of the seeds.
Eating seeds is an iconic psychological pleasure, comparable to drinking tea and meditation. There is an opinion that eating seeds is harmful, which is generally not supported by nutritionists. On the contrary, moderate consumption of well-cooked sunflower seeds helps strengthen blood vessels and improves the functioning of the nervous system, brain and digestion. The most useful are raw seeds, extracted from the husk directly during consumption. The recommended daily amount should not exceed 100 grams.
Recently (peeled and peeled, fried and unfried) are sold packaged in an assortment. However, we are not always satisfied with the taste of these finished products; they can deteriorate due to violation of storage conditions and periods. In addition, we do not know how they are prepared, whether they contain any unhealthy additives.
We'll tell you how to properly fry seeds in a frying pan at home.
Ingredients:
- raw sunflower seeds – 1-2 cups;
- coarse salt (optional).
Preparation
We rinse the seeds to free them from dust and small plant particles and place them on a sieve, and then place them loosely on a clean napkin.
Heat a dry frying pan, cast iron or aluminum (without coatings) well. Pour in the seeds and distribute them evenly over the surface of the pan. First, dry over medium-high heat, stirring with a wooden spatula, until the steam stops rising. Then reduce the heat to low and, continuing to stir, fry until the desired doneness (presumably, the frying time will be no more than 10 minutes). If the seeds begin to crackle, it’s definitely time to turn off the heat. During the final frying process, you can add 1-2 pinches of coarse table salt to the pan. Pour the roasted seeds, evenly distributing them, onto a clean, dry napkin or wooden board.
Some people like to fry the seeds, making them more salty, as you understand, this is not healthy. In any case, the amount of salt should not exceed 1 teaspoon per 1 cup of seeds. Moreover, there is no need to add oil to the frying pan; it may taste better for some, but much more carcinogens are formed during such frying.
Well, and most importantly: I would like to advise you to peel the seeds not with your teeth, but by hand - this style of use will be the best. And then there are pumpkin seeds, which are an excellent way to cleanse the body of possible harmful microorganisms. optimize water-salt metabolism, strengthen blood vessels and promote male strength.
How to properly roast pumpkin seeds?
Pumpkin seeds, extracted from the husk during the absorption process, taste excellent without any toasting, and if they are raw and wet (just removed from the fruit), they can simply be dried in a dry frying pan or on a baking sheet in the oven. If you still want to lightly toast them, proceed in the same way as for toasting sunflower seeds (see above). There is no need for salt at all. We eat pumpkin seeds, extracting the kernels with our fingers, it’s not difficult, and it also develops  fine motor skills, which is especially good for children over 4 years old.
How to fry peeled seeds?
We fry the peeled seeds in the same way as unhulled ones; in this case, they must first be filled with hot water, and then after 3 minutes, drain the water and rinse again to remove any remaining residual oil (it may taste unpleasantly bitter). Next, lightly dry the seeds on a napkin, or simply eat them, or lightly dry them and fry them in a dry frying pan, stirring with a wooden spatula. We proceed approximately the same way as when frying seeds in the husk (see above).
To fry the seeds in a frying pan, you don't need any special culinary skills. This is a fairly simple process that anyone can handle. It is only important to know how to do it correctly, and how long the seeds are fried before they are ready. We will tell you about this in detail in our article.
Nowadays, there is not a single person who has never eaten seeds. In some societies, it was considered shameful and unaesthetic to “husk” seeds in public. But now it’s quite common to see a person on the street cracking sunflower seeds in the park, at a tram stop, or even in cinemas and the circus.
The higher the popularity of this product became, the more all sorts of signs they came up with about it. Some particularly superstitious people even managed to find some kind of secret subtext in eating seeds. But these are all relics of the past. Today, seeds are a widely available food product, and once you try it, you can’t stop eating it.
But, would you agree, it’s much more pleasant to eat seeds fried with your own hands at home? They are clean, aromatic, can be salty or even with all kinds of seasonings - it depends only on your imagination. This is especially very beneficial when you have a summer house or your own garden where sunflowers grow. By harvesting these flowers, you can easily provide yourself and your family with a delicious treat.
There are many ways to fry sunflower seeds, but in our article we will talk about the most common and effective: frying the seeds in a frying pan. Additional information can be found in the video, which is also presented in the material.
How to fry?
Properly frying the seeds in a frying pan should take no more than 20 minutes. This takes into account the preparation of seeds.
Before frying the seeds, they must be thoroughly washed. To do this, fill them with water and remember a little with your hands. This will help get rid of dust and dirt, so your hands will remain clean when you eat your homemade roasted seeds.
Let the seeds dry, place a frying pan on the stove and heat it thoroughly. After this, carefully pour the seeds into it and stir regularly using a wooden spatula. When you hear a crackling sound, you need to remove the frying pan from the heat and let the seeds sit for about three minutes. Then return to the stove and fry until they crack again. This procedure should be repeated three to four times so that the seeds are thoroughly fried. Remember to stir them regularly to prevent overcooking.
When the seeds are ready, pour them onto a newspaper spread on the table, then roll it up and let the seeds sit for a while and cool. After this they are ready to eat.
To make it easier to fry the seeds, some advise peeling a few seeds from the shell and throwing them into the general mass. During the frying process, we observe these kernels: when they become golden brown, it means the seeds are ready and you can remove them from the heat.

Sunflower seeds with salt in a frying pan
Surely many of you have tried sunflower seeds fried in a frying pan with salt. A very original and tasty dish that you can prepare at home. The beauty is that homemade salted seeds will be no different from store-bought ones, only the quality will be better, and you don’t need to spend money.
In order to fry the seeds in a frying pan with salt, you first need to rinse them thoroughly. Then take a pan, pour the seeds into it and fill them with water. Add salt at the rate of 1 tablespoon per 150 grams of seeds. Place on the fire and wait for the water to boil. After boiling, remove the seeds from the pan and pour into the pan. It takes about seven minutes to dry for excess moisture to evaporate. Taste the seeds periodically to avoid overcooking them. After the fried seeds are ready, pour them onto a cloth towel, wrap it and after it has cooled, the seeds are ready to eat.

pumpkin seeds
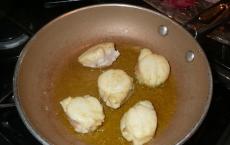
Here's how to fry pumpkin seeds in a frying pan:: Fill a wide frying pan with a thin layer of sunflower oil, heat it, then add pumpkin seeds. Fry the seeds for about half an hour, stirring them constantly. Once the shells of the pumpkin seeds begin to brown, you can remove them from the heat, but do not remove them from the pan until they have cooled. This way you will allow them to warm up thoroughly, which will have a positive effect on the taste of the fried pumpkin seeds.

Some people eat pumpkin seeds for health purposes, while others crack them for fun while watching TV or reading.
Some people buy them already dried, while others, having learned how to dry pumpkin seeds, prepare and dry them themselves. Having received a decent harvest of pumpkins, or having bought them at the market, you can easily dry or fry the achenes at home using kitchen appliances.
How to dry pumpkin seeds at home
There are several ways to dry or roast pumpkin seeds: outdoors, in the microwave, electric dryer, oven, electric grill and in a frying pan.
Before drying or frying, remove the seeds from the fruit, peel the pulp, wash and dry with paper towels. Now they are ready for drying, all that remains is to choose the appropriate method.
Frying in a pan
How to fry pumpkin seeds in a frying pan without burning them? We fry them using the following technology:
- Place the seeds in the pan in a thin layer.
- Turn on low heat and fry the contents without covering the pan with a lid.
- Stir the seeds regularly, avoiding burning.
How long to roast pumpkin seeds? About half an hour. As soon as they turn golden, remove the pan from the stove, pour its contents onto a baking sheet or dish, and wait until they cool. If the achenes remain in the pan, they will dry out.
Drying outside
To dry pumpkin seeds in the fresh air, dry, sunny weather is necessary: it will prevent damage to the raw materials.
How to Dry Delicious Pumpkin Seeds Outdoors
- Spread them in a single layer on trays or baking sheets, placing paper towels first.
- We put the dishes in a sunny place and let them sit for 2-3 days (we bring them into the house at night so they don’t get damp).
- When the seeds have hardened but are still brittle and easily crack when pressed with your fingers, they are ready.
If after three days the achenes have not dried, dry them to the desired condition. To prevent insects from landing on them, we cover them with gauze or tulle.
Oven drying
How should you dry pumpkin seeds in a regular oven? There are a couple of proven methods depending on the type of oven.
Drying in an evenly heated oven (where you cannot turn on the upper heating element separately):
- Preheat the device to 200°C.
- Place baking paper on a baking sheet.
- Sprinkle a thin layer of pumpkin seeds.
- Place the baking sheets in the oven on low heat.
- Dry the raw material for about half an hour, stirring it every 10 minutes. and regularly testing for readiness.
- As soon as the seeds acquire a brownish tint and become hard, we finish drying, take out the baking sheets and pour the achenes onto dishes: let them cool.
If they have not hardened properly, turn off the device and dry the pumpkin seeds for 10 minutes.
Oven drying with adjustable heating modes (when you can turn on the upper heating element separately):
- Turn on the upper heating element (frying mode) at 150 degrees.
- Before you start drying pumpkin seeds yourself at home, lay out the paper on a baking sheet.
- Cover with a thin layer of seeds.
- How to roast pumpkin seeds in a simple oven? Place the baking sheet in it for 10-15 minutes.
- We monitor the condition of the seeds, preventing them from burning. Have they turned brownish? We take them out, stir, turn off the device and dry for ten minutes.
Pour the dry seeds onto a plate and leave to cool.
Drying in an electric grill
Although the electric grill is not intended for drying seeds and other products, housewives have gotten used to drying seeds in it.
How to dry pumpkin seeds in an electric grill:
- Heat the grill to 60 degrees.
- Spread the seeds in a single layer on the surface of the container.
- Place it in an electric grill and dry the achenes for 20-30 minutes, regularly checking them for readiness. They can dry and acquire a golden hue much faster, since the device is equipped with a fan.
After drying, pour them onto a dish and wait to cool.

Drying in an electric dryer
How else can you dry pumpkin seeds at home? Using a special electric dryer. Usually berries, mushrooms and fruits are dried and dried in it, but it is also suitable for drying seeds:
- Preheat the device to 70 degrees.
- Scatter the pumpkin seeds into the containers in a single layer.
- Before drying pumpkin seeds, you will have to wait more than one hour, since at low temperatures drying occurs slowly, but, unlike frying, it retains all the beneficial substances.
Every hour we change the containers and mix the seeds. They are considered ready when they become hard and darken.
Microwave drying
Many people are interested in how to roast pumpkin seeds at home in the microwave. It's not difficult, the main thing is to follow the step-by-step instructions for drying seeds:
- We cover the bottom of the glass plate from the device with baking paper.
- We spread a thin layer of seeds on it.
- Place it back and turn it on at maximum power for 2 minutes.
- Mix the raw materials, set for another couple of minutes, but at medium power.
- How long should I roast pumpkin seeds? We repeat the procedures, leaving medium power, until the seed hardens and turns brownish.
Cool the finished treat on another plate and put it away for storage.
Storing Dried Pumpkin Seeds
Having learned how to fry pumpkin seeds in a frying pan, in the microwave, or dry them in another way, we will find out where and how to store them so that they do not become damp and spoiled.
Storage conditions for pumpkin seeds
- Dry dark place;
- Glass container;
- Unclean storage.
We pour the unpeeled seeds into the jars, close them and store them in a dry, lockable cabinet.
If salt or spices were added during frying, we try to eat this delicacy early, since the seeds are not stored for a long time in this form. Regular, dried achenes can be stored for a year.
Now it’s clear how to dry pumpkin seeds in the fresh air, in a frying pan and various kitchen utensils. The main thing is to properly prepare the seeds for drying and carefully follow the drying or roasting technology.