Tiles for paths in the country: laying instructions
The path in the country house performs many functions, including connecting the entrance to the house, the house to the garden, etc. Therefore, when arranging it, it requires due attention to the choice of materials and the process of its installation. The optimal material for laying on the path for giving is tile. We will consider how to lay tiles in the country house below.
Options and materials for the construction of the path in the country
There are many options for arranging a track in a summer cottage. The choice of one or the other depends directly on the desires of the owners, the general exterior of the building, the type of soil on which the path is being built.
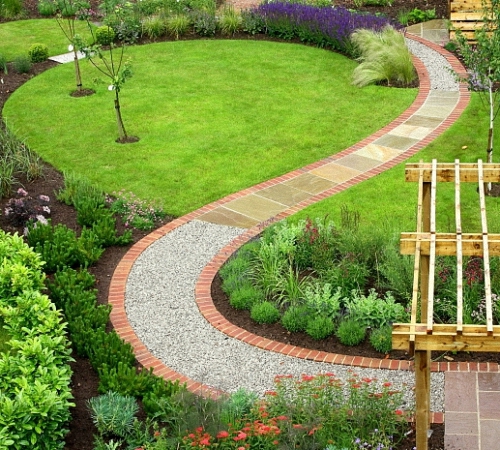
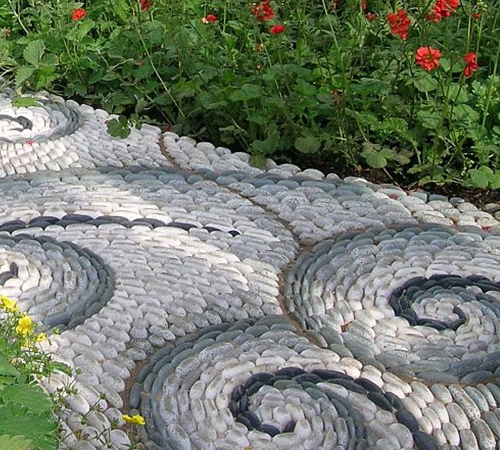
The use of natural stone makes the exterior noble and truly beautiful. Although the cost of this finishing material is very high. Curved paths are made with the help of natural stone. The location of the stone elements is chaotic, so with their help it is excellent to build a beautiful bend.
When making a country path in country style, it is possible to build it from wood. By applying special impregnations and varnishes, it turns out to improve the natural texture of the tree. Such a path looks extraordinary.
If the cottage is built of brick stone, then brick is also suitable for the construction of the path. Its combination with pebbles will improve the appearance of the path. In addition, the use of ordinary brick is impractical, it is better to use a brick adapted to the tile, as it has a high level of moisture and frost resistance.
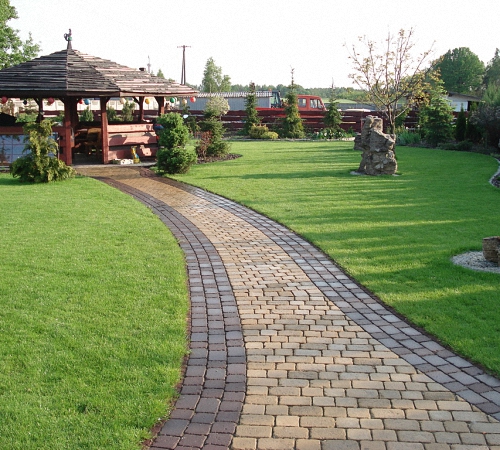
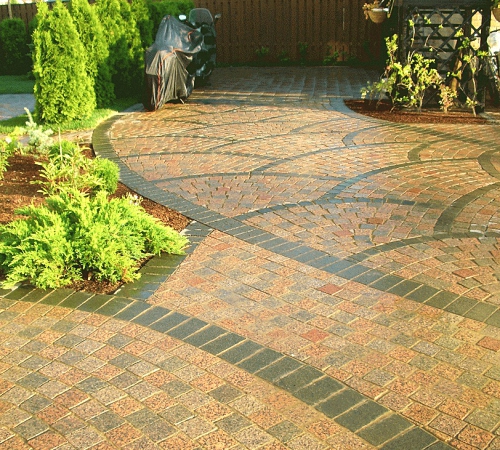
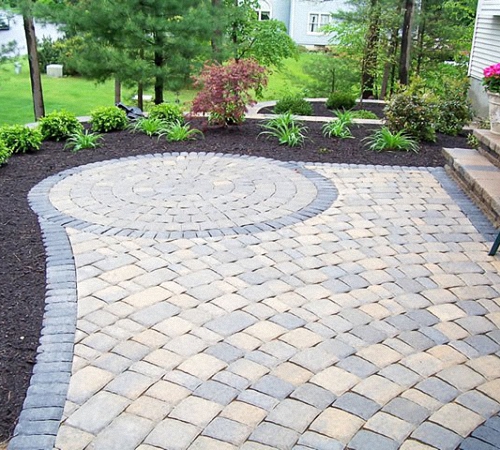
The longest service life is different paving stones or paving slabs. With the help of multi-colored paving stones and a certain scheme for its installation, a variety of drawings or ornaments are made that fit the individual style of each garden.
A more budgetary and inexpensive option is the construction of a gravel path. Its installation is appropriate in the wild or in the design of a naturalistic cottage.
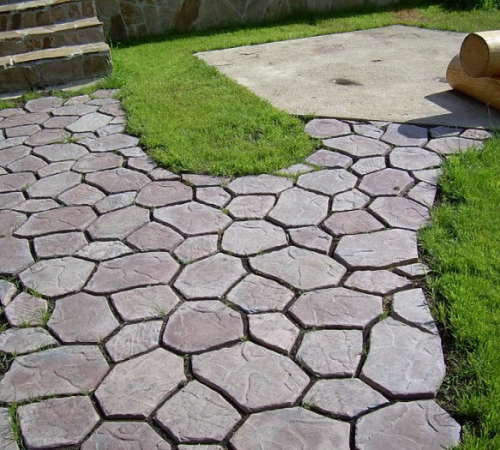
In addition, for the construction of the path, which will be unique and chic, ordinary concrete is used, which is poured into special silicone molds. A combination of several materials will also serve as a good way to experiment in the country.
Tiles in the country: features of choice and application
The country path is constantly exposed to the influence of the environment, so the material for its decoration must be of high quality in order to serve its owner for many years.
The path in the country house is influenced by people who move along it, garden carts and equipment, they spill water on it, bring dirt or dust from the garden plot, in addition, there is a constant effect of rain and snow with ice, which periodically need to be cleaned. Therefore, the requirements for the construction of a summer cottage are very high.
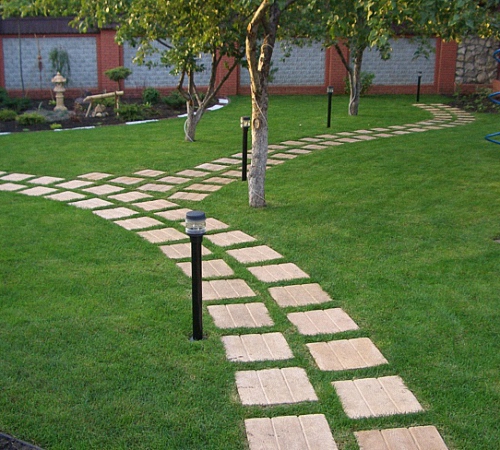
Tile in the country house photo:
As well as possible, material in the form of paving slabs is suitable for finishing a garden path. Let's take a look at the features of her choice below:
1. Pay attention to the material from which the tile is made. Since the main components of the solution greatly affect its durability. In addition, the technology of its manufacture plays an important role. This information, without fail, must be owned by the seller. Otherwise, look elsewhere to buy it. In addition, we recommend that you examine the certification of products and documents confirming their quality.
2. The size and thickness of the tile also plays a role in its operation. If the garden path is intended for pedestrians, the recommended thickness is three centimeters. When installing platforms for the location of vehicles, choose tiles with a thickness of five centimeters or more. You should not choose tiles that are too large, as it has been practically proven that the smaller the tile, the more resistant it is to mechanical damage and cracking.
3. The appearance of paving slabs will also help determine its quality. If the tile has a bright color and a smooth surface, this does not mean that it is of high quality. It is the smooth texture that indicates a large amount of water in the solution, and the brightness indicates the use of cheap synthetic dyes that improve friability and reduce the strength of the material. In addition, it should be noted that a too smooth tile surface leads to slipping injuries, especially in winter or in the rain. Therefore, before buying a tile, you should clearly define its texture, color and pattern. To test the tile for strength, you should hit one tile against the second, if there is a sonorous sound, the tile is strong, otherwise it is loose.
4. It is possible to purchase one tile that you like for a thorough inspection. If there are various kinds of stains on the reverse side, it is better to refuse the purchase. Since in the production of such tiles, sand with a large amount of clay was used, which significantly degrades the quality of the tiles. Clay is never combined with cement mortars, as it degrades its quality and leads to friability. Next, you should split the tile into two parts in order to inspect the uniformity of the texture on its inner part. In the absence of paint stains, clay or sandy areas and pores, feel free to buy tiles for the construction of the track.
The path is an important part of the cottage, so it is better to think about its location even at the stage of building the building itself. To facilitate the calculations, it is better to make an approximate drawing using special online programs. After identifying important points, connect them using straight or curved paths.
It is advisable to place on the diagram all the objects present on the territory. These include a garden plot, a vegetable garden, a greenhouse, a bathhouse or a gazebo. Tracks provide a connection between these objects.
As the material used to build the walkway, choose a finish that blends with the environment. You should not make all tracks of the same kind. It is possible to combine solid tracks with step-by-step ones, curved ones with straight ones.
When designing a site, you should indicate the location of the future location of plants and bushes. If you live in a climate zone with heavy rainfall, take care of the arrangement of the drainage system, which involves the construction of drains, on the sides of the path. With their help, water will be removed and stagnation will not appear. In the process of building a country path, it should be remembered that the water that freezes on its surface reduces the life of the coating on the path several times. Avoid planting powerful trees near the path, as their root system will destroy their integrity over time.
Laying tiles in the country: the technology of the process, the initial stage
After purchasing a high-quality tile for a summer residence, a series of works should be carried out to install it. If you take this procedure lightly, then even the best tile will require replacement over time, due to non-compliance with the technology of its installation.
Before laying paving slabs in the country, it is necessary to study the instructions from the tile manufacturer for its installation.
The initial stage of the work is the design and marking of the territory for the construction of the track. All calculations from a pre-prepared project should be transferred to the surface of the earth. To markup, you will need to measure the width and length of the track, gradually setting the pegs in the marking places. A tension thread is pulled onto the pegs, a slope, if any, and turns are affixed.

You should decide on the type of tile you buy in advance, but buy it only after the markup is ready. Since it is with its help that it will be possible to calculate the required number of tiles for laying. It is preferable to take a tile with a margin of several pieces in order to replace the material in case of accidental crumbling.
The next stage is based on earthworks to remove the soil layer before laying the tiles. The thickness of this layer is influenced by factors such as the size of the tile, the drainage pad and the amount of concrete required to reinforce the base. In addition, it must be taken into account that over time, soil shrinkage will occur, and the installation height of the tile will decrease. The correctness of these calculations depends on the type of soil located in the summer cottage, the size of the track and the base under it.
The most accurate calculation is made by a specialist who is directly at the installation site of the tile. The interval between the values \u200b\u200bof removing the soil layer is from 8 to 40 cm. The first number determines the thickness of the tile, for example, 5 cm, the second - the sand cushion - 4 cm, if necessary, in arranging paving with increased bearing capacity, it makes a recess by another 8 cm.
We should not forget about the arrangement of the rain slope, which is being built at the work site. Its value is one centimeter per 1 m². In addition, there is a need to make lateral indents of 8 cm on both sides. They are necessary for the installation of curbstones.
The third step in laying tiles is the installation of borders. The main requirements for them are evenness and uniformity. In addition, they must be set at a certain slope. The installation of the stone is carried out using a liquid solution. Try to strictly adhere to the markup.
Continues the installation procedure - filling the base pad. Crushed stone is used as the bottom layer, with a fraction of two to four centimeters. After its laying, tamping and leveling of the first layer follows.
When creating a surface with increased bearing capacity and strength, the pillow has a slightly different look. Sand is poured onto the crushed stone, then a non-woven geotextile is laid, which improves the quality of the pillow and prevents the sand from shrinking. Then another sandy layer, 10 cm thick, is laid on the surface. A vibrating plate or a skating rink is used to compact it. Then another layer of sand is poured, 4 cm thick, it does not require tamping. Directly on this sand begin to lay tiles.
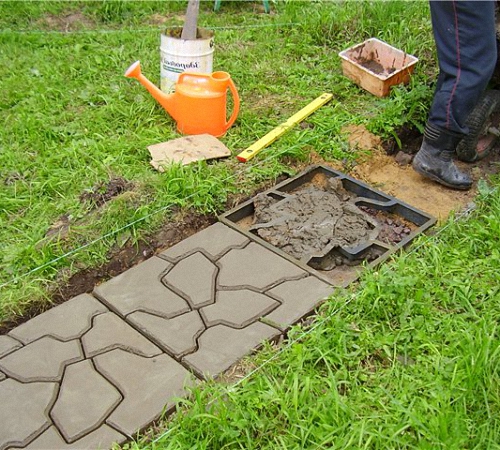
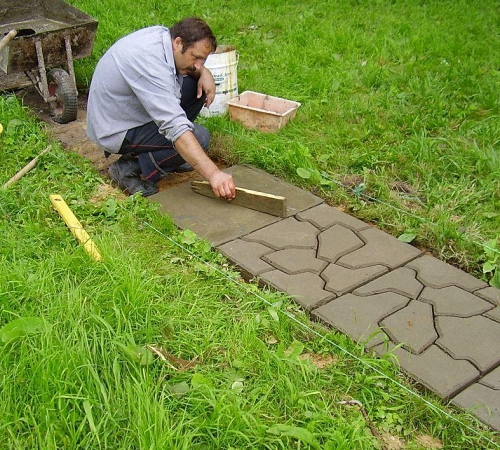
The final process is the direct laying of tiles. To do this, a rope is pulled along which the installation of the first row is equal. Start laying solid stones, leaving gaps of a few millimeters between them. When laying each brick stone, it is required to hit it with a rubber mallet for better compaction in the sand cushion.
The laying of the next row is carried out not with whole, but with half stones. Thus, a beautiful decorative pattern will turn out. In order to achieve even seams between paving slabs, it is recommended to purchase special crosses installed in the gaps between each of the tiles.
Once the tiles are laid, backfill the joints between them with sand or a sand-cement mixture. Thus, their reliable sealing will occur. Several times it is necessary to wet the seams with water, and wait for them to dry completely.
- when carrying out work, use only special tools, because there is a risk of damage to the tiles;
- be sure to buy tiles with a small margin to compensate for damaged material;
- if necessary in standard bearing capacity, the tiles are laid on the surface with a dry mix or sand cushion;
Path of tiles in the country - an extraordinary solution
A simple and budget option is to independently make a path in the country from old tiles.
To create it, you will need:
- old ceramic tiles or new tiles of the cheapest cost;
- cement;
- sand;
- gravel;
- mixing tank;
- peg;
- cord;
- shovels;
- roulettes;
- level.
For self-production of such a track, first of all, it is required to make markings according to its width and length. According to the previously done markings, it is necessary to dig a trench, its depth is 15 cm. The trench should be sloping by one and a half centimeters. On the sides of the future path, attach a wooden formwork. Pack the bottom of the trench and level with a roller. Note that the slope must be maintained.
Pour sand into the bottom of the trench, with a layer of 5-8 cm, then crushed stone, by 6 cm. Start preparing the concrete solution, watch its consistency. It should be mushy. The surface of the track should be several centimeters higher than the surface of the ground. Level the concrete surface, get rid of excess air. Break the ceramic tiles into pieces, if desired, and install them based on your own preferences and imagination. Wait for the concrete mortar to dry completely, it will take about 6 days and use the track for its intended purpose.
Please note that this version of the track does not imply too much load on its surface, and serves more as a decorative element.
Paving slabs in the country house video: