Learning how to properly lay paving slabs
How to lay paving slabs with your own hands without any problems so that it lasts for more than one year? There are generally accepted guidelines that everyone should follow. In this case, it is not difficult to achieve high quality with a minimum amount of effort.
Material Advantages
Paving slabs are considered a popular material that is used to form walkways and playgrounds.
Walkway from paving slabs
It has numerous advantages:
- a wide selection of shapes, colors, textures of the material, which allows you to realize any design solution;
- paving slabs are made from environmentally friendly materials, which prevents harm to the environment;
- the coating does not change color and does not change shape when exposed to high or low temperatures;
- laying street tiles involves the formation of drainage, which prevents the accumulation of water on the surface;
- characterized by high strength to various types of loads and wear resistance;
- the operation of the finished coating is easy, since caring for it does not cause difficulties;
- paving stone laying is carried out quickly and does not require the involvement of specialists.
Plot marking
At the planning stage, it is necessary to carefully consider where the pavement paths will be placed, how they will be laid. It is best to draw a site plan, which will allow you to calculate all the necessary areas.
After calculating the required volume of materials, 10-15% should be added to the resulting number. Laying paving slabs may not be so easy, so a supply is needed if it is damaged during installation.
When planning paths, one should also not forget that curbs are installed along its edges. They should be much thicker than paving stones. The border will help maintain the integrity of the coating and give it a complete appearance.
To lay paving slabs with your own hands, use the following tools:
- shovel (it is desirable to use a shovel and a bayonet);
- rubber or wooden hammer;
- building level;
- Bulgarian;
- a set of spatulas of different widths;
- rule;
- twine or cord;
- roulette;
- Master OK;
- a container suitable for the preparation of building mixtures;
- rake.

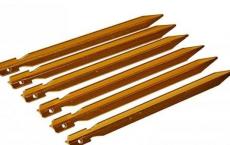
A rake will help spread the material evenly
Foundation preparation
Before laying paving stones, you need to take care of. First, markings are carried out on the territory of the site, hammering wooden pegs along the edges of the tracks. A cord or twine is pulled over them.
The resulting site must be carefully leveled. In the process of carrying out the work, all the hills are removed and the pits are filled up. The technology of laying paving slabs implies the presence of a slope (transverse, longitudinal, transverse-longitudinal). When it rains, it will allow water to run off and prevent puddles from forming on the surface.
After leveling the site, it is carefully rammed.

Various types of hand rammers
This prevents uneven shrinkage of the coating during operation. It must be remembered that the entire installed paving structure will have a thickness of 20 to 30 cm. Therefore, in many cases it is recommended to remove the top vegetation layer of the soil and deepen the coating.
Laying paving stones on a concrete base
Can paving slabs be laid on a concrete base? This should be done if the coating will be placed on weak soils. Such actions will prevent premature destruction of the tracks. You can lay out all the layers of the structure in the following sequence:
- A layer of screed formed from is poured onto a compacted base.
- The surface is carefully leveled and compacted to remove air bubbles.
- It is necessary to lay the curbs, falling asleep on both sides of fine gravel.
- Curbs are installed taking into account the fact that paving stones will be located on their inner side (there is a gap of 2-3 mm).
- Borders are concreted with a mortar prepared using a 1:2 ratio.
- The rules imply the use of a cement-sand mortar as an adhesive.
- Spacers made of wood are installed in the gaps between the individual elements of the coating to form seams.
- After mounting the entire track, the remaining solution is carefully removed from the surface.
The process of removing mortar residue from paving stones
Sand base application
How to lay paving slabs on sand so that the resulting coating lasts more than one year? This foundation is the most successful, since it plays the role of a drainage system. Sand several times increases the stability of the structure and prevents its premature destruction.
How to lay paving slabs in this case:
- A sand cushion 50-60 mm thick is arranged over the entire surface.
- Bulk material is carefully leveled with a rake.
- The sandy base is watered with water until puddles form.
- After 3-4 hours (in sunny weather), the pillow is given the desired shape.
- An ordinary pipe or bar is used as a guide profile.
- The pipes are placed at a distance of 2-3 m, and the sand in the interval between them is leveled by the rule.
Paving slabs
Installation on a cement-sand mixture
How to lay paving slabs correctly if a heavy load is expected on it? The following recommendations should be followed:
- A powder of sand 3-4 cm thick is made on the prepared base.
- Install a reinforcing mesh, which will significantly increase the strength of the coating.
- It is necessary to mix fine dry sand with cement in a ratio of 4: 1 (you can buy a special tile composition in the store).
- The finished mixture is leveled on the surface (the maximum thickness of the preparation is 4 cm).
- To facilitate the performance of all operations, guides from reinforcement bars or pipes are used.
Popular schemes for laying paving stones
How to lay paving slabs so that it looks beautiful? There are several popular schemes.

Classic order
For a beginner, laying tiles in the yard is easiest using the classic scheme. It involves the placement of individual elements of the coating one after another. In this case, it is best to use paving stones of the correct shape - rectangular or square. It is easy to install without professional skills.
To improve the appearance of this coating during the formation of the track, it is recommended to use paving stones of different colors and textures. In this way, it is possible to implement various design solutions.
Laying scheme "with offset"
This technology of laying paving slabs also belongs to the traditional ones. It involves the installation of individual elements in such a way as to avoid overlapping joints.
To achieve a good quality coating, it is recommended to use paving stones of the same shape. There are no restrictions regarding the color and texture of the material.
Herringbone pattern
You can even lay paving slabs in a herringbone pattern, which means mounting each coating element at an angle of 45 or 90 degrees.
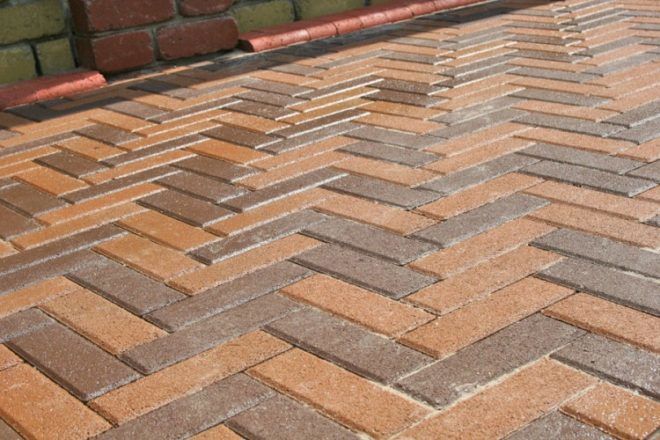
In this case, the paving stones can have a rectangular or curly shape.
An improved version of the "herringbone" is considered to be "wicker". It implies the alternation of longitudinally and transversely placed coating elements. To ensure that the resulting pattern is clear and aesthetically pleasing, it is recommended to use materials of only two colors during installation.
Other schemes
There are other ways to lay paving slabs:
- chess order. It is recommended to combine several colors;
- diagonal layout. The longitudinal seam of the coating is displaced relative to the axis of human movement by 30-60 degrees;
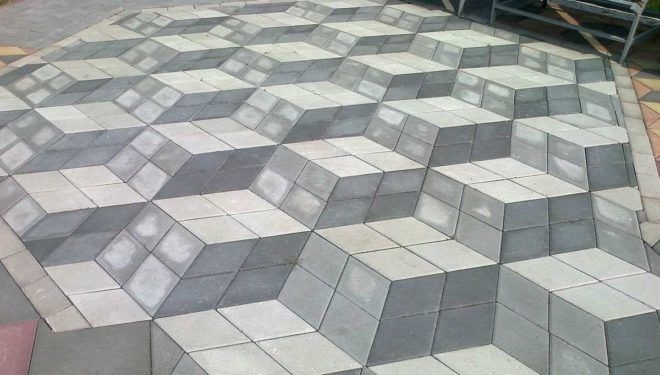
- geometry. We put tiles of the same size, but different colors (different patterns are formed in the form of geometric shapes).
Rules for laying paving stones
It is necessary to start laying paving slabs in the direction away from you. In this case, the coating is not deformed under the weight of a person. Laying of paving slabs on sand occurs according to the chosen scheme. Each element is carefully leveled and fixed with a mallet.
Subsequent rows of coating are also installed with a 2 mm gap. During installation, the evenness of the pavers is checked all the time. When a marriage is detected, the tile is dismantled and installed in a new way.
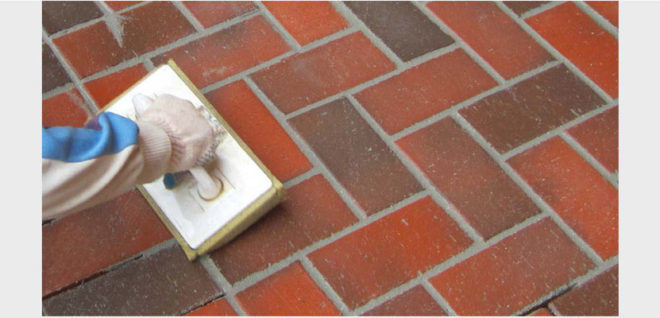
After the laying of paving stones is completed, they begin to fill the joints. For this purpose, sand or a sand-cement mixture is used.
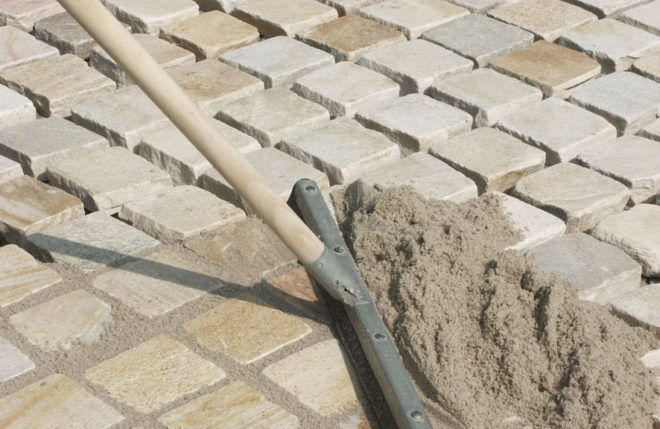
At the final stage of work, excess grout is removed, checking the quality of filling the seams. They are also thoroughly moistened with water. The seams must be tight, as they take on some of the load.
Some nuances of installation
The existing methods of laying paving slabs are implemented in compliance with the following rules:
- paving stones are installed from the lowest point to the top;
- when mounting in a circular way, work starts from the center of the picture;
- during operation, the horizontal is checked by the level every 2-3 rows;
- when installing paving stones on sand, the gap near the curb is not concreted;
- to better fill the joints with sand, it is recommended to tamp the surface with an areal vibrator.

Care and maintenance of the coating
It is allowed to walk on the laid paving stones only 2-3 days after the final sealing of the seams. To clean the surface of dirt, use a broom or wash it with a stream of water from a hose. You should constantly monitor the safety of the seams. Over time, the sand is washed out, so it must be periodically poured.
Paving stones must not be cleaned with abrasive powders. To do this, it is better to use sifted river sand. If necessary, the surface can also be washed with a mild soap solution.
Laying paving slabs with your own hands, the step-by-step instructions of which are presented above, are carried out without difficulty. The main thing is to follow the recommendations of experienced professionals.