Options and technologies for the correct laying of tiles for the sidewalk, the necessary materials and tools
Paving slabs are valued for their practicality, high strength, durability, resistance to moisture and temperature changes. It does not emit substances harmful to humans when heated, like asphalt pavement. The variety of shapes, sizes, colors and textures of road building material is amazing. By combining different types of products, you can create beautiful coatings. Laying paving slabs requires strict adherence to all building regulations. If the paving technology is violated, the coating is quickly destroyed.
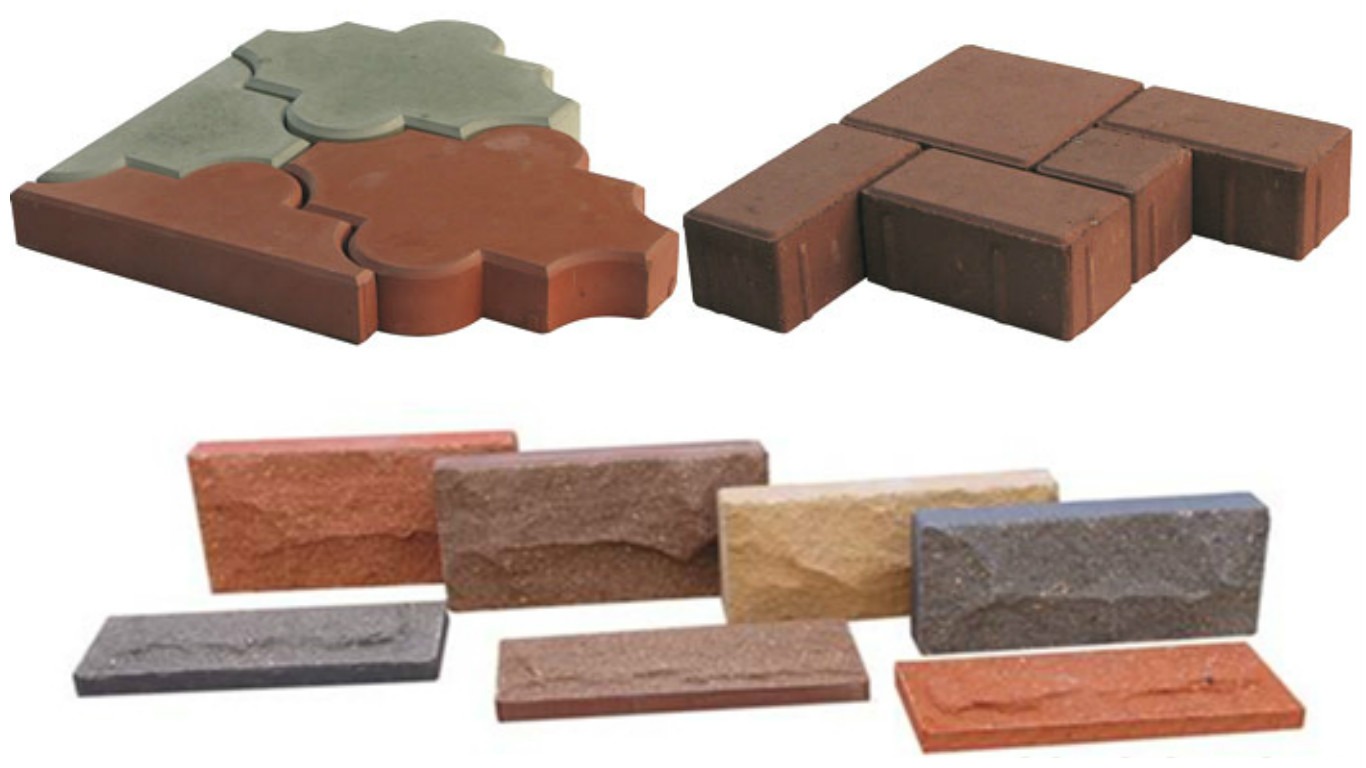
It can be vibrocast and vibropressed. Products differ in manufacturing technology. Vibrocast elements are created by tamping the solution on a vibrating table. In the manufacture of a vibrocompressed product, the mixture is subjected to pressure with vibration. Vibropressed products have higher strength. Tiles are made from concrete mix and clay. Screenings of granite rocks and plasticizers are added to the composition. The most durable is granite tiles. It is made from natural granite.
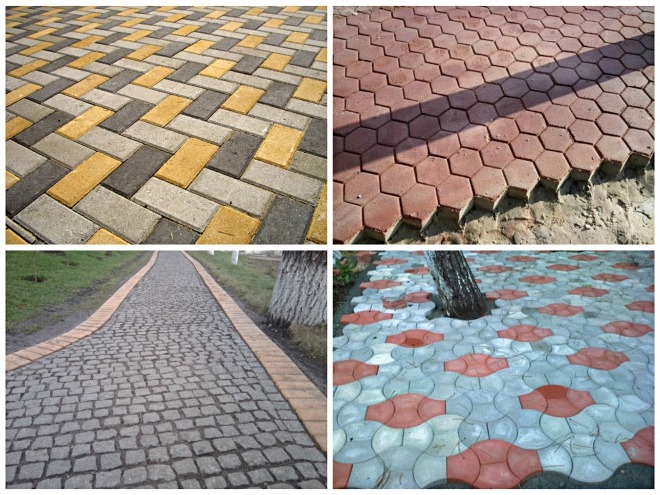
Products can be diamond-shaped, hexagonal, rectangular, square and wedge-shaped. The curly material "Wave" (with wavy edges), "Clover" (with semicircular protrusions) and "Bone" (resembles a coil) is popular. There are many ways to lay diamond tiles (hexagons, snowflakes, stars). From diamonds, you can create a coating with a 3D effect.
To create garden paths near cottages and country houses, vibrocast tiles 40 mm thick are purchased. Vibropressed products can be laid on roads with a heavy load (squares, sidewalks). They must be at least 60 mm thick. If laying on the street on the roadway is planned, it is better to use granite tiles. Intensive traffic of passenger vehicles will withstand material with a thickness of 70-80 mm. If trucks are to be driven on the road, the pavement should be 100 mm thick.
Before buying, you need to evaluate the quality of the tiles. On its surface there should be no holes, notches and crevices. When the tiles are tapped against each other, a ringing sound should appear. If the sound is deaf, the purchase of goods must be abandoned. You should not buy brightly colored products, as well as those in which there are voids. To assess the density of the material, you need to ask him to break it. It is necessary to find out how even the surface of the product is. If the paving slabs lay down on the table with all corners, lie flat and do not sway, it is of high quality.
Styling options
Before purchasing paving slabs, you need to choose a laying option. On straight and flat sections, it is easiest to perform a linear scheme. This paving slab laying technology is the simplest. It allows you to save material.
The linear layout can be horizontal, vertical, straight or offset. When the rows are shifted, the coating pattern resembles brickwork. If you use products of different shades, you can get the effect of a "caterpillar track". Rows of tiles are sometimes placed at an angle to the track line. This arrangement is called diagonal.
If a diagonal-angular layout is used, a herringbone or braided pattern is formed. To lay the herringbone, the rows of tiles are placed at an angle of 45 ° to the track line. "Pletenka" is paved, alternating horizontal and vertical laying. The diagonal-angular pattern is highly durable. It visually reduces the space.
Tiles can be laid in modules of 2-3 elements. Combining 2 colors, create a checkerboard pattern. If you use elements of different sizes and shades, you get an original chaotic pattern. The spiral layout looks beautiful on the local area. To create decorative circles, you need to purchase material with wedge-shaped elements. Artistic layout is performed from products of different shapes and colors. Choosing methods for laying tiles, it is necessary to take into account the design of architectural buildings and backyard territory.
Necessary materials and tools
To perform laying work, you need to purchase tools:
- Bayonet and shovel for excavation.
- Rake to level the surface of loose materials.
- Stakes and rope for marking the site.
- Rubber mallet for leveling material (wooden mallet with rubber head).
- Building level (1.5-2 m).
- Roulette.
- A brush or broom.
- stamping.
- Rubber spatula.
- A flat bar for leveling the surface of the layers.
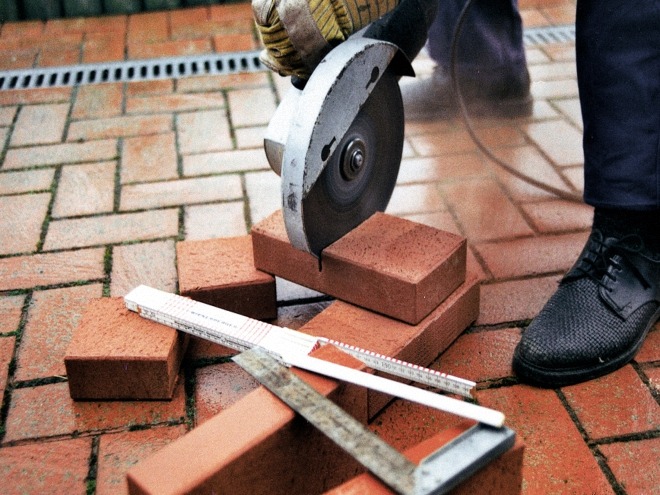
- Bulgarian (disk with diamond coating).
- Scrap to carry out the dismantling of paving slabs.
It is necessary to prepare curbs, sand, crushed stone (fractions 10-20, 20-50) or gravel, plaster mixture or cement (M400, M500). To strengthen the foundation of the coating, you will need a reinforcing grid with cells of 10x10 or 8x8 cm. A laying machine will help to create a coating over a large area.
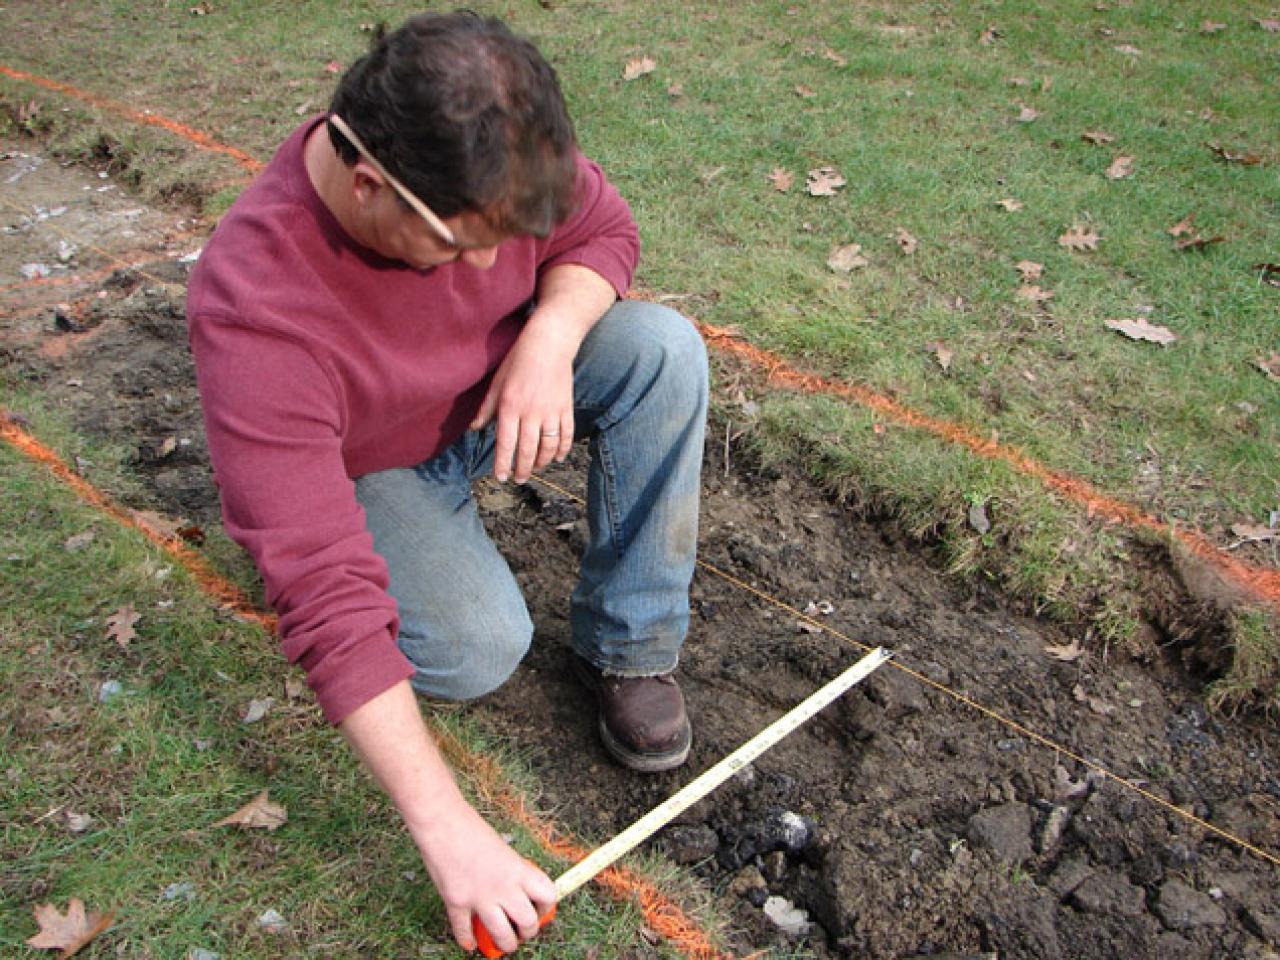
Marking future tracks
To correctly lay out the tiles yourself, you first need to make a markup. You need to start work near the building, fence or gate. Near the building you need to score 2 pegs. The distance between them should correspond to the width of the track. It is better to adjust the width of the coating to the size of the product so that you do not have to cut the material. Since the structure will be supported by curbs, space must be left for them (10 cm on each side). The other 2 pegs are hammered near another building. 2 ropes are pulled between the pegs.
Laying street tiles over a large area is carried out after dividing it into strips 1-1.5 m wide. If the road has bends, it is divided into small sections. Each section is marked separately.
Earthworks and protective layer
The amount of earthwork depends on the type of soil. If the soil is dense and clayey, it is enough to remove a layer 15-20 cm thick to remove the roots of the plants. When the soil is loose, it is necessary to remove a layer 30-35 cm thick. If it is planned to lay paving slabs in winter, the paving trench must be prepared before the cold weather.
Sand is poured onto the surface of the trench. The sand is compacted along with the soil. So that the plant seeds remaining in the soil do not germinate and do not destroy the coating, a non-woven fabric is laid at the bottom of the trench. The strips of material should overlap each other by 15-20 cm.
Drainage device
Correct laying of tiles is not a guarantee of the durability of the coating. Groundwater and rainwater gradually wash away sand and soil particles, destroying the foundation of the road. To prevent moisture from spoiling the coating, it is necessary to make a drainage layer.
At the bottom of the trench you need to pour gravel. The layer thickness should be 15-18 cm. The crushed stone should be well compacted and leveled. A thin layer of sand is poured on top and also leveled, on which a non-woven fabric is laid. Care must be taken to ensure that water flows to the edges of the path. To do this, make transverse and longitudinal slopes. A pillow for paving slabs is performed at the last stage of the preparatory work.
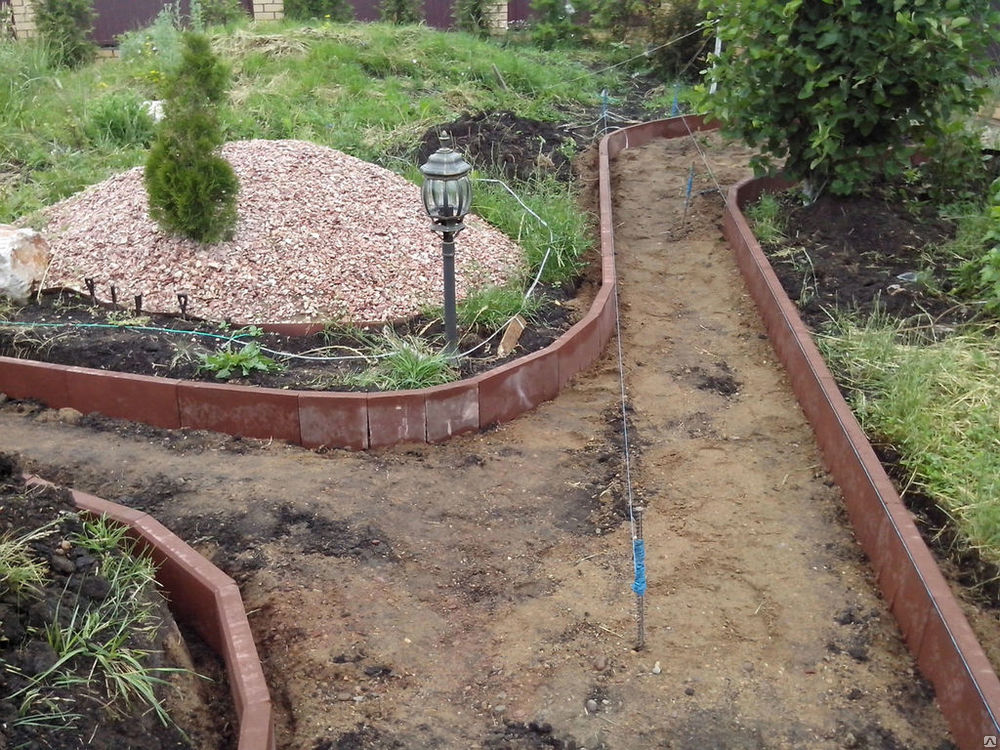
Placement of fencing curbs
The laying of the curb is carried out immediately after the completion of the work on the drainage device. It is better to use a ready-made concrete curb. Curb blocks are installed near the vertical cut of the soil along the edges of the road. It is desirable that the upper edge of the border is 1-2 cm above the soil level. Otherwise, the paths will be constantly dirty.
Curb blocks are fixed with concrete mortar. After laying the curb, you need to check how smooth it is. To do this, use the building level. If some blocks are installed incorrectly, their position is corrected with a wooden mallet.
Applicable types of bases
Before laying out the site with tiles, you need to make a base. The underlayment helps level the surface of the site. It gives the coating stability and increases its strength. A reliable foundation does not allow the sidewalk to collapse under the weight of people and cars. It protects the coating from destruction in the autumn-winter period, when ice forms in its gaps.
The technology of laying paving slabs depends on the method of operation of the coating. If the load on its surface is small (footpath), it is enough to make an underlying layer consisting of sand and cement. If paving is carried out under a car, a concrete base is required.
Concrete
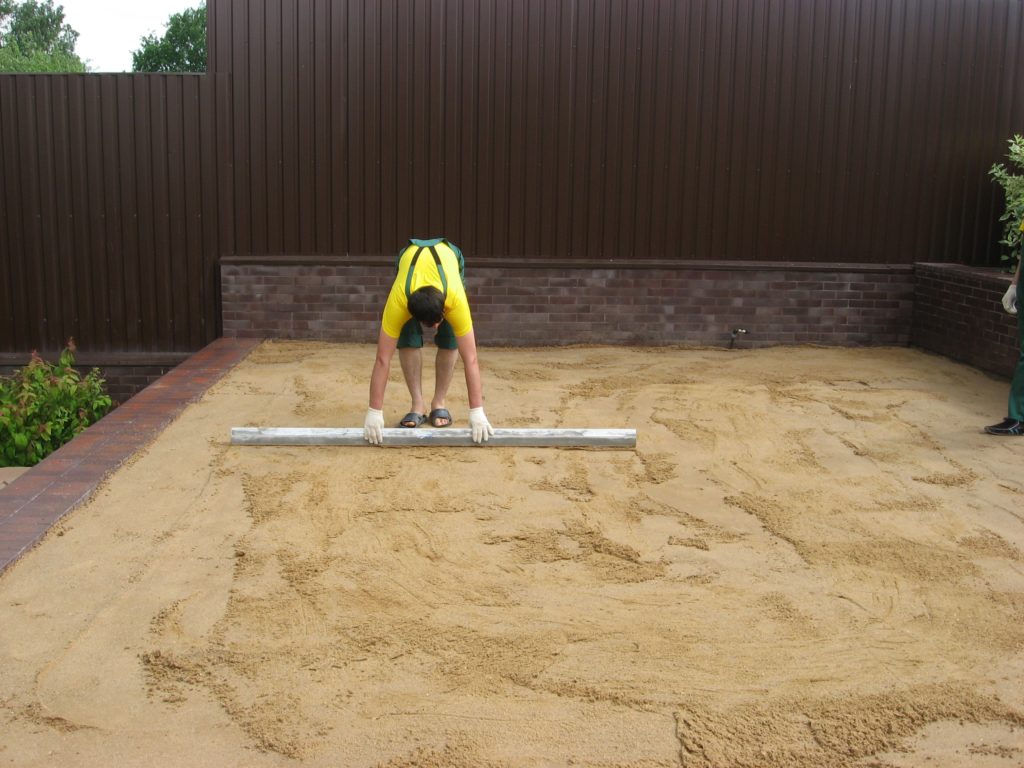
Before concreting the base, reinforcement work is performed. The reinforcing mesh is laid on metal or stone supports. The reinforcement should be 3-5 cm above the trench surface. Gartsovka for paving slabs is prepared from sand and cement in a ratio of 3: 1. It is better to use river or quarry washed sand. It should not contain particles of clay or lime. The mortar is evenly and thoroughly distributed over the trench area to achieve a level surface.
It is better to immediately fill the entire track with concrete. If part of the work is postponed for the next day, the area filled with concrete must be covered with polyethylene. The concrete base for paving slabs should have a thickness of 10-12 cm. In order for the cement pad to be strong, it is moistened for 3-5 days. After moistening, the concrete is covered with polyethylene. You can lay the coating in 7-12 days.
From sand and cement
The trench is backfilled with a mixture of sand and cement. It is prepared in a ratio of 3:1. The thickness of the sand-cement base should be 12-15 cm. The underlying layer should be well compacted and leveled. If the trench is too deep, it can be reduced with sand. Sand is poured under the base and carefully rammed.
The paving slab technology requires that the cement-sand mixture be dry. Therefore, it is better to make the foundation immediately before paving in dry weather. The cement-sand layer must be laid on geotextiles. If this is not done, the sand will quickly wash out, and the tiles will sag.
Tile treatment before laying
Before installation, the tiles must be treated with a hydrophobic solution. The tool will increase the frost resistance and moisture resistance of the material, as well as increase its service life. Water repellents improve decorative qualities and protect against fungal microorganisms. Salt stains do not appear on the surface treated with a hydrophobic solution. The material is immersed in a hydrophobic composition, then dried. The procedure is repeated.
During processing, you need to carefully inspect all the elements. Products with defects must be put aside. When you need to cut paving slabs to make corners, defective elements come in handy.
Laying work must be carried out under suitable weather conditions. The weather should be dry and calm. It is impossible to lay the coating on a sand-cement base at sub-zero temperatures. When frozen, the soil expands, and when thawed, it sags. If you lay the coating on frozen ground, after it thaws, it will collapse. The rules for laying paving slabs allow you to work on a concrete base during frost, but this is undesirable.
Mounting
Paving slabs on a concrete base are fixed with cement mortar. The seams are completely filled with the mixture. In this case, the thickness of the seams should not exceed 3 mm. When laying the elements, you need to be on the floor. You can't step on the base. After laying each row, you need to check the quality of the work performed by the building level. Elements that are not laid correctly are leveled with a rubber mallet.
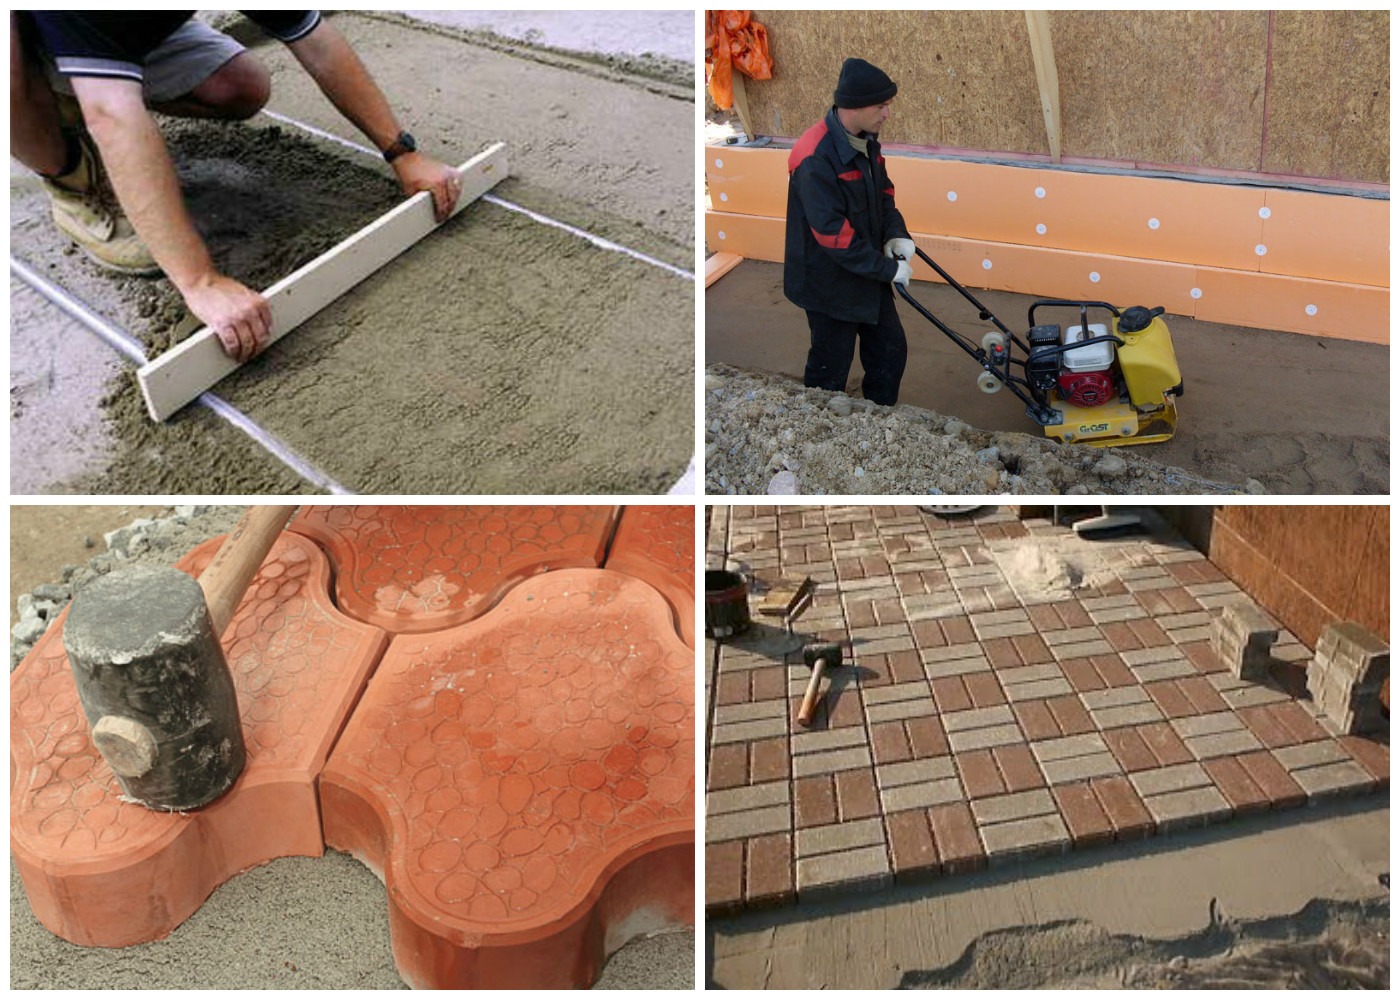
It is necessary to lay on a cement-sand base, driving in each element with a wooden mallet. The material must be firmly fixed in the base. If the product "fails", a layer of sand must be poured under it. The gaps between the tiles are filled with a mixture or sand. After completing the work, the coating is moistened from a hose with a sprayer. If the mixture “sagged” in the gaps, you need to pour a little more mixture into them. You can use the coating after 2-3 days.
Sealing paving slabs is carried out using sand, cement or concrete mix. If sand is used, it must first be sieved. The cement mixture is prepared from cement and sand in a ratio of 1:5. When preparing a concrete mixture, cement is mixed with sand in a ratio of 1: 3. Sand and mixtures must be dry. The grout is spread using a rubber spatula. The level of the mixture in the gaps should be from 1/2 to 3/4 of the height of the tile. Excess mixture is swept from the coating with a broom.
After that, they begin to fill the seams. When the mixture hardens (after 1-3 days), the mixture is poured into the gaps and moistened again. After the composition has dried, the procedure is repeated a third time. You may have to add the mixture to the seams a few more times. You can finish the work when the mixture in the gaps is on the same level with the surface of the tile.