Stone mirror frame. DIY designer mirrors and frames. Affordable paper decor
You can imagine a living room or hallway without paintings, vases, figurines and other artsy accessories, but without a mirror - no way! Indeed, this item is necessary in any home, not only to look at your reflection, but also to decorate the surroundings. Often factory mirrors look faceless, unable to reflect the individuality of the room.
Fortunately, an outstanding do-it-yourself mirror decor helps to solve the problem of facelessness. Let's look at the most unusual ways of decorating.
3 tricks for aging a mirror
The mirror with a touch of antiquity looks solemn and tasteful. Naturally, such an item is in perfect harmony with the classic or vintage style - in a modern setting, it looks lurid. How to create the effect of artificial aging at home?
Reception 1 - chemical etching. To form a plaque, you must purchase a tinted or silver base, etched chemical composition. The resulting patina does not reduce the reflectivity, so the mirrors retain their versatility.
Reception 2 - eglomise. The decoration of the mirror with the eglomise technique is quite laborious. It involves the imposition of thin sheets of potali with a gold or silver coating on the base. The main advantage of this technique is the ability to insert a photo between layers for greater decorativeness. Such a mirror acts as an independent art object, but its reflectivity is rather low.
Reception 3 - aging with craquelure / acrylic. To achieve the effect of archaism, it is not necessary to process the entire surface of the mirror - it is enough to age the frame with your own hands. To do this, you will need acrylic paints or craquelure varnish. Paint the frame with silver acrylic, and after drying, apply a mixture of blue and green paint to the surface.
Stucco frame ideas
One of the main features of styles such as baroque, empire and retro classic is the use of stucco. The mirror is no exception. For decorating a mirror with your own hands, both a gypsum mixture and plastic are suitable. Stucco elements can be bought or made independently using ready-made molds.
The base frame itself is made from MDF sheets painted in White color. After drying, stucco elements are attached to the frame with silicone glue. Then the remaining glue is removed with a sponge, and the finished molding is painted with white (gold, silver) acrylic paint.
Decorating mirrors with moldings
An easier way to make an original mirror frame is to use ready-made moldings / skirting boards. Styrofoam skirting boards are available in a wide variety of variations, imitating more expensive gypsum stucco. To decorate the frame, you will need an MDF sheet protruding beyond the edges of the mirror. Moldings are attached to the protruding part of the plywood. So that the frame does not look cheap, it is covered with acrylic paints; joints are sealed with putty.
DIY wood mirror frame
Nothing looks more harmonious in the interior than wood. In addition to excellent physical characteristics, this material has an aesthetic appeal, which is why it is considered an excellent tool for creating an original do-it-yourself mirror decor. It is customary to frame square and rectangular mirrors with simple wooden borders, but you can experiment with rounded products.
A mirror-sun looks very unusual in any interior. To make it, you will need wooden blocks (twigs of trees), a plywood frame according to the size of the product, a primer, a glue gun, wood glue, spray paint, sandpaper.
First, we lay the blocks with wedges around the perimeter of the frame. To simulate the sun's rays, it is necessary to alternate short and long bars. Apply glue to the frame and hold each branch for 15-20 seconds. After drying, remove the remaining glue with sandpaper, apply a primer from the spray and leave for 1 hour. After that, cover the sun frame with paint or clear varnish.
Instead of sticks, you can use ordinary wooden clothespins. Just a few minutes - and the frame for the mirror is ready!
Screen painting on the mirror
In order to decorate a mirror, you do not need to be an artist or a hand-made master. It is enough to buy stencils and apply them to the canvas. About everything in order.
We apply the finished stencil to the mirror surface, and then carefully glue it with a roller, preventing air from getting under the film. We apply matting paste on the stencil (not on the coated surface), carefully spread it over the entire film and leave it for 15 minutes. After that, the paste should be removed, and the mirror should be washed under running water. Finally, carefully remove the film from the stencil.
The number of mirrors in each house is different, but it is impossible to imagine a situation without them at all. The functionality of this piece of furniture is beyond doubt.
But in terms of aesthetics, not all mirrors look as good as possible. Therefore, if the house has a mirror in the old frame or without it, it is worth trying to fix it. We share simple but effective ideas for transforming a mirror.

1.In a ceramic environment
If the bathroom is planned to be renovated, then the mirror can be mounted directly in ceramic tiles. Fix it to the wall with a suitable adhesive, and then proceed with the laying of tiles or mosaics.
2. With memories of summer
To decorate the mirror, use small river or sea pebbles. It can be glued directly to the mirror with silicone adhesive. If this option is not suitable, cut out the base on which the mirror is glued from thick cardboard, and the upper part with a hole for it. Glue the top part with stones, and then glue both parts together.
3.Original plastic frame
Ordinary disposable plastic spoons become excellent material for decorating a mirror with your own hands. To make the frame look even more spectacular, we recommend covering them with acrylic paints.
4. For the most economic
The frame for the mirror, which can be made in just a matter of minutes, is made from ordinary wooden clothespins. They can be pre-painted. Just attach the clothespins to the mirror.
5. In stained glass style
Such a mirror, reminiscent of stained glass techniques, is easy to make on your own. To apply dark lines on its surface, use special paint for glass or black tape.
6. Futuristic mirrors from the future
To fix several mirrors, you can use a single base. For example, wooden. Just glue the mirrors with silicone glue.
7. Return to nature
Short branches will be an excellent material for decorating a mirror, especially if they are painted in a bright color. They can be glued directly around the perimeter of the mirror or on the frame.
8. In a nautical style
A frame for a mirror made of thick rope will perfectly fit into the interior in nautical style. Additionally, it can be decorated with shells or pebbles.
9. Spring is coming
Artificial flowers will help create a delicate frame for the mirror. Also, the composition can be supplemented with green leaves and fruits. Everything you need for such a mirror decor with your own hands can be purchased at a florist shop.
10. Beads and shells
The combination of beads and shells in the decor of the mirror creates an unforgettable effect. Such an interior detail will harmoniously look in the room of a beautiful lady of any age.
11. A new look at the usual tree
To make such a wooden frame, you need a thick branch. It will need to be cut into thin slices, which are then used as decoration.
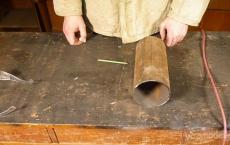
12. Affordable paper decor
The most affordable and affordable option for decorating a mirror with your own hands is the use of paper strips. Glue paper strips to the cardboard base, and a mirror on top of them.
13. Decor for the kitchen
Cutlery that has not been used for a long time will become an unusual material for decorating a mirror. An ordinary plate can be used as the basis for this composition. Both a mirror and cutlery are glued to it.
14.Mirror for needlewomen
Those who are fond of sewing or embroidery will definitely like a mirror decorated with spools of thread. Just glue multi-colored coils around the perimeter of the mirror.
15. Bright frame from old magazines
Reading magazines can be useful when decorating a mirror. Cut the page into two or three parts, twist each of which into a tube. It remains only to glue the paper tubes to the mirror or frame.
16. New life for an old T-shirt
Cut the knitted T-shirt into several fairly wide strips and weave a pigtail out of them. Then glue it around the perimeter of the mirror, leaving the edges free, and hang it on the wall.
17. Edible decor
Legumes, cereals, pasta can be made into an unusual material for decorating a mirror with your own hands. Apply a generous layer of glue to a flat frame and sprinkle edible decor over it. After drying, we recommend covering the decorative composition with acrylic varnish.
18.Useful buttons
Mirrors for the most sporty.
Old rackets can also act as a frame for a mirror. Finding a ready-made, suitable mirror can be problematic. But you can cut the appropriate size and shape in a workshop that specializes in working with glass.
20. More shine
Decorative glass pebbles are used to decorate a regular frame. You can buy them in stores specializing in the sale of goods for animals. Most often they are used to decorate aquariums.
It is easy to diversify the interior with your own hands. Ordinary mirror can be turned into a work of art thanks to the frame own production. For decoration, you can use both expensive and valuable materials, as well as improvised means. The right frame design for the mirror will make any room more stylish.
Homemade frames for mirrors have their own characteristics and advantages.
Among the majority it is worth noting the following:
- You can choose the material yourself. So, you can create an environmentally friendly frame. Often, manufacturers treat products with chemicals that can harm you. When self-manufacturing, such property is excluded.
- Product budget. Making a frame will require less financial costs than buying it.
- Uniqueness. You are free in your imagination and can create a unique product. Additional decor can be very diverse, from ribbons to wood carvings. This item is especially important for those who love original solutions.

If you decide to make a frame with your own hands, then get ready for creative dilemmas. When choosing a material, rely on your own preferences and the general style of the apartment. A frame for a mirror can even be built from paper tubes or cardboard. By the way, the smallest members of the family can be involved in the manufacture of such a frame. Consider the most interesting materials.
These products are lightweight and durable. Frames can be installed in rooms with high humidity. If you are given the color of the product, just repaint it. Models made of polyurethane baguette are suitable for round and oval mirrors. Baguette frame is easy to manufacture, the material is easy to cut and behaves obediently during operation.

Certain skills will help you if you need a metal frame. An aluminum frame will require less effort. This material is thin and docile. Forged model - the height of professionalism. This frame will add luxury and charm to the room.

Oddly enough, the mirror frame is very popular. It is not difficult to make it, it is enough to purchase that very special coated glass. So you can build a frame from many small mirrors.

Soft frame - interesting and original version. Leather construction can be voluminous. To do this, fill it with synthetic winterizer or other similar filler. Alternatively, you can use leatherette. This will be more budget friendly. These mirror frames will fit perfectly into the interior of a bedroom or living room.

lovers non-standard solutions can make a frame of rope or rope. Such a model will perfectly fit into the style of any room of the apartment. Avoid this framing of mirrors in the bathroom and kitchen, as moisture and temperature changes will not benefit the material. Moreover, such a frame is not so easy to clean.

Such material can be both primary and secondary. For example, you can fill the bamboo cavity with mounting foam or simply make such an original finish.

Interesting and noble material. If you have woodworking skills, then you can make a carved frame or burn out a drawing. If there are no skills, then use branches. From them you can build original decor along with the children. What’s more, you don’t even have to spend money on material - just walk around and collect branches of the right size. You can make a plywood base and glue natural materials on it.

More often, the material is used as an addition, but the entire product can also be built from gypsum. Gypsum stucco can decorate a frame made of wood or any similar material. For greater aesthetics, paint all the coatings in one color. Such a model will fit well into a room with an interior in the style of classics, retro, baroque.

Color must be chosen carefully. Assess the overall color scheme rooms and choose either a similar or contrasting color. Black and white frames are considered classics. Such universal colors will fit into any interior. Great option if you do not want to focus on the mirror.

Decorate your living room with a bronze or gold frame. So, you will focus on the mirror. Such a product looks rich and elegant. Feng Shui advises making frames in such a way that they attract attention. It is believed that a mirror with this design brings good luck, and also attracts positive energy.

An interesting option is a colored frame. Such a product is suitable for any room, will bring brightness to the interior. You need to choose colors deliberately so that they do not enter into dissonance with the overall design. You can use not only a colored base, but also a colorful decor on a white background.
You can make a frame for a mirror from any material that you like. Creating a product from improvised means does not require special expenses and can become a real family entertainment. Want to make a quick decor for an oval or round mirror?
- Using a marker and a ruler, make a pattern around the circle.
- Stick a film or tape on the mirror that does not leave marks. Get outside the mirror to make it easier to remove the film later.
- Armed with a special knife that does not scratch mirrors, cut lines in the film in accordance with the pattern.
- Take a can of spray paint and spray the entire surface of the mirror.
- After complete drying, remove the film and enjoy the result.

For mirrors of this shape, you can make a frame of 7-8 bushings from toilet paper. For the base, take thick plywood. Paint the workpiece black, after drying, glue the mirror. Paint the bushings in the same color, and after drying, cut them into circles of 1 cm, give the shape of leaves.
- Glue the leaves of 5 pieces: we fix 4 leaves at the corners, and glue the last one on top. So, the workpiece is like a little man with legs, arms and a head. We also glue all the leaves.
- Using hot glue, attach the blanks to the base of the mirror. Here you can show your imagination and group the blanks at your own discretion.
- Next, you need a mirror mount. For a thick and heavy product, you will need 2 fasteners, and for a light one, one is enough. Thread a rope or wire through them, make a loop.

For a large floor mirror, you can make a massive, heavy frame. A regular one is good, no surpluses, wooden frame and decor from small vases in which you can put flowers or useful things. This mirror is both beautiful and functional. For rectangular and square mirror make a frame out of wood ceiling plinth.
A homemade wooden frame will decorate any mirror. For manufacturing you will need the following:
Key material can be anything. A simple wooden frame can be made from twigs or saw cut, even driftwood can be used. The main thing is that the material is dry, otherwise deformation or decay cannot be avoided. Carved frames are made from natural walnut, cedar or wenge. Carving requires special skills, so sketches may be needed, but for beginners it will be extremely difficult to do such work. You can also use MDF and similar materials.

All elements of the frame must be securely fastened. Otherwise, the product will simply fall apart during use. Fastening elements include corners, carpentry glue, self-tapping screws. All this you can find in the nearest hardware store.

This item includes paints, varnishes, ropes, stones, and more. There are no restrictions, and it all depends on your wishes. Please note that an overabundance of decorative elements spoils the aesthetics of the frame.

To make a simple frame, a hacksaw for wood and a hammer is enough. For more complex options, you may need a screwdriver, electric jigsaw, circular saw. To create a carved frame, get a set of cutters.

Master class on making a simple frame in 5 steps:
- For manufacturing we use door frame from wood. Knowing the basics of carpentry will help you make a concise frame for a mirror.
- We make 4 elements for each side of the mirror. The inner edge of the fragment should be 1 cm shorter than the corresponding side of the base. You need to cut the parts at an angle of 45 degrees.
- On the reverse side of the slats, make small indentations to accommodate the mirror sheet.
- Use building corners to fasten planks. They will serve to fasten the canvas itself.
- As a decor, you can paint the product and cover it with a special varnish.

The material gives vent to imagination, so you can choose the pattern and width yourself. A frame for a mirror from a ceiling plinth is easy to make. First, fix the mirror itself on chipboard or plywood. Such a simple manipulation gives a guarantee of reliability.
- Cut 4 sides out of the ceiling plinth. The length of the inner edge should correspond to the length of the corresponding side of the mirror.
- Connect the parts with hot glue.
- Cover the product with putty on all sides. Wait for complete drying.
- The frame with your own hands is almost ready. At this stage, it needs to be painted and varnished. To give it an old look, you should treat the product with a sponge with gold paint.

The design of the frame includes the choice of shape, color and additional decor. In this matter, you can give free rein to your imagination and make an exclusive work of art. Strict and concise frames look good in some interior styles and in work rooms (offices). In other cases, approach the issue of design with creativity.

There are four classic frame shapes: circle, oval, square and rectangle. These products are truly versatile. It is easy to make a standard mirror frame and it will fit perfectly into any style of interior. True, it is not at all necessary to be limited to such a set of forms. Geometry throws up a lot interesting options. For example, you can make a frame in the form of a polygon or a box.

Create a cloud-shaped frame and place some round mirrors in it. Products in the form of animals will amaze your guests. You can put such a mirror in front of everyone. Choose an animal either among your favorites, or among those that are easier to make. Flower frames also look great.
We live in an era of formation and popularization of the author's design of premises of any type. The standard finishes of apartments and household items are no longer fashionable. The real chic is the presence in the room of hand-made items - planters, vases, lamps and chandeliers. Well, a mirror in a beautiful frame, which was created by the owner of the house, is a real masterpiece!
Do-it-yourself designer mirror frame - the advantages of such a mirror design are obvious - you can choose the size of the frame and its design in accordance with the general style of the interior, and the mirror will not resonate with the environment, it will become an integral part of it.


What materials can be used
The decor of any piece of furniture with your own hands is a game of fantasy and imagination. But in this case it is very easy to “overdo it” and overdo it, carried away by creativity. For finishing and decorating a mirror, it is better to use one type of material. For example, if you decide to make a frame from the remains of ceiling plinths, then you do not need to add parts from another material to the design. They may be structurally incompatible and difficult to connect, and the construction may be heavy.
Mirror frame can be familiar design, and can also be made in the form of stucco molding from any materials at hand, in the form of a mosaic directly on the surface of the mirror itself. There are a lot of design options for this item, and the most important thing is to choose one of the ways.


How and from what to make a frame for a mirror
Before you start working on an author's frame for a mirror, you need to carefully consider all the steps, prepare everything you need during work - materials, accessories, tools, measure the mirror and, of course, make a sketch of the future masterpiece. To create a sketch, you need a pencil, an eraser, a ruler, a triangle and a pattern, a drawing paper of the appropriate size. It is better to create a drawing and a drawing in full size and “in color” so that you can “try it on” on a mirror.
To work, you will need a table and tools - a saw or a knife, wire cutters and a hammer, glue, paints, brushes, finishing elements (beads, shells, buttons, mosaic glass), if they are supposed to be used, a construction stapler or small carnations. Small parts should be laid out in containers so that they do not crumble and interfere with creativity, and for brushes it is best to prepare a glass or a jar of solvent so that they do not dry out.

Skirting board frame
Very often, after repairs, trimmings of skirting boards, wallpaper and other finishing materials remain in the house. Prudent and creative owners never throw away this “garbage”, but create real masterpieces from it, which can be both boasted and proud of. For example, a frame for a mirror from ceiling plinths turns out to be very beautiful, and it is very simple to make it.
The material is quite inexpensive and durable, it is easy to cut and glue, in most cases the ceiling plinth is already beautifully designed. In addition, it can be painted with almost all types of paints and even “aged”.
To work with the plinth, you will need a jigsaw or a regular file, a ruler and a pencil, acrylic paint, brush, glue, putty, plaster is best. To protect the desktop, it is necessary to prepare a covering material - it can be old newspapers or wallpaper trimmings.
From the plinth, you need to prepare the frame parts in accordance with the dimensions of the mirror. You can pre-attach the mirror to the base of plywood or thick cardboard. It is much easier to attach the frame to the base than to the glass surface. The details of the frame must match not only in size, the pattern on the plinth must be adjusted so that the lines of one part smoothly merge into the lines of another.
After the glue has dried at the joints of the frame, you need to cover its surface with putty to hide the traces of gluing and “refine” the pattern. After the putty has completely dried, you can start painting. There are a lot of ways to finish such a frame - you can highlight the pattern on the plinth with a contrasting color, you can artificially age the frame with paint, or you can paint it in one color, in a classic style.
mosaic frame
Creating a mosaic is an amazingly fascinating type of needlework, art. A mosaic frame for a mirror is sophistication, uniqueness and practicality in one bottle. The advantages of such a mirror design are ease of use, low cost of materials, because you can create a mosaic even from fragments of broken dishes. Fragments of dishes, and fragments of tiles, jewelry, colored glass are suitable for work.
The mirror is attached to the base, it can be a sheet of plywood or chipboard. The base must be larger than the plane of the mirror. Mosaic elements will be attached to the protruding part of the wooden base with glue and a glue gun.
Serious materials require a serious approach to working with them. An unusual shape of jewelry will require a longer time investment. The voids between the elements must be filled with sealant or putty so that dust does not accumulate between them. And caring for such a frame will be more difficult, because many materials cannot be washed with water and detergents.
60 meters of 6mm cotton rope.
Scotch tape (optional).
1 mirror (in this example 40 x 50 cm).
Plywood 12 mm thick, 56 x 66 cm.
Aerosol white paint, one can.
Glue "liquid nails" and a gun for him
hot glue gun
24 shoe studs
Suspension (optional): 2 screws, 2 D-rings, string or wire capable of supporting the weight of the mirror.

STEP ONE: WEAVING A FLAT GALOON
Cut two pieces of string long enough to wrap around the perimeter of the mirror. For this size, we took 2 pieces of 2 meters. This will be the base around which the pattern is woven.
Cut two more pieces of rope, each 1.2 meters long. This will be the weave itself.
Tie all four segments with a knot at the end. The long ends are together in the middle. Short on the sides. Start weaving as shown in the picture.

STEP TWO: EXTENDING THE PATTERN OF THE FRAME FOR THE MIRROR
When the short ropes run out, cut two more pieces of 1.2 meters and continue weaving. The ends of the segments of the ropes can be fixed with adhesive tape on the wrong side of the weave.

As a result, you should get a galloon that completely covers the perimeter of the mirror in length.
STEP THREE: WEAVING THE QUARTER PILOT
Take 4 pieces of rope, 4 meters each. Tie them in a knot together. Start braiding a quadruple as shown in the picture.

For convenience, the free ends of the ropes can be collected into balls.
STEP FOUR: FINISHING THE PAIR
Weave until the pigtail is equal to the length of the perimeter of the mirror. (2 meters in this case)

STEP FIVE: REGULAR BRIDGE to frame the mirror
Take 3 pieces of rope, 4 meters each. Tie in a knot and braid a regular pigtail.

STEP SIX: FINISHING THE REGULAR BRIDGE

Braid until the pigtail is 2 meters long (mirror perimeter)
STEP SEVEN: MAKE AN OBLONG FIGURED KNOT
You will need two pieces of rope 1 meter long each. Tie a knot as shown in the picture. Make four such knots.

Use a hot glue gun to carefully secure the cut ends of the rope under the knot.
STEP EIGHT: MAKE THE CLOVER KNOT
Take a rope 1.2 meters long. Fold the loop (Fig. 1). The tail of the rope on the left is not involved in weaving, all weaving is carried out with a long end. In step 5, tighten the knot. You have a quarter clover. Repeat weaving three more times with the long end and tighten the resulting knot. Fix the ends of the rope with a hot glue gun.

Make two clover knots.
STEP NINE: GLUE THE MIRROR TO PLYWOOD
Paint the plywood white and let dry. Apply liquid nails strictly under the mirror and glue the mirror. Leave under oppression for the night.


STEP TEN: GLUING THE PERIMETER OF THE MIRROR FRAME
Apply glue around the perimeter and glue a simple rope.

Important! The ends of all ropes, galloons and braids must begin and end where you then place the curly knots.
STEP 11: GLUING THE FLAT GALOON
Apply a sufficient amount of glue and tightly attach the braid around the perimeter. If necessary, use a hot glue gun to hold the lace in place while the liquid nails dry.


Shoe studs will also help to fix the galloon while it is glued. Then delete them.
Let dry overnight.
STEP 12: GLUING A REGULAR PITT
Glue a regular pigtail in the same way. After the usual pigtail, stick a simple rope as a beating.