Hanging flower beds from plastic bottles. DIY flowerbeds from plastic bottles. Round-shaped flower beds made of plastic bottles, which are arranged vertically
Plastic bottles are not only garbage, for real needlewomen they are a precious material for making beautiful crafts for giving. How to decorate a flower bed with plastic bottles? Today we will look at various options use plastic bottles for the manufacture of original crafts for a garden or country plot.
bottle border
There are two main ways to make a border - vertical and horizontal bottles. The first way is simpler. For its implementation, bottles of various capacities and purposes are suitable. It is advisable to use bottles made of more rigid plastic, but this is not required condition, since their subsequent filling with earth will significantly strengthen the material.
The described method is also good because it allows the use of bottles of any color, quality, and the bottles do not need to be stained. The material for filling the bottles will be ordinary earth.
To create original design flower beds from plastic bottles, containers up to 2-2.5 liters are taken and filled with earth. You can also use those that have already cut off the neck. They are easier to fill, and the trench will need to be less deep, but the strength of such a fence will, of course, be somewhat weaker than when using whole bottles.
After that, a trench of the required depth is dug. The height of the fence will depend on the depth of the oblong fossa. The bottles are tightly packed, sprinkled with earth, after which the earth is rammed.
Horizontal laying more difficult and requires more precision. A trench is also dug for her, but much less deep, and the necks are not cut off. You can put the necks inside, or you can turn the bottom of the bottles towards the florist. This method allows you to make a fence multi-tiered. It looks very nice, but difficult to execute. The necks of the bottles are fastened together with a net and dug in with earth.
Photo examples of such borders


Flower bed-lake
The highlight of this decor is, first of all, its brightness. Of course, the finished lake can be decorated with flowers, birds, but it will not look so wonderful if the color is not kept.
Paint the outside of the bottle this case doesn't make sense. This is good for smaller jobs, and neither spray paint nor oil paint will do for such a large-scale street decor. But you can use diluted acrylic paint.
It's better to fill such a bottle light sand. This is done to minimize color distortion. If you cut off the necks, it will be inconvenient to shake the paint inside the bottle, and it will become impossible to fill it with dry sand.
Ideal if you have bottles originally dyed blue or blue-green tones. Just green ones are also suitable, but then it will turn out not a lake, but a swamp, which is also interesting. In the swamp, it would be nice to add a plastic frog and mosquitoes.
The place for the lake should be flat.
Slightly recessed terrain it doesn’t matter either, it’s enough to adjust the bottles in height, or you can remove excess land along the edges of the lake, and perform raised border. Bottles are placed close to each other hexagon method. Any other way to fill the plane with round objects is not suitable, as it leaves a lot of holes.
Plastic flowers are a great decoration for flower beds
One of the most beautiful crafts made from plastic bottles are flowers. For plastic flowers, it is advisable to use colored bottles. If you have gathered a lot of transparent containers, then a translucent flower with painted ends of the petals will look very beautiful.
White, yellowish and milk bottles will be great center of the flower. To bring this idea to life, the edges of the containers are cut according to the shape of the intended petal, the bottles are stacked in many tiers one into one, so that the petals turn out to be multi-layered.
In boiling water or over a gas fire, you can change the texture of the petals.
Please note that when plastic is processed at high temperatures, the material may release toxic elements.
In order for the deformation to go in a certain direction, you must first bend the cold petal tongs or other devices. In this case, the shape can turn out to be as close as possible to a natural flower, or, if desired, fantastic for fantasy decoration. Under the green petals, you need to look for green bottles, but any dark ones will do. Brown makes a wonderful effect. autumn leaves. Dark ones look very stylish. As you can see, the possibilities of decoration flower beds from plastic bottles are very wide.
Depending on the idea, you can use both the central fragment of the container and the rest. The upper part is denser and already has its own distinct shape. This can be conveniently beaten in a flower. The lower part is also interesting in texture, even deformations on fire will be somewhat specific for it.
There are many flower technician. In one small section overview even half of it is impossible to see. Those who are interested in this topic should look for articles separately with a flower theme. The world of plastic flowers is diverse and immense. In the flower bed, they perfectly enliven the exterior.


Flower bed-container
The flower bed-container has small dimensions, thanks to which it can be installed anywhere. Light, mobile, small, nevertheless, with good performance, it will always attract attention and create positive.
There is nothing complicated in manufacturing, since it is usually made from a single large water bottle. Such containers are also available in 3 liters, 5 liters and 10 liters. For a very large flower bed, you can take an even larger bottle, but the very charm of the container flower bed is precisely in its small size and low weight. In its own way, it can even be called just a flower pot. Many people know cases when bottles with a cropped top were used for seedlings.
The main container performs only the function of a pot, but in addition it can be decorate with flowers. It is also possible to make such a container in the shape of an animal. The result is very cute compositions.
To complete, you will need glue, scissors, a main bottle, auxiliary small bottles for jewelry and acrylic paints. In this case, you can also use oil dyes, and sprayers in cans.
If this is the first work of the master, and the general idea of \u200b\u200bperformance has not yet been found, then the most The best way-feel the material and its capabilities by making a container in colors. This will allow you to master both the labor-intensive flower technique and the arrangement of flowers on a three-dimensional plane. Flowers should be fixed with glue.
Ladybug flowerbed
This type of flower bed is very suitable in cases where there is a flat large lawn. A convex bug will create an elevation on a boring plane, improve the exterior.
The first thing to start when doing this type of street decor is to create earth pile. The elevation will become the place to install the bottles. Plastic containers must be painted. A reddish brown beer shade would not look good in such a flower bed.
If earth filling is planned, then the necks can be cut off. This makes it easier to compact the earth in a bottle and easier to install later. central part made from dark bottles. It must be done from the very beginning of work. If you do not follow this rule, then the center may inadvertently shift or be curved.
The next step is laying the head of the bug, starting from its edge. In the plane of the head on the oval surface there will be inevitable displacements of the rows of bottles. Therefore, so that they do not affect the border of red and black, it should be performed first of all after the center line. The next step is to smoothly lay the red bottles, tamp them down and make a fence.


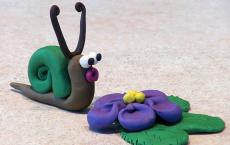
Flowerbeds-animals from plastic bottles
Flower bed-animal can perform the functions outdoor flower pot. To do this, it is based on one main plastic bottle. All parts that are necessary for decoration are attached with glue. making holes permissible only in those parts of the bottle that will not hold water, that is, at the top.
To make an animal, you need a lot of paint. The paint must be waterproof and preferably have dense texture. Oil paint may be suitable, but keep in mind that it does not dry well.
Plays of bright color will provide paint in spray cans. Paints based on acetone solvents soften and deform plastic. Perfectly fit for the job acrylic dye solution. It is able to create that very dense matte texture and brightness, while it is not poisonous and dries quickly.
It is advisable to have enough small and large bottles on hand to complete the details of animal figurines. All of them are attached to the glue and covered with paint mainly from the outside. Even here, however, there are exceptions. Very complex work is performed by many different techniques.


Gnomes from plastic bottles
A very cute detail of the flower bed is a gnome. It can be placed along the edge of the path, and in the middle of the flower bed, it will look appropriate everywhere. Exists two ways its implementation. The first - actually from the bottles, the second - with the use of papier-mâché. The first method is undoubtedly simpler and requires less time to manufacture, but the second allows more opportunities to show the facial expressions of the figure. In both cases, it is recommended to use a large 5 liter water bottle as a basis.
Simple gnome performed by connecting simple parts. As hands one-liter or one and a half liter bottles are used, as they are elongated and thin. You can glue it with any tool that can fix plastic.
The necks of the bottles are cut off in the place where the rounded convex part ends and only the cylinder is left. Special small fixtures attach the part to the main body without deforming it. By adjusting the shape in this way, elements of clothing and a hat are made. The finished figurine is painted, small elements are painted, dried and placed in a flower bed.
A plastic bottle is considered not only ordinary garbage, but also a real product for quick implementation. creative ideas. This is, in essence, great material, thanks to which today it is possible to make especially beautiful ones. But what is the best way to ennoble a flower bed using ordinary plastic bottles? Today there is a large number of a variety of options for the independent implementation of unusual crafts for a private country house.
It is recommended to engage in the direct manufacture of the border with the help of two effective ways- vertical and horizontal position of the bottles. Method number one is easier and more affordable. For its implementation, you will need bottles with absolutely any capacity. It is best to use bottles with hard plastic, as when they are filled, the necessary material will be significantly strengthened. The method under consideration involves the use of bottles of various shades and qualities. To fill the bottles, you only need earth. To create an original masterpiece, you need to fill a two-liter bottle with earth as much as possible. You can use bottles even with a pre-cut neck. They are easier to fill, and the trench will not be needed there with great depth. Although, as a minus, it is necessary to highlight a small strength.

Next, you need to dig a trench with the desired depth. The height of the fence directly depends on the depth of the pit. Bottles must be tightly packed, sprinkled with earth and rammed.

When laying horizontally, you must concentrate carefully, as there is a heavier mechanism. It is also necessary to dig a trench, but with a shallower depth.

The neck does not need to be cut. With this method, you can achieve the presence of a multi-tiered fence. This looks very aesthetically pleasing in real practice, but it is more problematic to execute. It is best to fasten the neck of the bottle with a mesh and drop it with earth.
Making flower beds - lakes with plastic bottles
Excellence - maximum saturation. Of course, the finished lake is decorated with a variety of different colors, birds, but it does not look organic if you do not follow the color scheme.

In this situation outer part bottles are not covered with paint. Acrylic paint works great. Such a bottle is filled with light sand. It is advisable not to touch the neck, otherwise it will not be possible to mix the paint. It is good when the bottle is pre-painted in blue, blue or green. The location of the lake is desirable to choose a flat one. But deeper terrain is not considered a problem, as the bottles are perfectly adjustable according to the height. You can also remove the excess land along the edge of the lake, and at the same time make an elevated type of curb. The bottles used should be installed in a hexagonal manner. From plastic material you can easily build a sculpture for the garden.

One of the most optimistic plastic flower crafts. At self erection Plastic flowers are perfect for colored bottles. A translucent type of flower with dyed petals also looks great. For the middle of the bottle, light, yellow and milky colors are great. At the container, cut the edges strictly in shape, and fold the bottles in a multi-tiered plan, so that the petals come out as a result of multi-layered. The texture of the petals in the boiled liquid changes. If you process plastic material at high temperatures, toxic substances will be actively released.

The cooled petal is bent with tongs and other devices. If you want to make the petals green, then you need to look for a green or dark bottle. From the brown bottle, the final result will be the presence of autumn. Dark bottles will look very advantageous.

Making a flower bed - container
The considered flower garden - the container has a relatively small size, for this reason it can be placed in any desired place. Due to its lightness and mobility, it will be admired by the people around. The capacity for application can vary from three to ten liters.


This container can be made in the form of any forest animal. To work, you will need high-quality glue, ordinary scissors, a bulk bottle and acrylic paint.

This flower bed is great for lawn owners. Initially, you will need to create an earth pile. On a hill, you can also install a bottle. Plastic must first be painted over. The main thing is to avoid red and brown shades.

When filling with earth, it is desirable to cut off the neck. To work on the central part, only dark-colored material is required. The next step is to lay the head of the bug, starting from the edges. Next, a red bottle is laid, tamped down and a fence is made.

Flower garden - a little animal from a plastic bottle
This one serves as a flower pot for the street. Only one plastic bottle is needed for the workflow. All used elements are attached with glue. When making an animal - a flower garden, a large amount of paint will be required. Purchased paint must have good water resistance.

You can buy a special oil paint but this type of paint takes a long time to dry. To obtain color overflows, it is recommended to use paint with a spray bottle. It creates haze and brightness, and dries much faster.
How to make a gnome from a plastic bottle?
To decorate a summer cottage, there is such a simple decor as flower beds made of plastic bottles. It can be used not only for giving. People living in a country house can similarly decorate a flower garden under the window. Or, conversely, it will be easy for an inhabitant of an urban high-rise building to diversify the lawn at the entrance in this way.
Plastic bottles can be used in a variety of ways. Someone uses them for household liquids or grows seedlings, others immediately recycle or throw them away without regret. Bottle flower beds are another option for using them, an inexpensive way to decorate your place of residence.
Why bottles?
Firstly, this option is the most budgetary. Lemonade and mineral water, alcohol and even household chemicals─ A plastic bottle can be found on every second shop window. They are ubiquitous, produced and thrown away simply by the ton. So why not find a worthy use for them?

Plastic bottles give a lot of scope for the most incredible ideas.
Secondly, it only looks like a plastic bottle - a flimsy and unreliable material. Filled with water, it can withstand fairly large loads.
Thirdly, it is easy to cut and glue, paint as you like, it does not require any complicated tools for work ─ only scissors and, if desired, paint.
More complex flower beds will require correspondingly more materials, but the most basic ones will require almost nothing.
And, fourthly, the bottle will not lose its original shape, will not rust, will not collapse from excessive humidity or temperature changes. Plastic is a very reliable material that does not require any special attention and care.
Use cases
There are many options for building flower beds from bottles. For example, these:
- horizontal placement;
- fence;
- small flower beds in the form of animals, insects, flowers;
- mosaic. How to make a border, see this video:
In fact, there are many more options for using bottles. This is such an accessible and simple material that you can create and try as much as you like without worrying about damaging it. Turn on your fantasy to the fullest! And the above methods should be used only as a guiding factor.
Preparation of materials
For an ordinary flower bed, 1.5- and 2-liter containers for lemonade, beer, milk, etc. are suitable. It is better to use the latter - their plastic is denser, so it will last longer. For fences, it is advisable to select multi-colored bottles, if necessary, you can paint them yourself. Enamel or acrylic compositions are usually used for work.

For the simplest flower bed, only these items will be required
To make a simple flower bed, bottles of the same size and color are used, and when making mosaics, you can fantasize ─ create drawings using different colors. It is better to think over the flower bed scheme in advance, draw it on a piece of paper with multi-colored pens, pick up bottles of a similar color or pre-paint them. Such a flower bed will come out neat and beautiful.
Before constructing the decor, all containers should be carefully prepared: rinsed from the liquids that they contained, remove the labels, and dry well.
By the way, you can not only paint them, but also fill them with colorful water. So the paint will not peel off, but for this you need to select exclusively transparent bottles.
Vertical placement
This is the easiest way to place (Fig. 2). Before creating a decor, the material must be washed, dried and rid of all labels. After that, it is already filled with water, earth, sand or pebbles. Again, the goal here is simple - to give the whole structure stability and durability, but you can also get creative. If transparent bottles are used, then colored water can be poured into them, dry and clean sand can be poured, and the pebbles themselves can play the role of a kind of decor.

Stick the bottles into the ground along the marked contour
To form a vertical fence, two steps are required. The first is the marking of the contour, and the second is the direct placement of the bottles.
Work execution algorithm:
- Contour marking. On a previously prepared site, it is necessary to dig shallow trenches, the width of which will correspond to the size of the bottom of the bottles used. The depth of the pits should be about 20 cm. After digging the containers into the ground, they should not protrude more than 10 cm.
- Bottle placement. The products filled with the selected material are installed vertically on the flower bed, as close as possible to each other. Gaps between them must be avoided. Bottles are placed in a trench along the entire perimeter of the fence.
For fencing, you can also use containers without necks. Cut off the top of the bottle at the rate of 1/3 of its entire length.
With this placement option, the container is dug into the ground quite tightly, to a depth of about 5 cm, while the earth is tightly driven into the bottle.
The fence will turn out to be less convex than in the previous placement option.
Horizontal placement
When placed horizontally, the tanks are located parallel to the ground (Fig. 3). There are 3 ways here:
- First. A trench is also dug, the width of which is equal to the diameter of the bottles. Containers filled with water, earth or other material are placed in it.
- Second. The neck is cut off exactly to the point where the vessel begins to narrow. The bottles are inserted into each other, the gaps are filled with earth or other material.
- Third, the most difficult. By this method, literally vertical, high flowerpots are made. Here you will need Additional materials, such as cement and a rigid base to which the bottles will be attached, such as a large rubber tire, old barrel without a bottom, if desired, you can even use flexible slate. The size of the flower bed will depend on their size.
Bottles must be glued over the entire outer area of \u200b\u200bthe base. To do this, a sufficiently thick layer is applied on top of it. cement mortar so that the neck can be firmly pressed into it. 
Bottles are placed from the bottom up, each bottom row will be a support for the one above. Therefore, the very first row, which is the foundation of the entire building, must be given close attention: it must be installed as evenly as possible.
Hanging flower beds
In addition to the usual flower beds, horizontal and vertical, you can use this option to decorate a summer cottage. Surely somewhere there is an ugly or simply nondescript wall that spoils general form. It is she who should be used for hanging flower beds.

Hanging flower beds save space on the site
To make original cups for the subsequent planting of flowers in them, the bottles should be cut. Then such containers are fixed on ropes or chains.
It is better to use as landings climbing plants so that the flower garden subsequently grows and completely covers the wall.
In order for the roots of plants not to rot in the ground, one or more small holes must be made in the bottom of the glass. Thus, excess water, and this will appear in abundance during summer showers, will simply drain. Helpful Hints see in this video:
The process of creating a hanging flower garden will definitely attract children (Fig. 4). The main thing is to protect kids from cuts on the sharp edges of processed bottles. You can cover them with tape or duct tape: this is both safe and convenient.
Fence from plastic bottles
To create such a fence, you will need a rigid support, as when creating a vertical flowerpot. Usually these are wooden or iron poles. The bottles themselves are strung on a wire that is attached to the cross bars. For more information about the implementation of the idea, see this video:
You can also decorate the fence here in different ways. First of all, you need to draw its scheme, where bottles painted in different colors will participate. Animals, insects and flowers ─ this decor method is simply shown for creativity with children, since there are a lot of options here.
For example, you can make several little animals that will imposingly settle down in the middle of an already finished vertical or horizontal flower bed, the main thing is that it is wide enough for this (Fig. 5).
The garden decor element itself can play the role of a lawn, and the animals themselves will be container beds in which it is convenient to plant flowers.
It can be pigs, hedgehogs, cats, dogs - again, everything that the master's imagination allows. And it’s better to ask the child about it, he will probably come up with something funny and at the same time original.

Funny animals are best made from large plastic bottles
How are these animals made? A plastic bottle is taken, a rectangle is cut out on one side of it, and small holes are made on the opposite side for water to drain. A few more bottles can be used for component parts: eyes, ears, tails, etc. By the way, it would be nice to paint them acrylic paints- so it will be much brighter and more beautiful. It is necessary to pay attention to the fact that they need to be painted on both sides. You can “plant” such an animal anywhere, it can even be one, only for this you need to choose a container of the appropriate size.
If the bottle is large enough and wide enough, it can indeed play the role of an independent composition.
You need to take a closer look at it: perhaps its shape or color itself will tell you what kind of unknown beast to turn it into. Or maybe not at all into an animal, but into a boat or a cart with flowers. From several identical bottles you can make a whole train carrying flowers to some flower bed. 
The bottles themselves can play the role of artificial flowers and even trees. For example, it is easy to build a palm tree from them: for the trunk, take widespread brown bottles, cut off the bottom of each and string them one on top of the other. And the leaves of the plant are made from equally common green bottles. To make them look like leaves, they need to be curly cut with scissors.
Mosaic from plastic bottles
Such a flower bed performs an exclusively decorative function, since it is usually not intended for planting flowers. The plants here are rather drawn using the bottles themselves. At the same time, fantasy is not limited by anything, except for the color spectrum and the availability of the necessary materials. You can “draw” with bottles the faces of cats or dogs, bees, butterflies, ladybugs, or depict some kind of abstraction ─ everything that comes to the master’s head. An interesting option for using mosaics from bottles, see this video:
If before that it seemed that the decoration personal plot─ it’s not easy or even unnecessary, then it’s time to get convinced of this. Firstly, it is necessary, because the house should please the eye not only inside, but also outside. And secondly, if you make at least a modicum of effort, then there is nothing easier than planting a couple of flower beds, protecting them with a few unnecessary bottles.
A plastic bottle is the easiest way to decorate.
Cheap, convenient and practical thing that is a throwaway item. And also a material that is very polluting environment if you do not take it to special recycling points. Therefore, here practicality goes hand in hand with common sense: it is better to use a thing for decoration than to send it to the trash. garden bed ─ the best of that the confirmation. 
Draw a plan of your site on paper, get the children interested in this activity, evaluate how much unnecessary rubbish has accumulated in the pantry. Be creative while being practical. Is this not a universal way to bring joy and harmony into life?
We see plastic bottles almost every day. This is the most popular container for drinks, which, perhaps, is in every home. Have you ever thought that such a vessel deserves closer attention, and that it can be used in the garden for decorative purposes, because it is quite possible to make stunning flower beds with interesting themes from plastic bottles, as well as incomparable decorations and fences for flower beds!
There are many ways to decorate a summer cottage, garden or vegetable garden. Help the gardeners various materials, design ideas, beautiful garden crops. But one of the most interesting options garden decorations are precisely plastic bottles. Let's figure out what are the advantages of decorating a flower bed with plastic bottles:
- Picturesque. With the help of plastic bottles, every summer resident and gardener can feel like a real artist and designer. You can realize your creative ideas or follow already developed concepts. In any case, with due diligence, it turns out very beautiful!
- Cheapness. Plastic bottles for flower beds and flower beds can be bought separately for little money, or you can buy a drink in such a container, and then use it for the garden.
- Practicality. Such a container is not only beautiful, but also practical. Instead of throwing away the container from the drunk drink or storing it at home, taking up extra space in the home, you can practically use the vessel on the site.
- Environmental friendliness. Now the problem of recycling plastic is more acute than ever. Agree that it is better to use a bottle to decorate your garden than to lie stray in a landfill.
- Convenience. Decorative components are made up of individual elements (i.e. individual bottles), and in case one of the elements deteriorates, it can be replaced without any problems.

What can be done in the garden from plastic bottles
If you have firmly decided that you want to have such beauty in your garden, then you just have to choose the type of construction and think over the design. Instructions for creating popular flower beds from plastic containers, photo and video materials will come to your aid.
Fence
Fencing for flower beds made of plastic bottles in the country or garden will serve you long years, and you can make it very beautiful and original with your own hands. It will be great to paint the bottles in one color or in several shades and make the design rainbow. To make the venture a success, you are invited to study the information below on how to make fences for a flower bed from plastic bottles in vertical and horizontal form.
Horizontal arrangement
With this arrangement, you can recreate a more solid plastic structure. As a rule, cement mortar is used for fastening, and for the base (if the flower bed is planned to be round) - old tire(you can read more information on how to decorate a garden with old car tires).

Horizontal decorative fence for flower beds made of plastic can be done as follows:
- Prepare the material - choose a container of the same size. Clean it of dust and dirt, dry it thoroughly.
- Mix cement (it is recommended to mix cement with sand in a ratio of 2 to 1). Make sure that the cement mass is thick enough, because the quality of the future fastening depends on it.
- Start laying the fence. First of all, apply cement to the base of the structure - the tire. Then decide what part of the bottles you want to see on the front side (necks or bottoms). Zatkem start laying on the base of the bottle with the side that you like. Lay the fence should be in a checkerboard pattern.
Note! The height of the horizontal plastic fence for flower beds depends on your desires - you can make both a low fence from several layers of containers, and a high one.
Vertical arrangement
The simplest, most understandable and convenient option hedges - place plastic bottles in an upright position. You can make a design according to the following scheme:
- Also, as in the first case, the bottles must be prepared - pick up vessels of the same size, wash and dry them.
- Mark a place on the site for a vertical fence and dig a small neat trench (choose the shape to your taste, even oval or round, even square). The recommended trench depth is ten centimeters. But the width should be equal to the thickness of the container.
- Place the container in the ground. Install containers as close as possible to each other. The decorative structure must be stable and not wobble.
Advice! To design a decorative plastic fence for flower beds it was more reliable, it makes sense to fill the containers with earth, pebbles or sand.
Below you can see the photos different variants making a fence for a flower bed from plastic bottles with your own hands:


As you can see, making a plastic fence for a flower bed is not so difficult. You just need to try a little and treat the matter responsibly and creatively. You can check out the video tutorial below.
Video: how to make a fence for a flower bed from plastic bottles.
piglets
Glorious pink pigs in the garden will not leave indifferent any person who saw them on your suburban area or vegetable garden. The pig is not only funny and cute, but also very easy to make.
Before you start making pigs, prepare necessary materials:
- scissors, knife;
- glue;
- black felt-tip pen or marker;
- 2 black or blue buttons;
- one large five-liter bottle;
- four containers with a volume of 0.5 liters;
- brush;
- pink paint (or whatever you like).
Having collected all the necessary materials, you can get down to business. Correctly make a flower bed in the form of cute piglets from plastic bottles will help you step-by-step instruction:
- Take the largest container and make a hole large enough to fit the "legs".
- Make legs from 0.5 liter bottles as follows: just cut off the top with the cap. Then insert the legs into the opening of the large vessel.
- From the remaining scraps of half-liter bottles, cut pig ears. Make small cuts at the top of the large container (where you plan to have the piggy's head) and insert the ears.
- Then color the piglet in pink or any other color.
- Use glue to attach the buttons to create the eyes.
- At the final stage, draw the pig's eyelashes and nostrils on the heel.
Advice! If you want the pig to turn into a flower garden, then make a hole in the back, fill it with soil and plant your favorite flowers.


Video: step by step instructions for making a pig from a bottle
Various animals and birds
Bright little animals will deliver a lot of positive emotions every time you visit your dacha or garden. You yourself are able to decorate the garden both with existing birds and animals, and with miracle animals invented by you.
For inspiration, you can look at the photos and decide how exactly you want to make a flower bed with animals from plastic bottles with your own hands:


A summer resident who decides to use such an unexpected and unconventional material as plastic bottles to decorate his garden not only turns his site into a fabulous place, but gives a second life to the used raw materials. And in order to turn nondescript used plastic bottles into elegant decorations for a garden or cottage, you just need to take a little time and follow the instructions. Or show an outstanding creative imagination and create your own unique masterpiece!
In contact with
Plastic bottle flower beds have become popular with the advent of this material. Craftsmen create real masterpieces in the form of animal figures from empty containers, lay out a mosaic. Summer residents are lazier just making small fences for flower beds. In any case, the flower bed is transformed, becomes brighter, takes on a specific shape.
Advantages of flower beds from plastic bottles
If it is difficult to decide whether it is necessary to make such a flower garden, you should familiarize yourself with a number of advantages of the simplest invention:
- An environmentally friendly decoration of a flower bed made of plastic bottles does not poison the air and soil. PET containers do not decompose in the ground, are resistant to sunlight and low temperatures.
- The long service life of the fences allows you to grow perennial flowers in the flower bed. The boards prevent the growth of plants outside the flower bed, and also prevent the penetration of weed roots.
- Fencing made of plastic containers reduces the rate of drying of the soil in the heat.
- If several bottles in the fence are damaged, they can be easily replaced with new containers.
The use of plastic material for arranging flower beds carries more positive qualities. Cons here is almost impossible to identify.
Advice! In order to be 100% sure of the environmental friendliness of bottles, only food containers should be used to decorate flower beds.
Preparation of materials
To make the flower bed look beautiful, the material for its fencing must be properly prepared:

To create most crafts for a flower garden from plastic bottles, the container is usually buried upside down. The elements are placed as close as possible to each other so that there are no gaps. The decorative structure is periodically poured from a watering can to wash off the accumulated dust with water.
How to make a flower bed out of plastic bottles
There are as many ideas for creating flower beds as there are summer residents. Each person comes up with his own original invention, and someone copies from the Internet.
Vertical flower bed made of plastic bottles

Plastic containers are used in small areas to create vertical flower beds. Each bottle plays the role of a flower pot. Containers are attached with wire vertical support. Most often it is a fence or a wall of a building. Sometimes a support structure is specially installed for a flower bed.
There are two options for attaching bottles:
- Horizontal. With this method of fixation, a window is cut out with scissors in the side of the plastic container for filling the soil and planting plants. Tanks in a horizontal position are fixed in rows or in a checkerboard pattern.
- Vertical. The flower bed is created from individual pyramids. The bottom of the plastic container is cut off. A drainage hole is pierced in the cork. Each pot is covered with soil, tied with wire vertically to the support with the neck down. The first element is attached from below. Each subsequent container is inserted with its neck into the previous lower container so that the cork touches the soil. The last upper bottle is not filled with soil, but water is poured for drip irrigation. Plants are planted in windows cut out on the side wall of each bottle.
Flowerbeds from PET bottles look beautiful. They are used for vertical gardening. The disadvantage is the rapid depletion of the soil. Plants need to be fed more often, monitor watering.
Horizontal bottle placement

The unusual idea of creating a flower bed in the form of a well involves laying bottles horizontally on cement mortar. To make the masonry even, you will need a temporary template. Any large container will play its role: a barrel stacked in a pile car tires or other similar design. After the laying of the walls of the flower bed is completed, the template is removed. The resulting frame is suitable not only for growing flowers. Here you can plant low-growing shrubs.
For creating beautiful flowerbed from plastic bottles for the garden do the following steps:
- Sand is poured inside plastic containers of the same size, tightly corked. From 2 parts of sand and 1 part of cement, the solution is kneaded.
- The first row of bottles is laid out on compacted sand. It is important to align each element, otherwise all subsequent rows will begin to “move out”.
- The second and all subsequent rows are laid on cement. It is enough to lay a layer of solution 3 cm thick. The bottles are laid horizontally in a checkerboard pattern. The bottoms should be directed in one direction: outside or inside the flowerpot.
- After completing the masonry, the top row of the flower bed is poured with concrete. Shells, cones, colored pebbles, sea pebbles are embedded in a raw solution for decoration.
A template from a flower bed in the form of a well is removed carefully after the solution has solidified.
Multi-tiered flower beds

For a multi-level flower bed, the use of multi-colored bottles is especially important. The finished design resembles a huge cake. The idea of creation involves burying plastic containers with their necks into the ground according to the method of creating a fence, but in this case there are at least two of them, and they are installed in tiers.
To beautifully decorate a flower bed with plastic bottles, do the following steps:
- From a plastic container form a fence of the first tier. Capacities are instilled with the neck down. To prevent the fence from falling apart under the pressure of the earth, it is pulled together with a rope or wire.
- Soil is poured inside the fence and immediately they begin to dig in a plastic container of the second tier. In terms of size, the structure is made smaller, but of the same shape, for example, a circle.
- If the flower bed will consist of more levels, the procedure is repeated.
Advice! It is undesirable to make a flower bed above four levels. The design will turn out to be bulky, over time it will begin to “disperse” under the pressure of the soil.
At each level of the flower bed, flowers of the same height are planted. Moisture-loving plants are sent to the lower tier. Flowers are planted on top that do not suffer from a lack of moisture.
Hanging flower beds

Hanging flower beds are made according to the vertical method. Bottles play the role of pots. Plastic containers can be hung vertically or horizontally. The ropes should allow the florists to turn freely on all sides towards the sun. In each flower garden, a drainage hole is pierced with a nail. Planters are arranged so that after watering, water does not drip on the head of passing people and does not flood the structural elements of the building.
Fence for a flower bed made of plastic bottles

The simplest fence for a flower bed is a fence. The plastic container is instilled with the neck down. First, the area is leveled, markup is applied. Under the bottles dig a trench. Plastic containers are placed tightly to each other. Check that the tops of each element are at the same height. The trench is covered with soil, rammed. Substrate is poured inside the fence, flowers are planted.
Mosaic from plastic bottles
A mosaic looks beautiful from multi-colored plastic containers. In fact, the structure is an additional decoration of the flower bed. Mosaic lay out figures of flowers, insects, animals. Craftsmen create complex compositions in the form of a lake with swans, a flower meadow.
To decorate a flower bed with plastic bottles, first create a scheme. From paper, it is transferred to a site where an additional mound of loose soil has been previously made. Plastic containers are painted to the desired color to create a composition. Guided by the scheme, each bottle is immersed with its neck into the ground. Only a colorful bottom remains on the surface. Undersized flowers are planted near the mosaic so that they do not cover all the beauty.
flower bed
The technology for creating a flowerpot is similar to the method of building a well with horizontal stacking of bottles. A template is required. A large plastic florist would be a better element. To the top, it goes to the expansion, which will allow you to better extract after lining. In addition, the curly shape will give the flowerpot aesthetics. The container will have to be laid with a slight offset, exactly copying the contours of the florist.
It is better to lay the containers with the bottoms outward to create an attractive pattern. They are pre-stained. The top of the flowerpot is similarly decorated with stones. The composition of moss and cones looks beautiful.
Mini-flower beds in the form of animals and insects
There are many ideas for creating mini-flower beds. The main requirement is to give the design appearance, replicating an animal or insect. The element is able to act only as a decoration or a flower pot for several plants. Most often you can see in the photo flower beds from 5-liter plastic bottles made by a piglet, a hedgehog. Mosaics are laid out from smaller containers.
In the video, an example of designing a flower bed in the form of a swan:
Flowerbed-piggy from a plastic bottle

A beautiful pig is obtained from a five-liter bottle. A rectangular window is cut out in the side part. Two triangular petals are left in front, imitating ears. The cork will serve as a patch. Elements of the face are drawn with a marker.
Flowerbed-hedgehog from plastic bottles

To create a hedgehog, a window is cut out in the same way in the side. Draw a face with a marker. The role of thorns will be performed by green ornamental vegetation. A family of hedgehogs can be made from bottles of different sizes and beautifully placed among the greenery of a flower garden.
Flowerbed of bottles in the form of a ladybug

Insect figures are usually laid out in mosaics. A combination of bottles painted red, black and yellow will make a ladybug. A fence made of white plastic containers looks beautiful along the contour of the mosaic.
Ideas for decorating flower beds with plastic bottles


Conclusion
Flowerbeds made of plastic bottles are mobile. If necessary, they can be easily moved to another place. If the flower garden is no longer needed, the fence can be easily removed from the ground, returned to the landfill, from where the material was extracted.