Applying Venetian plaster. Applying Venetian plaster: step-by-step instructions with a photo and video lesson Venetian plaster technology
The use of Venetian plaster in interior decoration allows you to create an original interior design. It has a number of advantages that distinguish it from other finishing materials. Venetian plaster does not crack, does not peel off, does not change its color. The appearance of the finished coating resembles natural marble. The composition can be used where conventional plasters are not suitable. In this article, we will take a closer look at the composition, application and various technologies for applying Venetian plaster with our own hands, and at the end you will find step-by-step instruction from our reader
Tools for applying Venetian plaster
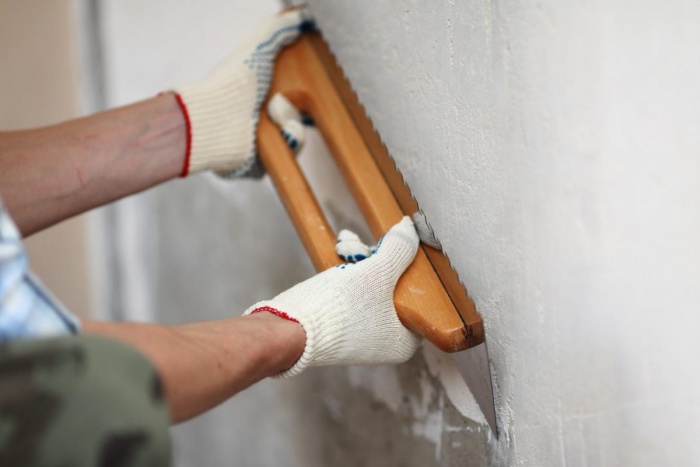
To apply the composition, you will need plastering trowels and spatulas. They can be used for applying wax to the plaster surface, as well as for sanding intermediate layers. Spatulas must be taken in different sizes. The base layer is applied using a large trowel and the pattern is created with a small or medium trowel. You will also need suede mittens, which will later be used to polish the finished surface. Depending on the scale of work, an appropriate amount of plaster and color will be needed. Color can be any color.


Composition of Venetian plaster
Venetian plaster consists of the finest suspensions of natural materials such as marble, gypsum and lime. Acrylic and slaked lime are used as a binder. Which one is better is impossible to say. A beginner in decoration is unlikely to be able to distinguish one material from another. As for professionals: some say that only slaked lime allows you to get the “same” result, while others say that acrylic components give the mass better plasticity, which generally affects the increase in the manufacturability of the finish.
In addition to standard components, the composition of the mixture may include the smallest pearlescent particles. Their presence allows you to make the finished surface look like silk. For this reason, the combination "wet silk" is added to such Venetian plasters. From different points of the room, the same coating will look different. A few videos on this topic.
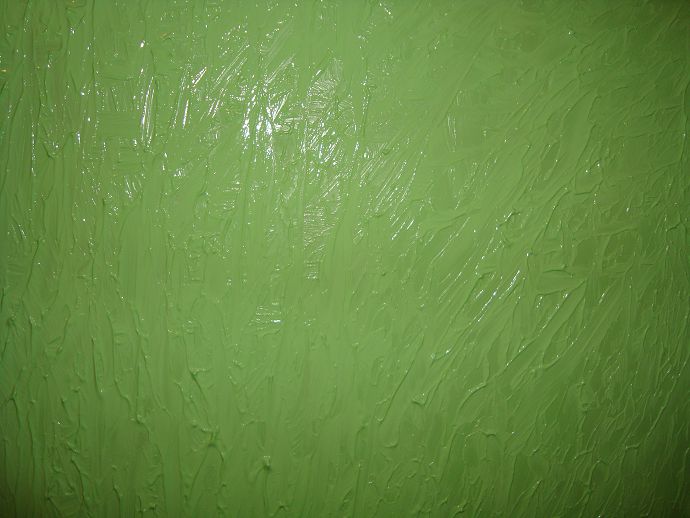
The appearance of the finished wall depends on the application technique. Using a special technique of moving a spatula, finishers achieve the appearance of interesting patterns that repeat the texture of natural stones. The surface can have a pearlescent shade, which is achieved by adding special impurities to the plaster.
Features of the most affordable OPTIMIST ELITE plaster
Considering the comparable low cost, let's dwell on the properties of Optimist Venetian plaster. We will try to avoid advertising this material by briefly describing the characteristics indicated by the manufacturer. Products are sold in plastic buckets of 3.5, 7 or 15 kg. Optimal conditions use imply air temperature in the working room in the range from 5 to 35 degrees Celsius. For application, a standard set of tools is used: a steel trowel, a pair of spatulas, a polishing machine with a soft nozzle. Drying of a layer of standard thickness - about a day.


Estimated cost:
- 3.5 kg - 750 rubles.
- 7 kg - 1350 rubles.
- 15 kg - 2750 rubles.
- at the first stage, a thin layer of plaster is applied to the surface, trying already at this stage to create some kind of pattern. The layer is allowed to dry for about an hour;
- to get rid of minor flaws, the dried surface is lightly sanded with a large spatula - smoothed in order to level it;
- apply the second layer in the same manner as the first;
- last layer decorative plaster applied with a spatula, because the coating should be translucent and thin - to give it more depth. The work is postponed for half an hour to dry the material, after which the wall is smoothed with a spatula. For dry rooms, the work is over;
- if it is planned to use Optimist plaster for the walls of a wet room (toilet, bathroom, kitchen), then the final stage of work will be surface treatment with wax and subsequent polishing to obtain a gloss
In the video below, you can more clearly see the methodology for using this material.
Application technology
Application technology is complex. If you have any questions, it is better to go to master classes, which are often held in company stores selling decorative plaster.
First of all, you need to pay attention to a large spatula, the edges of which should be rounded, so that you can firmly press the plaster into the wall. The spatula should not have mechanical damage and defects. Before you start laying the plaster, the wall is covered with a special primer. The wall must be perfectly flat, otherwise the plaster simply will not hold. The first layer of plaster is carefully compacted and leveled, after which it must be allowed to dry. If, after drying, irregularities remain on the surface of the plaster, they can be easily removed with a trowel.
Layer by layer
After 6-8 hours, the next layer of plaster is applied, on top of which a finishing layer is already applied. The marble pattern characteristic of Venetian plaster is created by brush strokes with small spatulas. In this case, the color of the layer should be different from the previous one. Once the pattern is ready, it must be polished with a large spatula or trowel. Depending on the sanding technique used, the finished surface can be glossy or matt. You need to work with the material quickly, as the composition dries quickly and becomes less plastic. When mixing plaster and color, attention should be paid to the amount of the finished solution - due to the dense laying, hands begin to hurt quickly, and the solution itself quickly hardens.
Wax protection
A wax protective coating is applied over the last layer of Venetian plaster, giving gloss and water repellency. Do not apply too much wax, as after drying it can darken and spoil appearance. As soon as the wax hardens, it can be further polished with a suede mitten. After 20-25 days, carbonization processes will end in the plaster, it will become more durable, after which it can be washed.


Externally, the finished wall will look like it is made of natural marble. An additional effect of similarity gives a wax coating. You can finish with Venetian plaster not only walls, but also various arches, as well as doorways. At next repair you don’t have to tear off the plaster - you can paint over it with paints, as well as glue wallpaper.
Illustrative examples of finishing (video)
As the saying goes, it's better to see once than hear a hundred times. Therefore, we suggest that you familiarize yourself with several interesting videos. The video below is an example of applying acrylic Venetian plaster.
And here you can get acquainted in detail with one of the author's methods of applying the Venetian. The material is long, but the quantity valuable advice overflows in it.
Another interesting technique. As a result, the surface is covered with decorative cracks. Read about antique plastering here.
Relatively simple method of applying the composition. In our opinion, it is more suitable for finishing a bathroom or toilet.
Do it yourself, or Additional motivation
Above, we gave the estimated cost of the material for finishing one "square" of the wall. If you decide to experiment, then independent work will only cost you your time. In the worst case, also nerves. But if you intend to pay third-party specialists, you need to be prepared for an increase in costs from 600 or more rubles per square meter. In Moscow and St. Petersburg - more expensive, in the regions the appetites of finishers are more modest. However, it must be understood that professional master only for his work will take from 1000 rubles. for every sq. m. finishing with Venetian plaster. The cost will increase as your requests increase and the complexity of the work (wall height, surface quality and geometry) increases. Cheap and beautiful will not work.
This can be seen from the reviews.
Those who dared to independently decorate the walls with Venetian plaster note the great laboriousness of the work. Therefore, you should not rush from one extreme to another - first try to work in "test mode": we take a sheet of plywood or fiberboard with an area of at least 1 sq. m. and trying to transform it. With this approach, you can try several techniques and choose the best one.
About tinting
If you decide to tint the mixture yourself, then carefully calculate the required amount of material - when re-kneading, it will not work to guess the color. How much plaster do you need? It is better to find out about this yourself by making test smears on square meter test surface. You should not trust the data written on the packaging - the material consumption is determined by the technique of its application.
As for tinting, there is one more nuance. Do not rush to fill in large volumes of the coloring composition, do it gradually, achieving uniform mixing of the mixture and subsequently adjusting the color saturation. This approach will take more time, but the chances of getting "what you need" are higher.
A few more nuances
It is best to work together, in conveyor mode: one applies the composition to the wall, the second gives the stain the desired shape. This is faster and more efficient, especially when you consider that finishing with Venetian plaster is even a purely physically complex process. Not to mention the creative side.
Be prepared for the fact that the final result will appear only at the final stages of work. This is just the case when you should not especially plan the appearance of the surface. When applying the mixture, it is recommended to periodically move away from the wall and inspect the entire canvas as a whole in order to understand where to go next.
Well, as for the reviews about specific types of plaster, they are in 90% of cases of an advertising nature. Therefore, their information content was questioned.
Update: personal experience
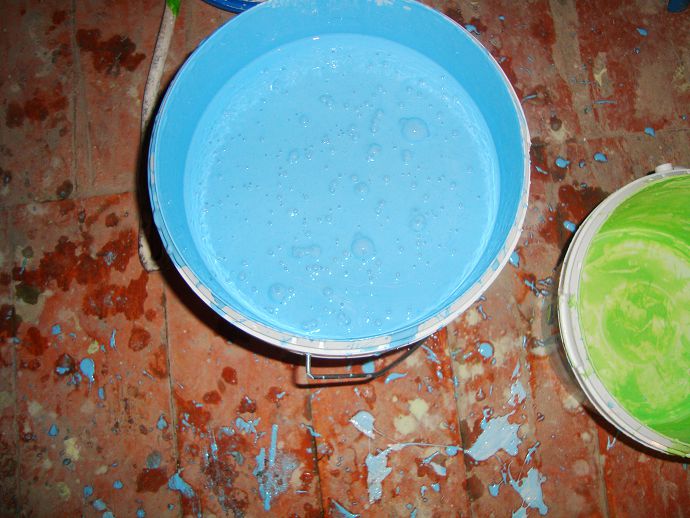
One of our readers, as part of our proposal, sent a photo essay on the application of Venetian plaster. Watch and admire
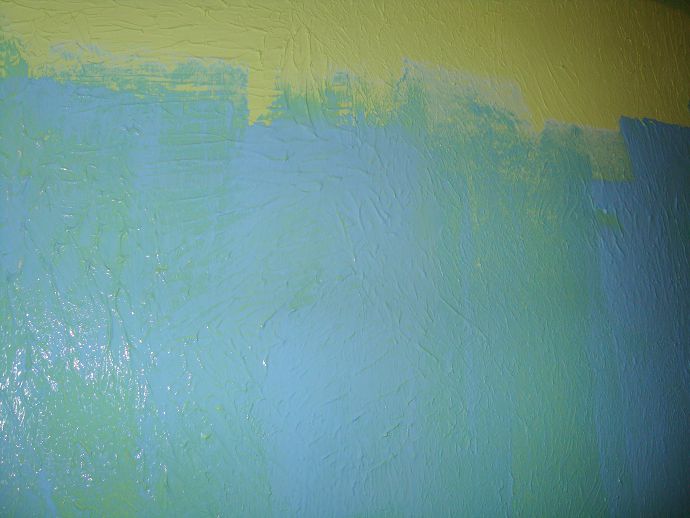
In order to finish the walls with Venetian plaster, you will need:
- Venetian plaster and contrasting color. You can choose the tone of the color scheme to your liking, it will only be visible in places and will not become the main color. In our example, this is the color "green apple".
- Water-based paint and color scheme suitable for its tinting. In our example, this is a blue concentrate, by adding which we got the desired blue tint.
- Acrylic varnish for the final coating of the walls, it will help to add shine, make the walls resistant to dirt. In addition, such a coating will be easy for you to wash and clean.
- Putty and primer for preparing walls for plaster.
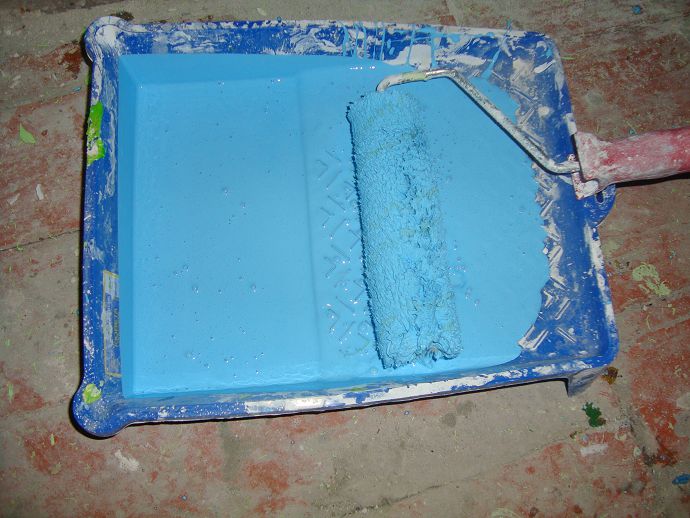
- Auxiliary tools - spatulas, a special structural roller, grout mesh, etc.

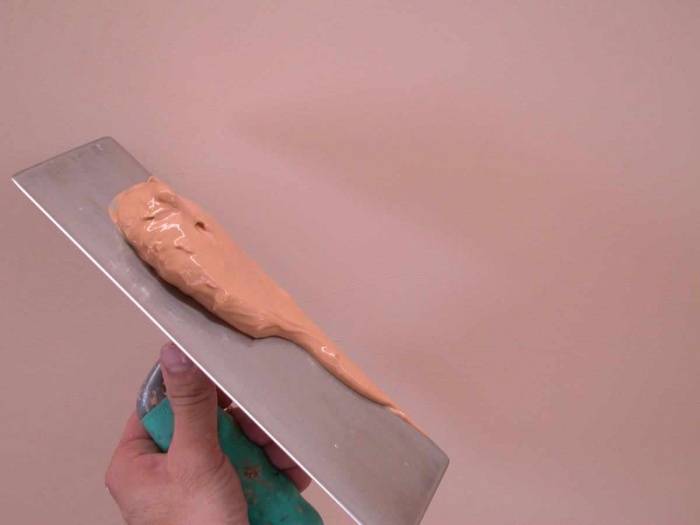
The first stage is the preparation of the walls. They are puttied in advance to a smooth state, then treated with a primer. The plaster must be tinted to the desired color shade. When tinting, keep in mind that after drying, the surface becomes a little lighter (like many mixtures), so the tone should be created brighter. 
Let's start drawing. First, we take a little mixture on the edge of the spatula, trying to evenly distribute the composition along the edge of the tool.

We apply the plaster in a thin layer (approximately 3 mm) and evenly distribute it over the surface. It should be applied from the bottom up: with this method, the plaster does not spread along the wall and does not drip onto the floor.
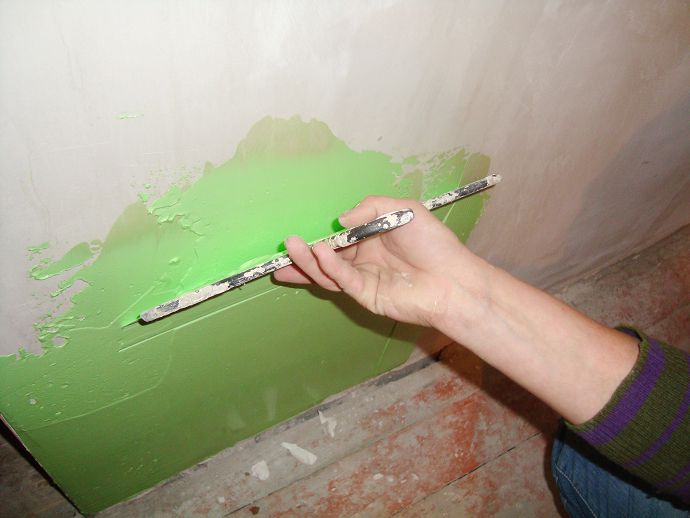
After applying to the walls, the plaster layer is leveled with a spatula in all directions. At one time, areas of more than 1.5-2 square meters should not be covered.
When applying plaster, carefully bypass sockets and switches.

After applying the Venetian on a small area (1-2 sq.m.), it is necessary, without waiting for drying, to give the coating a texture, for which a special structural roller is used. You need to roll the roller with the same pressure so that the texture is uniform.
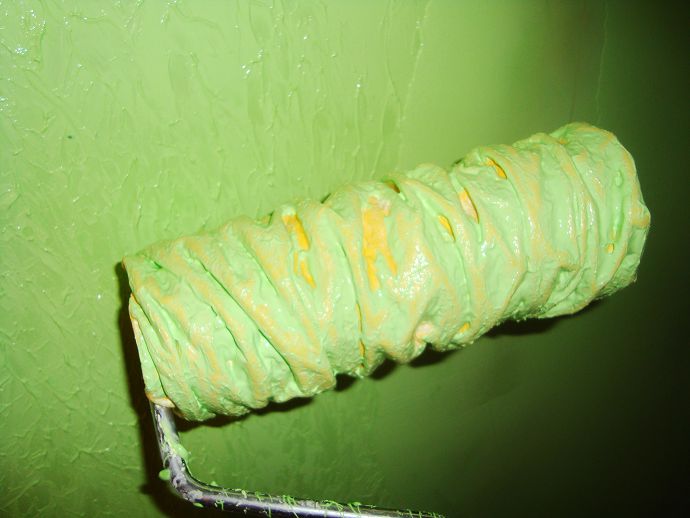
First, carefully work the edge of the wall - the surface from the corner or doorway. Try to run the roller along the wall from the bottom up only once, then the texture will be large and interesting.

When the first part of the wall is processed, you can proceed to the next section. The peculiarity of the texture roller is that the more often you run it over one area, the smaller the texture fragments on the surface are, so you should not overlap the new area with the already finished one. A small gap that sometimes forms between sectors is easy to roll up with a roller and turn into a homogeneous structure.
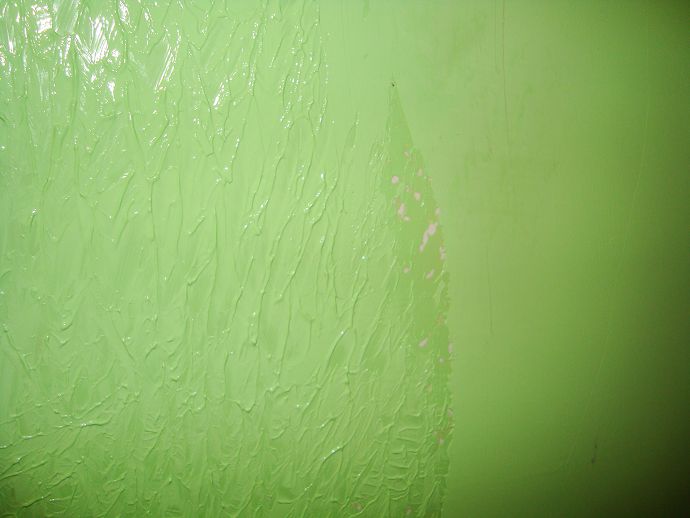
Gradually cover the entire surface of the walls and let it dry. Drying time depends on temperature and humidity. In a room with average humidity and a temperature of 20 ° C, the plaster will dry completely in 15-20 hours.
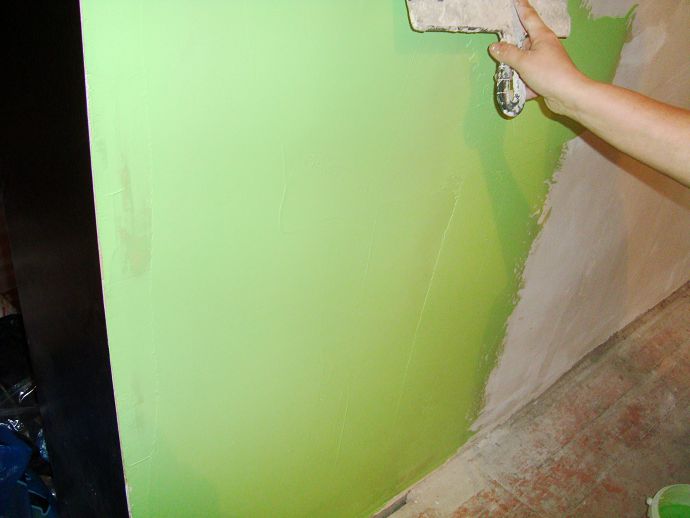
The next step is coating. water-based paint. When choosing a color for the second layer, you can choose contrasting colors (as in this example) or choose adjacent tones of plaster and paint. For color matching, the color wheel can help you: it is believed that harmonious combinations are adjacent colors in the circle, or vice versa, opposite.
To obtain a blue color in white paint, you need to add a little blue color and mix well until smooth.
Using a soft roller, paint all walls with a layer of water-based paint.
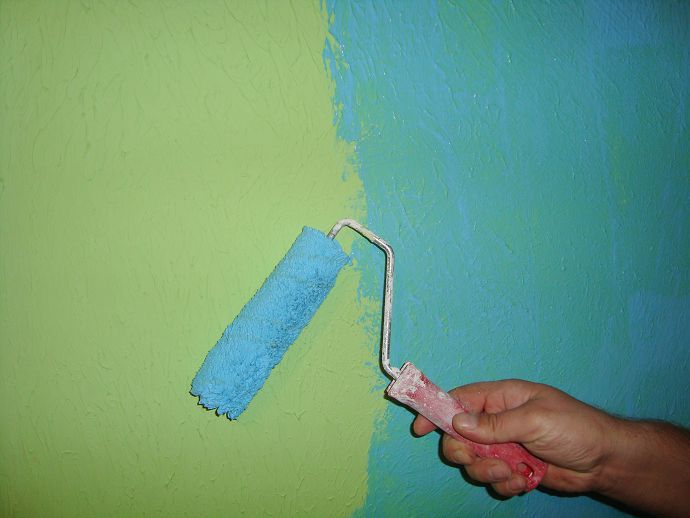
You need to paint the surface of the walls in one layer, but the paint should lay down in a dense layer. To do this, wet the roller with plenty of paint so that the thickness of the coating is sufficient.
The sequence of applying paint can be any, i.e. you can first paint the bottom of all the walls, and then start painting at a height.
Modern Construction Materials help to create a variety of interiors, with the help of them it is easy to implement specific tasks. So, for example, the application of Venetian plaster allows you to turn an ordinary standard apartment into a luxurious palace. The technology for creating the original coating is extremely simple. You can master it yourself if you wish. There are several ways to apply decorative coating. It makes sense to get to know each of them. Then it will be easier to choose the most suitable option and make repairs in the apartment with your own hands
How to apply Venetian plaster
Before you start working, it is important to take into account one circumstance: different methods of applying Venetian plaster to the walls help to form a different decorative effect. The basis of the technology is the same stages of work, and only the finishing layer can be carried out taking into account existing expectations.
What is Venetian Plaster? This is a multi-layer coating that helps to mimic the surfaces created by various natural materials. You can create on the wall the effect of natural marble, the wall of a farm hut, cork wood, complex textured volume. The color of the new coating is created using a tint. The finishing layer is often additionally processed with wax or mother-of-pearl. These components help to enhance the decorative component and make the interiors exclusive.
In order for the new finish to serve for a long time, it is important to follow all the technological steps. A step-by-step instruction will help you do this, telling you how Venetian plaster is applied.
Surface preparation.
In order for the multilayer coating not to crack or crumble in the future, the walls must be carefully prepared before decorating. The order of work is as follows:
- First, carefully dismantle the old finish.
- The walls are cleaned with a spatula.
- Then plastered.
- Putty.
- Treated with sandpaper.
- They are primed.
Note! Alignment of the walls helps to save on the consumption of the finishing decorative coating.
Today, Venetian plaster is quite expensive, ignoring the need for preliminary work with the surface leads to the fact that the consumption of multi-layer plaster increases three times.
Carrying out tinting of Venetian plaster
The Venetian plaster itself is white. If it is necessary to give it color shades, color is used - special coloring additives. They are simply added to the already prepared diluted solution, after which the mixture is thoroughly mixed with a construction mixer. It will not be possible to stir the color evenly without it manually: it will be difficult to achieve a uniform color mass.
Applying Venetian plaster to walls

Any Venetian plaster helps to create or simulate a cut natural stones or any other natural materials. To create this or that effect, a certain technique for performing the finishing layer helps.
marble effect

The marble effect is created as follows:
- Using a wide spatula and sweeping movements, the first layer is applied.
- Ten minutes later, a special trowel is taken into the hands and with the help of it the necessary relief is formed.
- Two hours later, a second layer is applied to the wall. It is made with a wide spatula. A multi-colored composition is laid out on it, stirred to a homogeneous mass. What colors to use to create a marble pattern will tell the video tutorials published in the article. A multi-colored mass is applied to the dried first layer with pulling movements. In this case, the Venetian should lie down in different directions. Five minutes after the end of the work, the applied plaster is leveled with a trowel.
- The applied layers must dry for a day, then the new coating is ground with a special grinder, and then polished with a stainless steel spatula. Applying wax on marble Venetian plaster helps to enhance the decorative effect.
The following video helps to see in more detail all the stages of creating a marble effect.
Classic Venetian effect

The effect of a classic Venetian is created a little differently. To form it, it will be necessary to apply several layers of textured putty to the wall (from three to five). In addition, each layer has its own color or shade.
Note! Since even professional decorators cannot repeat the chosen combination of colors twice, it is important to prepare all the necessary volume of Venetian plaster in advance, and dilute different colors in different containers.
The order of work is as follows:
- The first layer is applied with arbitrary strokes using a wide spatula.
- Ten minutes later, the necessary relief is formed with a trowel.
- Two hours later, the convex scallops are cut off with the same tool and the first layer is leveled.
- The second layer, like all subsequent ones, is applied using the same technology after the first layer has completely dried.
- At the very end, the surface is polished with a fur cloth. To give shine, Venetian plaster is treated with wax.
Demonstration lessons of application help to visually see how classic Venetian plaster is realized.
cork tree effect
The way to create a cork tree effect is quite difficult. But you can also master it if you wish. If it is necessary to apply Venetian plaster to the walls without a do-it-yourself master, it is important to realistically assess the howling potential. Otherwise, any alteration will be very expensive.
- The effect of creating an imitation cork tree begins with a selection of the right colors. As a rule, there are several of them: brown, coffee with milk, gold, bright burgundy. The first layer is applied with a mixture of these colors (note that they do not need to be pre-mixed for a homogeneous mass).
- The first layer of Venetian plaster is applied quite thickly.
- The secret to creating the balsa wood effect is to force-dry the Venetian. Therefore, immediately after application, we pick up a building hair dryer and dry the first thick layer of the coating with it. At the same time, the nozzle of the hair dryer is periodically brought close, then removed to a distance.
- When exposed to heat, Venetian plaster cracks. It is the cracks that help to imitate the surface of the cork pattern.
- After treatment with a hairdryer, the wall surface is left to dry. Finally, Venetian plaster will dry in two days.
- After the specified time, a second layer is applied. As it is used water-dispersion materials. They are tinted in a different color (it is better to choose bronze or gold). Apply in a thin layer.
The surface dries for a day, then it is processed by a grinder. Only after that, the finished Venetian plaster with the effect of cork wood is treated with wax (you need to apply it with a soft cloth). The following videos clearly demonstrate the above description.
Textured coating

Today, Venetian plaster allows you to apply a special textured layer to the wall surface, which also looks very decorative. But it is performed in a slightly different way than the technologies described above.
- After leveling, the walls are impregnated first with a deep penetration primer, and then, after it dries, they are treated with a covering primer. Re-treatment of the surface helps to increase the adhesive properties of the substrate. Such impregnation dries within one and a half hours, after which you can start laying the Venetian plaster solution.
- The material is applied not with a spatula, but with a roller. It allows you to form a thin layer. It dries within two hours, after which the surface is treated with a spatula. The main task is to remove the sharp protrusions of the frozen layer.
- After the first layer dries, you can arm yourself with a trowel. She and the ready-made solution form a relief that looks like a collection of small islands. The thickness of the second layer should not exceed one millimeter. The bumpy surface dries for five hours.
- We again take a spatula in our hands and clean the protruding parts.
- As a finishing layer, Venetian plaster is applied into which a special finishing varnish is mixed.
- The final stage is the implementation of ironing - processing with a special trowel. This operation helps to give the finish a metallic sheen.

And this video will allow you to see how you can create the effect of wet silk with the help of Venetian plaster
.
Conclusion
As you can see, Venetian plaster is a rather malleable material, the application technology of which is easy to master on your own. Different application methods help to solve different design problems.
Marble for interior decoration is very popular. This material is beautiful and durable. Its only drawback is the high price. Venetian plaster allows you to get high-quality imitation of marble, which everyone can apply with their own hands. Video lessons of application greatly facilitate the carrying out of facing work.
Do-it-yourself Venetian marbled plaster, video
You can buy Venetian plaster in every hardware store. Manufacturers offer a wide variety of colors, which allows you to choose it for the design of any room. Many people buy dye and plaster separately, and then by mixing the components they get the desired color or shade. Applying Venetian plaster is a rather laborious process, but watching the results of your work at the end brings great pleasure.
Applying Venetian plaster is a rather laborious process.
A special application technology allows you to get an imitation of a matte marble surface. The application of a special wax solution makes it possible to obtain in the end a perfectly smooth, glossy surface of an attractive appearance. The secret to obtaining a beautiful gloss is the intensive smoothing of the surface, which results in heating of the polymers that make up the mixture. Influenced high temperature going on chemical reaction and hardening of polymers, which acquire high strength and attractive appearance.
The composition of Venetian plaster includes components that have been used by craftsmen for centuries, namely:
- fine dust of granite, quartz, marble or other types of decorative stone;
- slaked lime;
- special dyes;
- water.
Modern manufacturers have improved the composition by adding plaster to the composition polymer materials. They greatly facilitate the application of the material, as well as its appearance and durability. 
The advantage of Venetian plaster is that it has no color. Thanks to this feature experienced master get a unique play of color, its depth and creates an illusion natural material. At the same time, it is worth paying great importance high-quality preparation of the base for applying plaster, since even minor defects will spoil the appearance of the finished surface. Venetian plaster is applied to various surfaces, namely:
- brick;
- concrete;
- tree.
Venetian plaster has gained high popularity, but its disadvantage is the complex application process and the high price of consumables. However, everyone will agree that it is worth it.
Video tutorial on how to apply Venetian plaster with your own hands:
Do-it-yourself Venetian plaster: application steps
You should immediately tune in to the fact that you will need to spend enough time. The final result depends on the quality of the surface preparation and application of the material. Masters recommend adhering to the following sequence of work:

Marble imitation is created by strokes using small spatulas, while polishing to obtain a sheen is done with a larger spatula. To work smoothly and quickly, you need to get used to it. The material dries quickly enough, while losing its plasticity, so it’s worth working quickly.
 After applying the wax, proceed to the second stage - polishing with grinder
Do-it-yourself Venetian plaster: waxing
Many masters recommend that this procedure be carried out at home. Decorative wax will protect the plaster during wet cleaning. Waxing is started 24 hours after the second or third layer of plaster has been laid. Wax is applied with a conventional spatula. It is important that the wax is applied evenly and thinly. If the layer thickness is large, the wax may peel off, which will spoil the appearance of the plaster, protection from water and detergents will become unreliable. 
After applying the wax, proceed to the second stage - polishing with a grinder. To do this, after 45 minutes, using a soft brush and at low speed, polish the surface until it becomes perfectly smooth and shiny. The wax curing cycle lasts at least 14 days. After that, you can be sure that the protection will be reliable.
Video on how to properly sand wax on Venetian plaster:
Many owners of houses and apartments want to make Venetian plaster, video application lessons make it easier to complete the work. Everyone can cope with its application, but the master who takes up the work must have puttying skills, otherwise nothing will come of it or the result will be far from expected. Venetian plaster will decorate every home, as it will make it respectable, refined and harmonious.
Venetian plaster - great material for wall decoration. We will figure out how it is applied, what tools and materials will be needed to create Venetian plaster, and what you need to know about the technology.
Venetian plaster is an excellent wall covering. It is durable and amazingly decorative. The surface plastered in this way appears translucent. Today you can order the application of Venetian plaster in professional construction companies. However, if you understand the technology, you may well do this work yourself.
What it is
Visually, this coating resembles marble tiles. A translucent layer that hides the characteristic veins of marble looks amazing on the walls. The surface can be distinguished from natural marble only due to the absence of joints between the tiles. Venetian plaster is chosen for exterior finish walls in houses and public buildings. In order to learn how to decorate the facade of a house with plaster, read this article.

This type of coating was invented by the builders of ancient Rome. They guessed that by mixing marble chips and slaked lime, you can get a finishing paste with unusual properties. When applied to the walls, it reproduced the texture of real marble. Clay was most often added to the mixture, which gave the plastered surfaces the color of natural marble. Other pigments have also been used.
The material acquired its name thanks to the city where its second birth took place. It was the architects of Venice who were able to unravel the composition of the coating used by the Romans, and brought the lost technology back to life.
The modern composition of the coating is somewhat different from the historical technology. The composition of modern mixtures for creating Venetian plaster includes:
- Marble powder, color pigments and slaked lime. These components have not changed over the years. Some mixtures still contain only these natural ingredients. However, their cost is quite high, and performance properties are not the most optimal.
- Acrylic paints can be added instead of natural pigments. They are cheaper and allow you to create unusual shades.
- Modern binders of polymeric nature. They make the plaster dough more plastic and increase the durability of the coating.
- Hevea tree sap or synthetic latex. These plasticizers make it easier to level the mix.
- Crushed granite powder for texture.
Despite the introduction of additives that are not provided for by historical technology, modern mixtures can rightfully be considered Venetian plaster. After all, the main component of the plaster test is marble dust, like many centuries ago.
Application technology

Mixtures for creating coatings using Venetian plaster technology are quite expensive. Therefore, it is not recommended to start work without mastering the technology properly. Otherwise, there is a high risk that the appearance of the resulting coating will be far from expectations, and you will have to clean everything off and start over.
The resulting pattern depends on how the tool works when smoothing the plaster dough. Learning to predict what will happen in each case can only be gained by gaining considerable experience.
How to train in applying Venetian plaster? Sheets of cardboard with a side of 1 m will become the optimal training tool. Such a sheet must be covered with an ordinary plaster mixture, dried thoroughly and sanded with sandpaper. On such squares, you can hone your technique, and save the most successful samples and use them as a portfolio to demonstrate your skills to clients.

Another opportunity to improve your skills is to follow the master classes held by Venetian plaster dealers. At such an event, participants are offered both material for work and a stand for creating a training surface. But such training meetings are usually held in large cities.
Video tutorials can help:
Preparatory work
First of all, you need to carefully prepare the wall. The quality of the alignment of the wall largely depends on how well it will turn out to make the coating. The wall is usually leveled in two stages. First, coarse differences are leveled with mixtures for rough plaster. Then the smallest irregularities are removed with a finishing putty.

If the walls are leveled by the customer or a hired team, it is worth clarifying in advance that Venetian plaster will be applied to the wall. It is also allowed to use putty for paint.
The leveled wall must be dried as thoroughly as possible. You can start work no earlier than one day after finishing. But it is better to take a break for two days. Insufficiently dried plaster can fall off the wall, nullifying all finishing efforts. After drying, it is necessary to carefully sand the smallest irregularities and remove all dust from the walls.
To increase the adhesion of Venetian plaster and increase the strength of the coating, the wall is impregnated with a primer. It is worth choosing primers for gypsum plaster, as they include quartz filler. There are enough for sale today. big choice such primers. The difference between individual brands is almost imperceptible, so you can use any.
The primer must be applied at least 2 layers, each time thoroughly drying the wall.
Number of layers
Such a coating is applied in several layers (at least 2). Depending on the desired result, up to a dozen layers can be used. Each layer must be carefully leveled and smoothed. You can apply a new layer only after the previous layer has completely dried, so finishing the walls with Venetian plaster can take quite a long time.
The base coat is applied first. Its task is, like ordinary plaster, to create an absolutely smooth surface. Depending on the final result, the base coat will burn to be white or pigmented. If plastered in 2-3 layers, the base layer will become translucent, its color will matter. If there are more than five layers, the base layer will not be visible.

When applying the second and all other layers, it is important to follow two rules:
- Strokes should be chaotic. different shape, directions, bends will well repeat the natural texture of marble.
- Each new stroke should hide the place of the first touch of the wall at the previous stroke.
After the layer has dried (usually about 10 hours), you need to rub it with a dry trowel to remove all irregularities. After that, you can put the next layer.
The final layer is applied in a special way: a little plaster dough is placed on the wall with a spatula, and then collected back, firmly pressing the surface of the spatula. As a result, the last layer is very thin, almost transparent.
Ironing

The procedure for grouting the last layer is performed when the condition is not dry enough. For work, a clean Venetian trowel is taken. It is very important that there are no chips, shells, pieces of dried plaster mass and other defects on its surface. Ironing is carried out by moving the tool in a circle.
Before performing the finishing layer and ironing, carefully read the instructions for the mixture. Some manufacturers recommend doing this procedure in small areas, others allow you to finish large areas at once.
If ironing is done correctly, the pattern will appear, become brighter and more expressive. Now the wall takes on an almost finished look, it remains only to protect it from moisture.
Wax application

The wax layer that protects the plaster from moisture is very important component. Beeswaxes provide a glossy, perfectly smooth surface. Synthetic waxes provide a more matte finish. Wax can only be applied to thoroughly dried plaster (at least a day).
The wax is applied in a very thin layer, like the finishing layer of the plaster mass. If applied thickly, the wax layer may crack, ruining the entire work.
When the wax dries (20-50 minutes), it is polished with a fluffy nozzle on a grinder or drill. Then the coating must dry for at least 14 days.
Necessary materials and tools
For work, you need to prepare the right amount of dry mix, a container for diluting the plaster mass and a construction mixer. It will be necessary to knead the plaster in large quantities, it will be very difficult to do it by hand.

It is also worth stocking up a tool for smoothing: a narrow spatula, a set of Japanese spatulas of various widths, a Venetian trowel. To grind small irregularities, a skin is useful. For polishing, you will need a grinder or a drill with a nozzle, as well as rags for grinding hard-to-reach places.
Applying Venetian plaster with your own hands. Step-by-step instruction

The procedure for applying Venetian plaster:
- Preparation of walls, materials and tools.
- Applying a base coat.
- Application of the main layers.
- Ironing.
- Waxing and polishing.
Each layer must be thoroughly dried. Therefore, it should be understood that the application of Venetian plaster is a rather lengthy process. But it is better to wait for complete drying than to spend a lot of time and effort on repairs if insufficiently dried plaster falls off the wall.
Before applying plaster using Venetian technology, you should thoroughly practice. But if you properly master the technology, you can get surfaces of extraordinary beauty that are in no way inferior to marble.
Venetian plaster is a vivid example of beautiful decorative design, known for about two thousand years. It retains great popularity to this day. With its help, walls, fireplaces, cornices, columns, ceilings are trimmed both in private houses and public buildings. Applying Venetian plaster is a rather complicated process that requires special knowledge, work skills and financial investments. But the result is the realization of the most diverse design solutions, giving the interior a unique, luxurious, majestic look (the photo below is one of the possible options).
Purpose and composition of Venetian plaster
Venetian plaster is used for interior decoration houses and apartments, where it can be used in the design of any room: bedroom, hall, hall, living room. It can be found in the premises of offices, bars, restaurants, hotels, hotels, saunas, baths.
For the design of facades, the material is used extremely rarely. This is due to its high price and harsher operating conditions outside.
The surfaces to be decorated in the course of the work being carried out are completely covered with a finishing layer, or it is applied in fragments, harmoniously combining with another cladding.
Materials for obtaining Venetian plaster:
- dyes;
- stone flour;
- astringents;
- water emulsion (or latex);
- gypsum and other additives may be used in some mixtures;
- wax - to cover the resulting finishing layer.
The first can be both natural and artificial origin. Dyes help to get a wide variety of shades. They can be easily selected for a specific design project.
For the production of plaster composition, flour is used from marble, granite, onyx, quartz and other stones.
Lime or acrylic is used as a binder, which makes the working mixture very plastic.
An aqueous solution is more environmentally friendly than a latex emulsion.

Venetian facing concrete, brick, stone and wooden surfaces.
The market is filled with all sorts of ready-made solutions sold in plastic buckets. Using them, you can achieve different visual effects on the surface: its dullness, velvety, gloss.
It should be borne in mind that the topcoat of the Venetian is translucent. Defects of the rough base are visible through it, therefore, its careful preparation is required.
Venetian - one of the varieties of decorative plaster compositions (this can be seen from the photograph). It differs from finishing materials similar in purpose to its appearance, composition, application technology, and operational characteristics.
Advantages and disadvantages of coverage
The technology of applying Venetian plaster involves obtaining a final coating that has a number of positive characteristics. Despite this, the material has minor flaws. All of them are presented in the table.
Advantages and disadvantages of Venetian plaster
| № | Positive properties | Characteristic cons |
|---|---|---|
| 1 | decorative indicators of the material are pronounced, allowing to achieve a mirror effect on the decorated surface | very high cost, both of the Venetian woman herself and of the work to attract specialists |
| 2 | plaster is environmentally friendly, because it is made from natural (natural) components | to achieve different effects, it is necessary to apply different methods of work |
| 3 | the formed coating is resistant to direct exposure to water and steam, which makes it possible to use the material in bathrooms, swimming pools and other wet areas | fairly complex technologies for creating coatings, often requiring the involvement of professionals |
| 4 | the plaster layer does not burn | the final finish is very demanding on the state of the rough base, which should be leveled almost perfectly |
Due to the large number of advantages, the main of which is the decorative variety of results achieved, the Venetian remains popular in decorating rooms. Although the work takes quite a long time, but the result (photo below) is worth the cost.

Material classification
The mixtures are divided according to the composition and technique of forming the final coating. Venetian plaster, the application technology of which consists in creating many layers of marble chips, additives and an astringent component, is called classical. Its types:
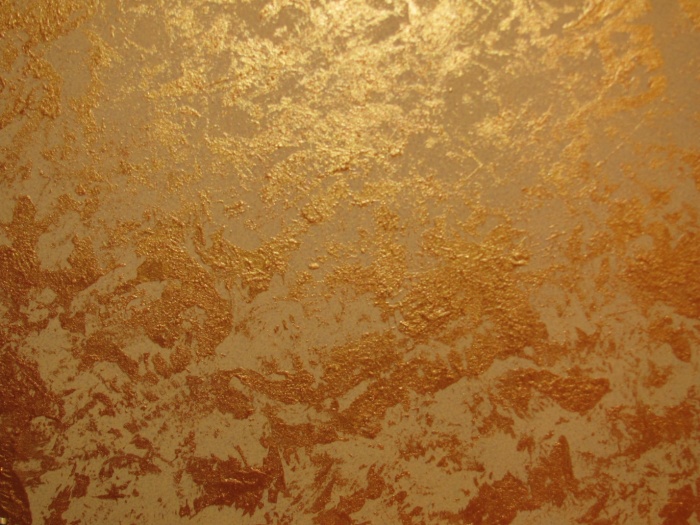
- "Veneto" - imitates polished marble (which is illustrated by the photograph);
- "Trevignano" - creates the illusion of internal illumination;
- "Marbello" - allows you to give the surface a matte velvet look, with streaks of gloss;
- "Encausto" - a semi-matte design with fragments of contrasting shades.
With the help of these materials, the interior is given beauty, style and originality.
Preparing to work with Venetian plaster

Before applying Venetian plaster to a working base, you will need to prepare it and stock up on tools. The preparation process consists of a series of manipulations performed sequentially:
- doors, floors, skirting boards are protected with a plastic film, paper tape, cardboard sheets from the solution;
- the surface for finishing is cleaned of exfoliated old layers of plaster or paint, dirt, dust, oil stains (as in the image);
- existing defects and cracks are sealed with a cement-sand mortar;
- check the evenness of the rough base with a level, if necessary, leveling the walls, puttying them with a finishing mixture;
- sandpaper (you can use a grinder with a special diamond-coated disc) grind the surface;
- apply the first layer of primer, and after it dries - the second.
The primer for the second layer can be painted to match the color of the plaster.
Work activities will require the following tools:
- mixer or perforator with a nozzle;
- grinders;
- a set of containers, spatulas;
- trowel, building level;
- sandpaper, graters;
- suede;
- rags (sponges).
Preliminary preparation is designed to speed up the application of plaster and properly prepare the base for this. Otherwise, the resulting final decorative design will have defects in the working surface.
Material application methods
There are basic ways to apply Venetian plaster. Their use can be used to simulate various surfaces. Plastering techniques differ in the order and method of performing actions. Let's consider them in detail.
Technology of decoration in the style of marble coating
It is often required to obtain the effect of marble on the finished surface. It is recreated in the following order of manipulations:
- with a wide spatula, a thin first layer of Venetian is applied to the wall (ceiling);
- with a trowel after 10 minutes create the desired relief;
- after drying for 2 hours, the next layer is applied to the initial layer, which differs in its shade;
- a solution of different tones is laid out on a spatula, mixed there and smeared over the base;
- after 5 minutes, everything is leveled with a trowel;
- after a day, the surface is polished and coated with wax, which is rubbed after 40 minutes.
The solution is applied by moving the tool in different directions.

An approximate result can be seen from the photo.
Classic variant
The classic way is to decorate the wall, created by several multi-colored layers of the mixture. The solution is prepared in advance with some margin. To do this, use several containers, the shades of the material in which differ due to the use of different colors. Operation steps:
- apply a thin initial layer;
- after 10 minutes, a relief is made with a trowel;
- after about 2 hours (drying time), the coating is polished to a brilliant state;
- after they form the 2nd layer, repeat all the steps;
- so create from 3 to 5 layers;
- at the end they are polished with a cloth, opening with wax ( possible result shown in photograph).
The polishing process will speed up the use of the grinder.

Imitation wood finish
The effect of the cork tree is obtained by forming the primary level from the solution different colors. Next, they act like this:
- a rather thick layer is formed from the resulting mass, which is dried with a hairdryer;
- after drying, the surface is covered with cracks, creating a decorative wooden look;
- after a couple of days, a thin second layer of a material of a different shade or mother-of-pearl enamel is applied to a completely dried surface;
- grinding and waxing complete the finishing work.

An example of a "wooden" finish is the following photo.
The working mixture is stirred until a non-uniform shade is obtained. Hairdryer allows you to give the plaster an original texture. To do this, it is either brought closer or removed. It is clear that you need to make movements periodically.
Methodology for creating an invoice
Venetian compositions allow you to create relief patterns and patterns. Here's how to properly apply Venetian plaster to create texture:
- with a roller with a fur nozzle, the solution is distributed in a thin layer along the working plane;
- after about 3 hours, remove protruding fragments with a spatula;
- the next level is formed by applying the composition with a trowel, which results in “islands” of the solution;
- after 5-6 hours, they are cleaned with a spatula;
- the final (third) layer is created from a plaster solution mixed with varnish;
- after drying (about 6 hours), the surface is polished with a trowel.

The photo below shows a vine relief pattern.
All the variety of technologies for applying the composition to the base is caused by the need to achieve different effects. Application various techniques allows you to simulate the appearance of a large number of natural materials.
Practical tips for choosing a plaster mix and working with it
Before choosing a plaster for work, it is necessary to clearly represent the desired result. A number of factors play an important role in this. The main prerequisites are:
- general interior style;
- purpose of the room;
- under what conditions the selected material will be used;
- the possibility of correcting defects obtained in the course of the work;
- are there any features in the care of the purchased type of coating.
Based on the purpose of the premises, the following tips for choosing the working staff are distinguished:
- the walls of the bedroom are recommended to be covered with pastel-colored lining;
- hall, living room are usually finished with bright, saturated colors.
The Venetian allows you to imitate marble, jasper, malachite, onyx, quartz, pearl facings. With its help, wooden, leather, fabric textures, various drawings are created. The applied coating is both matte and glossy.
Before buying, you should first calculate the amount of material needed for work. It is advisable to read reviews about him and his manufacturer. Instructions for applying Venetian plaster will help you understand the technology of coating.

The nuances of the plastering process are as follows:
- work should be done with a special trowel;
- the solution is rubbed into the wall (ceiling) with strong pressure;
- the new movement of the tool must be performed perpendicular to the direction of the previous action;
- carefully monitor the possible appearance of scratches on the applied surface, removing them in time;
- with a damp cloth every 15 minutes, the remains of the solution must be removed from the instrument;
- all manipulations should be carried out at a calm pace, carefully;
- to achieve translucency, the applied layer should not be thicker than fractions of a millimeter;
- it is recommended to start finishing from the top left corner of the room with tool movements that are different from each other;
- wax is better to use synthetic (artificial), avoiding the formation of sagging.
When purchasing a ready-made plaster composition, you can see the final result in the photograph from the package. Choose the material that is most appropriate to achieve the desired effects. Taking into account the nuances improves the quality of the result (photo).

There are no special rules for caring for applied Venetian plaster. It must be taken into account that during the first two months the resulting decorative design is not washed (during this time it completely hardens). During this period, it is recommended to protect the surface from water and dirt.
After the specified time, the resulting contamination is removed with a sponge (rag) moistened with water. Can be used detergents containing no abrasive particles.
The wax layer will need to be updated periodically: at least 1 time per year. This will preserve the appearance of the surface for a long period. It will look original.
The technique of applying Venetian plaster allows you to get many unique effects in interior design. The achievement of this is facilitated by the observance of the procedure and all the nuances, the choice of the appropriate material. Ready-made compositions have a high price. Reduces the cost of their process independent production. You can also apply the solution with your own hands. To do this, you need to be completely confident in your skills. If in doubt, it is better to involve professionals. An example of the Venetian application technology is discussed in the following video.
An economical version of creating Venetian plaster with your own hands is shown in the following video.


