New ideas for using old things. How to make homemade concrete balusters How to prepare drawings and make do-it-yourself flat wood balusters
Balusters are vertical support posts, the main elements of the railing. Whether it's a railing for a staircase, a bridge balustrade or a veranda railing, it doesn't matter, the device and purpose are the same everywhere. From this article you will learn what balusters are and how to make them yourself.
What is a balustrade? - this is a railing of figured columns connected from above by a horizontal beam, a handrail;
Fencing posts perform several functions:
- railing support;
- security;
- decorative element.
They can be visually divided into three parts:
- handrail support;
- central part;
- baluster base.
The base of the baluster or pint is that part of the post that is attached to the steps or balusters. The central part performs protective and decorative functions. A handrail is installed at the upper end. This part of the post is always made with a small allowance so that you can adjust the height of the railing.
For the manufacture of a classic balustrade, both traditional materials are used: wood, metal or concrete, as well as modern analogues: glass, plastic (PVC), polyurethane.
If you know what balusters are and have seen them many times, then you will agree that the most popular material for their manufacture is still wood. This is due to the ease of processing the material and the possibility of giving any shape.
Wooden balusters for stairs
Wooden balusters are made using three main technologies:
- turned balusters- the most common type, which is performed on a lathe using special cutters;
- milled. On racks of this type there are threads in the form of a screw, braids or other decorative elements;

- carved balusters, that is, pillars on which there are thread elements. For manufacturing, multi-axis machine tools with program control are used.

Stair railings consist of balusters (racks) and pillars. Entrance poles are mounted at the beginning and end of flights of stairs, as well as at the corners of the landings. They are made in the same style and differ only in height and cross section, for example, if square balusters have a side of 45 to 50 mm, then fence posts - from 80 to 100 mm. The height differs by 10-20 cm.
In accordance with GOST 25772-83, it must be taken into account that in order to ensure the safety of the operation of the stairs, the distance between the balusters must be:
- stairs for the house - no more than 15 centimeters.
- combined or screen railings - 30 cm.
- stairs in children's institutions - 10 cm.
Flat wooden balusters
As a rule, racks in cross section have the shape of a circle or square. However, along with models of the traditional form, flat balusters are also used, which are used not only as a fence for flights of stairs, but also for gazebos, verandas, balconies and other structures.
Flat carved balusters can be installed close to each other, forming a single pattern. Thus, it is possible to perform complex ornaments of large sizes, thanks to which wooden balustrades acquire a finished appearance.
To make flat wooden balusters, you need to stock up on blanks right size. Choose a suitable pattern and sketch. Then transfer the drawing to the workpiece and cut it out with a jigsaw along the contour.
When the ornament is sawn out, they proceed to finishing with cutters - all patterns and decorative elements are turned, made smooth and symmetrical.
What type of wood to choose?
It is very important to choose the right material, because not only the cost of the product, but also its performance characteristics. It is recommended that the steps and pillars for stairs be made of the same wood. This will avoid deformation of the structure in the future. For production wooden racks hardwoods are used.
Oak
Balusters made of oak are characterized by high wear resistance and strength, resistance to decay. The wood is dark brown or light brown in color. An important advantage is that oak balusters are not subject to cracking and do not warp. The dense structure allows you to make the smallest details and even curved elements - all types of balusters and material processing methods are accessible.
Beech
Balusters made of beech are almost as hard as oak in quality and hardness, while they are easily processed and bent. Wood lends itself well to impregnation with various compositions, which contributes to a long service life of varnish and paint coatings.
The disadvantage of this type of wood is that when it dries, it warps and rots a lot, so it is recommended to use beech balusters only in rooms with low humidity. Beech is used to imitate such valuable species as walnut or mahogany.
Ash
Outwardly, ash wood resembles oak, but is inferior to it in hardness and strength. The structure is elastic, dense and heavy. His hallmark is durability and resistance to decay. Ash has a beautiful texture of yellowish color with dark and light stripes. Balusters made of ash can withstand significant loads, especially bending loads. The wood warps a little and bends well when steamed.
Birch
This tree is used somewhat less frequently than the species described above. Birch has average density, hardness and strength with good toughness. The disadvantage of birch is its tendency to crack, significant shrinkage, susceptibility to decay. But at the same time, birch is easy to process, easy to glue, polish, paint. Birch, when using appropriate dyes, is easily given the appearance of precious woods: gray maple, mahogany or walnut.
Pine balusters
Pine belongs to soft breeds, due to which it is easily processed by cutting tools and lends itself well to grinding. Pine balusters are immune to temperature changes and are resistant to fungal attack. The color of the wood varies from light yellow to yellowish red. Pine has areas with different porosity, so the paint is absorbed unevenly, which reduces the quality of the coating.
Larch
Balusters made of larch have a red-brown or brown color. This tree is inferior to oak in hardness, but surpasses it in strength, and, over time, the wood, due to the special composition of the resin, only becomes stronger. Larch is not subject to warping, but during the drying process, internal cracks may occur. Railings and balusters made of larch are durable and do not rot.
Racks can be made from rarer and more expensive types of wood that cannot be bought in a store. In this case, you should contact the manufacturer directly or a specialized company that produces custom-made balusters.
Baluster making machine
Manual frezer
Milled balusters can be cut into homemade machine which is shown in the photo. This requires a cylindrical workpiece.

A platform is movably mounted on a threaded shaft (1) (2 - in the figure it is in a raised state), on which, in turn, an electric drive (3) with a wood cutter (4) is fixed.
When exposed to the handle (5), the wooden blank (6) starts to rotate. At the same time, the platform moves along the shaft in a horizontal plane. As a result, a spiral line is cut on the workpiece. The depth and width of the notch is determined by the size of the cutter, and the pitch of the helix is determined by the size of the gear. Depending on the complexity of the task, the manufacture of a baluster with a manual milling cutter takes from 15 minutes to several hours.
The production of wooden balusters can be simplified by using a machine with a copier. In this case, a template is first prepared, as shown in the photo.

The essence of this method is that the depth of the cut is not adjusted manually, but with the help of a thrust-guiding roller that moves along the template. First, with the help of a roller of a larger diameter, the workpiece is roughed. Then a roller of a smaller diameter is put on and final finishing is performed. The machine for the production of balusters is shown in the figure.

A manual milling machine is mounted on a movable carriage. The cutter can move along a line perpendicular to the axis of rotation. The distance to the center of the workpiece depends on the position of the guide roller moving along the template.
When using this method, balusters and railings in general are obtained in a more complex and perfect form. CNC machines allow you to make the most beautiful specimens of any level of complexity.
Manufacturing of wooden balusters
The manufacture of wooden balusters is a complex process that requires certain skill and equipment that will ensure the rotation of the workpiece along the longitudinal axis. Most often, a lathe is used for this purpose.
The production of balusters consists of several stages.
Design
First of all, it is necessary to take into account the size of the stairs - the number of racks that need to be made will depend on this. The height of the baluster is defined as the difference between the total height of the railing and the thickness of the handrail with the step covering. As a rule, the value ranges from 65 to 100 cm.
Next, you need to decide on the design. Samples of balusters can be found on the Internet. After the sketch is selected, it is necessary to transfer it to the drawing, indicating the dimensions. In this case, all sections are numbered and the depth of the cuts is noted. For example, a drawing of a baluster of the simplest form might look like this:

All marks must be transferred to the workpiece and numbered in order to know which tool to use for a particular part.

Baluster turning
It is very important to fix the workpiece strictly in the center in order to avoid beats and distortions. If the workpiece has the shape of a square bar, then diagonals are drawn at the ends, and the baluster is fastened strictly at the point of their intersection. In this place it is necessary to make a recess.
In order for the turned balusters to have a rounded shape, sharpening is done with the help of a reyer. To simplify the process, professionals recommend first grinding off the corners, turning it into an octahedron. To do this, a cutter of the required width, located perpendicular to the axis of rotation, makes a straight cut to the required depth, and the workpiece takes on the following form:
Fastening wooden balusters to the stairs - video and photo instructions
Balusters made of wood can be installed on the steps of the stairs, or on a bowstring or kosour. For fixing, hardware, anchors (dowels) or special brackets are used. In this case, several rules must be observed:
- the distance between the balusters should be no more than 150 mm;
- height from 90 cm to a meter;
- entry posts are installed at the beginning and end of the flight of stairs and at the corners of the site.
It should be remembered that fastening balusters with nails does not provide sufficient strength to the structure. And later causes squeaks and discrepancies in parts.
Before you install the pillars on the stairs, you need to make holes in the ends, strictly in the center. To do this, you can make a simple device, consisting of a drill mounted on a chipboard shield, and a wooden block with a centering hole. To prevent the rack from staggering, a bar is used to fix its position.
This device allows you to drill even recesses in the base of the balusters, the diameter of which is 2 mm smaller than the diameter of the fastener.
Installation of balusters made of hard wood is carried out using metal studs with a cross section of 6-10 mm and a length of 60-100 mm or wooden dowels with a diameter of 8 to 14 mm and a length of 50-80 mm. Stair poles are fixed with larger fasteners.
In the example, we will use 8x100mm metal studs for the uprights and 10x100mm for the posts.
- Before installing the balusters on the stairs, it is necessary to mark the steps and determine the points on which the racks will be attached. To do this, we mark the places for the extreme pillars, on the first and last steps, and screw the screws into them, but not completely. You should not place racks on the very edge of the step, make an indent of 5-10 cm, depending on the depth of the tread.
- Between the screws we stretch the fishing line, which will serve as a guide for marking the steps. With the help of a square, we draw center lines and mark the centers of the racks.
- We make a small hole under each rack with a thin drill. Then, using a device for perpendicular drilling, we ream these recesses to a diameter of 5 mm.
- We put a few nuts on the outer end of the stud and screw it in. When everything is ready, remove the nuts. Repeat this for all racks and poles.
- We screw the racks into the holes made in the steps. Before finally fixing, we check the distance between the balusters and their alignment.
When the installation of the balusters is completed, you can attach the handrail. To do this, we cut off the upper part of the two extreme racks at the right angle, apply a rail to them and mark the place for the cut on the rest. In accordance with the markup, we saw off all the tops.
When working with a miter saw, wrap the cut with tape, so you can avoid chipping the wood.

With self-tapping screws we fasten the railing rail to the uprights, on which the handrail is subsequently mounted.
The ends of the handrail are cut so that they stand close to the posts. Niches for fasteners are cut out on the reverse side.
At the end, we fix the handrail to the railing rail with self-tapping screws and close it with a decorative overlay, cut into pieces and glued between the posts.
Metal balusters for stairs
Compared to wood, metal balusters have a number of advantages, the main of which are their durability, ease of maintenance, and the ability to use both indoors and outdoors. In addition, they look aesthetically pleasing and blend perfectly with other materials. For example, you can see combined balusters, the base of which is made of stainless steel, and the core is made of glass or wood.
Metal railings, due to the variety of forms, can become an adornment of any architectural ensemble. They are used not only as a fence for flights of stairs, but also for balconies, terraces, etc. Forged balusters for stairs look especially advantageous. Let's see what kind of metals are used:
Stainless steel
Stainless steel balusters are undoubtedly the most sought after. Benefits include:
- ease of manufacture of racks. Modern methods of metalworking make it possible to make both seamless railings, made using welding, and modular, for the assembly of which hardware and brackets are used;
- high anti-corrosion performance. Chrome-plated stainless steel balusters are excellent for use in environments with variable temperatures and high humidity. Such products successfully resist corrosion caused by acids, chlorine solutions, alkalis and other aggressive substances;
- strength steel allows you to significantly reduce the thickness of the racks and give the whole structure a lightness and a feeling of airiness. The material does not lose its properties at low temperatures, which allows the wide use of stainless steel balusters for outdoor stairs.
Cast iron
Cast iron balusters are reliable and elegant railings for stairs. This material has its advantages:
- durability. Cast iron does not lose its aesthetic and physical properties over a long period of time, while remaining beautiful and durable. It can be said without exaggeration that the staircase with cast-iron balusters is built to last;
- mode of production cast-iron railings (casting) allows you to make a product with the most complex configuration - any shape and content is available.
- functionality. Cast iron balusters are suitable for stairs made of any material, be it wood, metal or reinforced concrete. Based on this, certain methods of fastening to the steps are used:
- using welding or brackets for metal stairs;
- concreting in steps for monolithic structures;
- threaded connections or installation on a dowel for solid steps.
iron balusters
Iron lends itself perfectly to forging, which makes it possible to make beautiful railings. Often, forged balusters are made to order, which allows you to adjust the balustrade to the existing design of the room, porch or balcony. Iron is susceptible to corrosion, but the use of modern protective coatings provides resistance to environmental influences.
Forged balusters have only two drawbacks: high price and manufacturing complexity.
Metal processing methods
Metal balusters are made by casting or forging.
Forged balusters
For wrought iron railings, the most suitable are soft grades of iron, steel or copper. There are two processing methods:
- cold forging;
- hot.
In the first case, a blank is cut out of the metal, which is stamped or bent on special equipment. Further, various forging elements and decorative inserts in balusters are welded to it. The cold forging method allows you to independently manufacture simple fencing elements. The advantage of this method is its low cost, and the disadvantage is the high labor intensity of the process.
During hot forging, the workpiece is heated to a high temperature, at which the metal becomes ductile and easily acquires the desired shape. AT this case it is possible to manufacture a balustrade of a more perfect form, but this method requires deep knowledge and considerable experience in working with metal.
Cast balusters
The metal is heated to higher temperatures than forging, at which it is melted and liquid is poured into the mold. Most often, cast balusters are made of steel or cast iron. There are several types of casting:
- in sandy-clay forms;
- investment models;
- in a chill mold;
- vacuum casting and others.
The main advantage of this method is its wastelessness and the ability to make any version of the baluster of the most ideal shape, exactly repeating the workpiece.
How to DIY
To make metal racks in " home environment» the cold forging method is used. For convenience, you can use a homemade bending machine, for example, as in the photo.

Depending on the shape of the circle, any shape can be given to the metal profile - made different types balusters. If the product consists of several elements, then they are connected by spot welding.
Do-it-yourself baluster installation
When installing metal racks, two main methods are used:
- installation on a step- the most popular method in which anchoring of balusters is used;
- at the end of the step. A more complex option, when the railing is mounted on special brackets and does not reduce the usable width of the steps;
Concrete balusters
Concrete balustrades are functional and aesthetic, they will give your home an aristocracy and elegance. Due to the qualities of the material, the product is not afraid of dampness or sudden changes in temperature. It is strong and durable.
Concrete balusters are made by pouring mortar into a mold. To make a mold, you need a model, which can be a ready-made stand made of concrete or a blank made of any other material. Such a model can be made from plaster on a simple machine (shown in the figure).

1 - handle for rotating the workpiece;
2 - baluster template;
3 - the axis on which the gypsum mixture is applied;
4 - axle mount.
The principle of operation of the machine is as follows: a gypsum mortar is fed to the rotating axis, the excess of which is cut off by the edges of the template and flows into the tray. Gypsum gradually accumulates, forming a baluster of the desired shape. After the solution hardens, the disc is scrolled several more times, cutting off the top layer. This is necessary because the gypsum expands when dried, respectively, and the size of the product increases.
The rod is pre-wrapped with paper so that the gypsum balusters do not stick and can be easily separated.
The resulting workpiece must be processed so that there are no open pores left. To do this, the surface is puttied and cleaned with sandpaper. After that, it must be primed and varnished. A model prepared in this way lasts much longer.
From the made blank, you can remove plaster, glue or cement lumpy forms.
Such a machine can be used not only for preparing models necessary for the manufacture of molds, but also directly for the production of concrete racks. How this is done is shown in the video.
First, a disk is cast, the diameter of which is approximately 5 centimeters larger than the section of the plaster model, and glued to its end, serving as a base. Further, places are marked on the disk for fractional pieces, from which the shell of the form for balusters will be formed. In these places, holes are drilled on the reverse side - these will be locks with which it will be possible to assemble the form without distortions.
The whole structure is divided in half, into two rows. Next, methodically collect the first row, as shown in the figure. All parts are lubricated with a release agent. Gypsum mortar is poured between the model and the formed board.
Forms for balusters are cast from gypsum, to which lime is added so that the material does not deform, and citric acid, so that it does not set so quickly.

After solidification, the structure is disassembled and the edges are cut. Holes are drilled on the upper part for pieces of the second row. Details are varnished and lubricated. The structure is assembled again, a side for the second sector is built, everything is smeared and filled with a gypsum solution.
Finished sectors are interconnected. For greater strength, you can still cast the outer casing in the same way as the mold itself was cast, only it is made of two halves. For ease of use, handles are inserted into it during casting. The form is ready, now you can start making the pillars.
Now in stores there are many molds made of polymers, fiberglass or other materials. plastic molds convenient to use and durable. With their help, you can make balusters of any configuration with your own hands.


Production of concrete balusters
Our mold can be used for both casting and beating balusters. Both methods are widely used and have their own advantages.
Beating balusters
The peculiarity of the process is that the balusters are beaten using an almost dry solution. To do this, the sand is mixed with cement and aggregate in a dry form. Then they are evenly poured with small portions of water and thoroughly mixed.
You can understand that the solution is ready and meets the requirements as follows. Take a small amount of the mixture and squeeze it in your hand. If, after unclenching the hand, the substance has not disintegrated, it is ready for use.
The prepared mortar is poured into the mold in small portions, in layers from 50 to 100 mm thick, and compacted well, as shown in the video. Thus, the form is filled to the very top.

Next, carefully remove the casing and pieces of the form. Be extremely careful, because the broken balusters have not yet had time to finally grab. Before complete drying, the product should not be subjected to any mechanical stress. And only in two days the rack will be ready for installation.
Rack casting
For casting concrete balusters, a mold with an upper piece in the form of a lid is used. A gypsum or concrete mortar is poured through a small hole (notch), the neck is tightly closed, and by rotating the mold in a horizontal plane, a more uniform distribution of the mortar over the vessel is achieved. After a couple of hours, the mold is disassembled and the casting is removed. By repeating the procedure, you can do it yourself required amount racks.

Balusters and poles made by the described methods do not require additional grinding and puttying.
Installation of concrete balusters - installation of a concrete balustrade
It is necessary to think in advance about how you will fix the balusters. To do this, metal inserts are installed in the upper and lower parts of the mold - pins 10 cm long for the bottom and 5 cm for the top. Sometimes thin reinforcement is used, passing through the entire rack.
If a concrete balustrade will be installed on a metal staircase, then this tab is simply welded to flight of stairs. If the staircase is concrete, then it is necessary to drill holes for the anchor in the steps and, after installing the racks, fill them with mortar. The video perfectly shows how to properly install balusters and poles - to make a balustrade.
Stone balusters - stone balustrades
Balusters made of natural stone are both the most beautiful and expensive at the same time. Railings made of massive pillars create a special charm of majesty and monumentality. A stone balustrade will serve as a wonderful interior decoration, emphasizing the luxury of home furnishings and personal plot. For the production of stone balusters, the following rocks are used:
- granite balusters. Granite is a very strong, hard and dense rock. It is widely used as a building and facing material. Possesses high resistance to pollution and a frost, and also low water absorption. That is why granite balusters can be used both indoors and outdoors;
- marble balusters. Unlike concrete, natural marble will never mold or crack. It is used for the manufacture of railings for both indoor and outdoor structures. It is applied to registration of balustrades of balconies, ladders, terraces;
- sandstone balusters. A feature of this breed is the ability to polish the surface to a mirror finish. Sandstone is easy to grind and polish, but very often the natural roughness is left to the stone. The breed is distinguished by a pronounced characteristic pattern and a wide color palette. Stone balusters made of sandstone have increased strength and are very durable.
All of the above rocks are natural, and therefore expensive. What to do if you do not have enough funds to buy natural stone. There is an exit. Today, when technology has gone very far, balusters made of artificial stone have become widespread. Look at the photo below. If you think that these wonderful railings are made of natural rock, rare and very expensive. You are wrong. This stone balustrade is the result of innovative technology.

Often, non-natural material looks much better. Modern technologies capable of many things, including imitating naturalness. The palette of colors and shades, patterns and textures will be much wider for stone balusters made in the laboratory.
This product has serious advantages over natural material:
- a wide choice of colors and textures;
- imitation of absolutely any natural stone;
- excellent performance characteristics;
- affordable price.
Artificial stone railings are resistant to aggressive substances, such as household chemicals. Therefore, in the house, such products are preferable to natural ones.
Production process
Artificial stone balusters are produced by casting, similar to concrete ones. First, a wooden blank is turned. According to it, a plaster mold is made, consisting of several parts. Inside, the surface is coated with a layer of water-repellent lubricant. This is followed by a key manufacturing step: a special solution is poured into the mold, which, after drying, will become artificial stone. The mold is placed on the centrifuge and quickly rotated in a horizontal plane to distribute the mixture evenly. After the solution hardens, the form is disassembled. And the finished column is subjected to finishing to obtain a shine.
Glass balusters
Now more and more often various elements of stairs, including railings, are made of non-traditional materials, such as glass. Such pillars in combination with glass steps will give a special look to the stairs, creating a feeling of lightness. Glass harmonizes with all kinds of materials, from metals to plastics, which makes it possible to create combined balusters.
For production, laminated silicate glass is used, the individual layers of which are glued together by a strong polymer film. Such glass is also called building triplex. It is almost impossible to break it: the material will not withstand a strong blow, but it will not fall apart into small fragments - only cracks will appear on it.
Glass balusters and poles are fixed with wood or metal fasteners. It can be hinges or special nozzles. Flat screens made of glass are inserted into a pre-cut groove or mounted on brackets.
Racks made of other materials
Polyurethane balusters
Inside the polyurethane shell is a metal pipe, which gives rigidity and strength to the entire structure. Polyurethane balusters are able to withstand loads no less than traditional materials. But the damaged part can be easily dismantled and replaced with a new one. Among their advantages is also ease of manufacture, speed of installation and low cost.

plastic railing
They are made of polymer plastics, which are devoid of all the shortcomings of natural materials and can imitate almost any of them, for example, wood. As a rule, high-impact polystyrene or PVC is used, the structures of which are lightweight and high strength.

Plaster balusters
Often used as templates and samples for the manufacture of racks from other materials. In appearance, they are very similar to concrete counterparts and are also produced. The main advantages are:
- the possibility of implementing the most daring design decisions;
- ecological purity of raw materials;
- resistance to shrinkage and deformation;
- light weight and ease of installation.
At the same time, gypsum balusters are durable, and if necessary, such a structure can be easily repaired.

There are other types of balusters from various materials and designs.
Conclusion
Now you know what a baluster is and what a balustrade is and are able to use the information received when buying or manufacturing these staircase elements. Do not be afraid to experiment and the result will exceed all your expectations.
The best things in life are free. Find out how you can turn boring, old, and tossed-out items into something beautiful and functional for your home.
1. Grandma's chest of drawers
An old grandmother's chest of drawers can be updated by the hundreds simple ways(with the use of paint, varnish, wallpaper, decoupage, etc.) and even transformed into a chic “antique” washbasin cabinet!


2. Wooden shutters
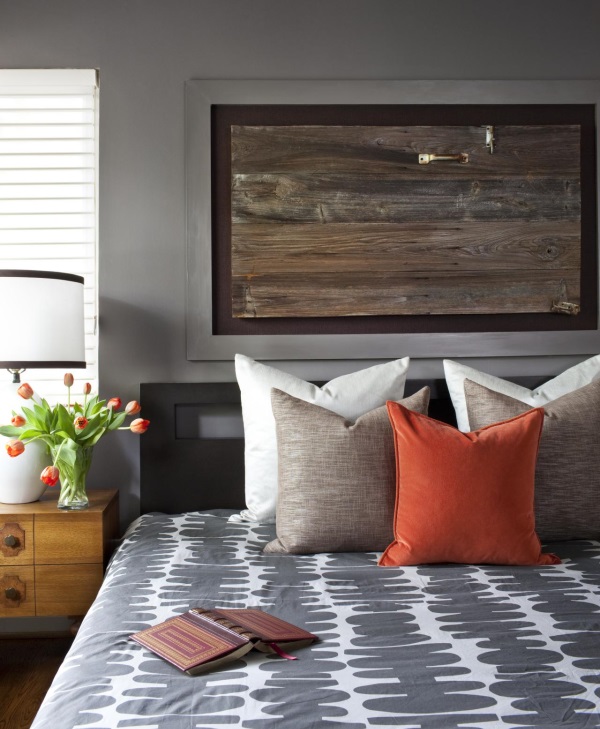
Antique window shutters can be a beautiful and unusual decoration for a wall or headboard, and can also be used as a functional decor! As a rule, for a new look they are painted in fresh light colors in the spirit of the Provence style. An additional effect can be given with craquelure or hand-painted.


3. Doors and window frames
doors and window frames are objects that are quite large and expensive, so even when they fail, not everyone raises their hand to immediately throw them out into the street. And great: because they can still serve you as a stunning wall decor!


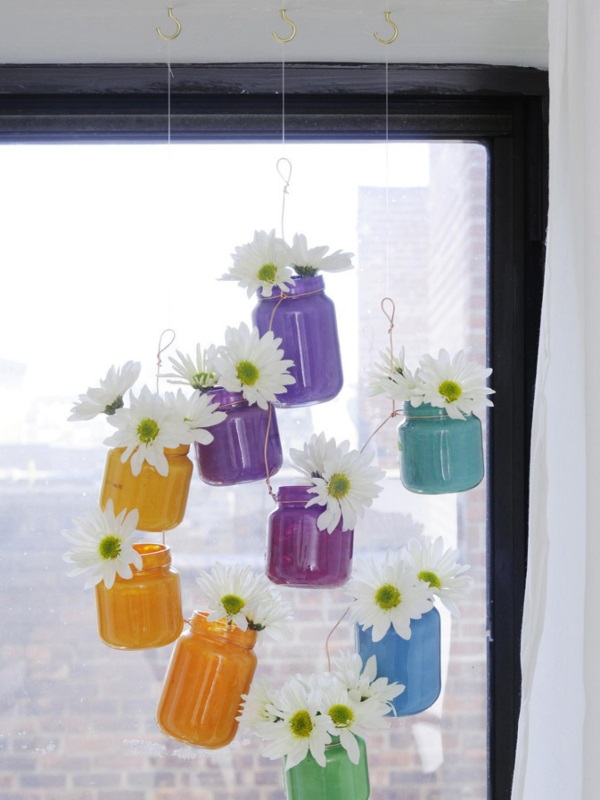
4. Glass jars
These are really items that are constantly accumulated in every home and can be used in a thousand ways! But, perhaps, they look most interesting in the role of a street or table lamp.


5. Lonely or broken chairs
Not sure how to use a legless stool? Or what to do with dining chairs that differ in color and design? Take inspiration from the photos below:


6. Door handles and knockers
Door handles and hammers can add originality and functionality to virtually every room in your home.


7. Burnt out light bulbs
Turn a burnt out light bulb into a very cute homemade decor, like this tiny terrarium or flower stand.


8. Cans
Why not? Pretty cute and convenient organizers for various things, pots for indoor plants, etc. are obtained from tin cans.


9. Old books
Crafts from books do not involve the use of your favorite and cherished works, but only badly damaged or unnecessary volumes. See what a beautiful decor they can turn into!


10. Maps
There are 3 popular ways to use old geographical maps:
- in the role of a wall decor that will remind you of places you have visited or places that still need to be visited;
- as a lampshade for table lamp or other lamp;
- for decoupage of old furniture.
But maybe you can come up with an even more interesting way?


11. Clothes and accessories
Is your closet full of old T-shirts? Not sure what to do with ties and belts you'll never wear? We hope that one of the methods below will give you a good idea.


13. Rulers and clothespins
As a rule, rulers accumulate in those houses where there are children or adults whose work is somehow related to drawing. We offer you several interesting ideas for use in the design of your home.


14. Balcony or stair balusters
Old balusters work great as a support for a console or a functional coat hanger. See below how to make a baluster original decor with your own hands.


This time our selection of ideas for decorating the house has come to an end, but with Dekorin you will find a lot of interesting things. Subscribe to our Facebook group and stay with us!
New ideas for using old things updated: October 10, 2016 by: Margarita Glushko
There was an idea for a long time to make stools, as in expensive furniture stores with carved legs. I present a cover version of such stools for 1200 rubles.
Instruments
- Hacksaw with small teeth.
- Screwdriver.
- stapler.
- Pencil.
- Roulette.
- brush for water-based paint and varnish.
- Sanding sponge.
From materials for 2 stools you will need
- 4 balusters with a symmetrical pattern - 480 rubles.
- 1 furniture board 1200 * 300 * 18 mm - 270 rubles.
- 1 bar 40 * 40 * 2000 mm - 100 rubles.
- Wooden sheet pile 50 pcs. - 30 rubles.
- Self-tapping screws 3.5 * 51 100 pcs. - 50 rubles.
- Foam rubber 40 or 50 mm (half sheet) - 250 rubles.
- Fabric (1 * 1.5 m) - 600 rubles.
- Metal corners 20 * 50 mm 8 pcs. - 120 rubles.
- Water-based paint + varnish - 500 rubles (I already had it, but I’ll count it in the total budget).
Price
Total 2400 rubles for 2 stools. It may be expensive, but the stool is made by hand.
Assembly
- We cut all the balusters in half. Then we saw off the square part so that the leg height is 360–390 mm.
The optimal height from the floor to the seat of the stool is 40-42 cm. The height consists of the height of the leg - 360 mm, the base for the soft pad - 20 mm, the height of the pillow - 40 mm. The base with the cushion can be combined, and the height of the leg will be 380 mm.
- Next, you need to cut the furniture board into 4 identical square parts. 2 parts - base for soft lining, 2 parts - for upholstery.
- The space between the legs must be filled by sawing off the required length from the bar. The bars must be sawn off exactly perpendicular, otherwise there will be ugly cracks that can only be removed with putty.
- From the ends of the sawn off bars and from the two inner sides of each leg, it is necessary to drill holes for 50% of the tongue length. Connect the parts to the tongue.
- Attach the base of the stool to the legs with a frame with 4 screws and 4 screws to the bars connecting the legs.
- On the inside, in each corner of the stool, pull off the metal corners, as in the photo below.
- After assembly, it is necessary to eliminate all roughness with a grinding sponge. After grinding, be sure to remove all sawdust and dust from the stool.
- The stool is ready for painting. A minimum of two coats are required, with an intercoat dry according to the instructions on the paint package. After the paint has completely dried, the stool must be varnished (preferably also in two layers).
- While the paint dries, you can wrap 2 square blanks in foam rubber and fabric. You can fix it either with a construction stapler, or with short self-tapping screws or buttons.
Foam rubber and fabric make up almost 35% of the total budget, and it’s not certain that you, like me, will like the result in the end. Therefore, the pillows can either be given to be sewn in the atelier, or you can buy ready-made ones. As a result, they can even cost less than 850 rubles for two pieces.
- It is better to fix a soft pillow on a stool by fixing it with 3-4 self-tapping screws with a maximum length of 40 mm. The stool is ready!
Labor costs
It will take quite a bit of time to create this miracle: about 4 to 6 hours, along with painting and cleaning.
Mistakes that should not be made
- Do not buy softwood balusters (including pine).
- Thoroughly eliminate irregularities and roughness before painting, otherwise after painting, each sawdust will turn into a “grain of sand” and will stick to you by clinging to clothes, scratching your skin.
- It’s better to use purchased pillows, because even after reworking my version of the seat, they still didn’t look presentable enough.
Experiment and everything will work out 😉
Installation of stairs, perfect installation of steps and stringers, flawless installation of treads and risers - that's not all. Railings for stair structures are no less important: firstly, they provide a safe descent and ascent, and secondly, they give the march a harmonious, finished look. Many people try to save on railings and balustrades, since the cost of manufacturing and installing strong and beautiful railings can be quite high. However, you should not neglect safety and aesthetics: creating and installing balusters with your own hands is an exciting process, the result of which will pleasantly please you. The most important thing is to choose the right materials and strictly follow the technology.
Wooden balusters
They look very aesthetically pleasing and give the fence a cheerful and cozy look. In addition, wooden balusters are easier to make with your own hands, and the price of such railings will be quite acceptable. For the idea to be successful, it is necessary to take into account all the nuances of the work and strictly adhere to the manufacturing technology.

Choice of materials and equipment
To turn the columns, you will need a certain number of blanks, which are recommended to be taken with a margin: in woodworking, marriage is not uncommon, especially for beginners. That is why it is not recommended to take expensive materials: damaged oak or walnut posts will cost a lot, and making a balustrade at such a price is an unreasonable decision. The best option would be blanks made of birch or pine: they are quite soft and perfectly workable.

Attention: the number of racks should be calculated based on the rule according to which the distance between the balusters must be at least 15 cm!
Creating carved balusters by hand is an interesting activity, but it requires perseverance and talent. In addition, it is quite difficult to immediately understand how to make such balusters yourself. Making turned and milled columns on a special machine will take much less time, and the result will be no worse. It should be noted that buying equipment at a high price is not worth it: making a simple machine for balusters is possible with your own hands. As a rule, this requires a metal base for the workpiece, a milling cutter or other tool for wood and an electric drive. If you want to make columns of more intricate shapes, it is better to give preference to a machine with a copier, where the depth of the cut is regulated by a special thrust roller or plate. In addition to electrical equipment, a set of various chisels may also be required.

Turning balusters
Before you start working with wood, you need to design the shape of the racks. To do this, it is desirable to accurately measure the height of the fence and the distance between future balusters, and then transfer the drawing of the columns to paper. It is important to indicate the depth of all cuts and bends. An approximate diagram of the drawing is shown in the figure on the right.
Next, you need to transfer all measurements to the workpiece itself - this will be needed in order to know exactly where which chisel to use or in what place it is necessary to change the support roller in milling machine for a piece of smaller diameter.
Making a stand with your own hands is performed in the following sequence:
- fixing the workpiece on the machine (this may require making holes in its ends);
- grinding the corners of a square blank (if required) - rough turning with a reyer (semicircular chisel);
- fine turning with a reyer at an inclination of 45º;
- turning curly elements (manually with chisels or on the machine by adjusting the thrust roller according to the template);
- column processing (polishing, varnishing).
When making support and decorative racks with your own hands, you should regularly check with the template!
Installation of supports
When the balustrade posts are ready, the only thing left is to install them correctly. Those who are not satisfied with the prices for installing balusters can try to do the installation themselves. It is recommended to perform it in the following order:
- Drill holes for fasteners in the base of the balusters (their diameter should be 2 times smaller than the diameter of the rack).
- Measure 5-10 cm from the edge of the upper and lower steps, mark the attachment points of the posts, screw the screws shallowly into the designated place.
- Using a fishing line stretched between the screws, mark the attachment points of the balusters on each step using a square.
- Drill a hole approximately 5 mm in diameter at each point.
- Screw a metal stud or wooden dowels into each rack.
- Install poles on studs.
When installing balusters with your own hands, it is important to observe the utmost accuracy: you need to measure the alignment of the racks and the distance between them regularly. For a visual representation of the installation of supports, watch the video.

Do-it-yourself metal balusters
Working with wood with a little skill is not very difficult. But what if you want to install a beautiful iron railing on the stairs? The question of whether it is possible and how to make metal balusters with your own hands can be answered in the affirmative - but this is true only for those who have certain skills in working with iron and a welding machine.
Self-manufacturing and the installation of iron racks is possible only by cold forging: all other methods require professional knowledge, the presence of a special room and expensive large-sized equipment. Working on a staircase railing at home is a laborious process, but at the same time you can create an excellent design yourself, according to your own sketch and at a reasonable price.

Training
To create a metal fence with your own hands, you will need the following equipment and materials:
- welding machine and necessary accessories;
- angle grinder with attachments, cleaning wheel;
- bubble level;
- vice, hammer, gas key;
- material for the balustrade: rolled metal and profile;
- decorative elements and overlays.
When choosing materials, you should take care of transporting the metal in advance: the length of the profile must be at least 5 meters. At the same time, the cross section of the elements should be small - so it will be easier to cut and bend them, and the price of such rolled metal is much lower.
Process

Before proceeding as work, it is necessary to think over a sketch of the future fence. You can draw it yourself or pick up a picture in a magazine. Next, you need to find a platform for forging: its dimensions should allow you to draw a ladder diagram on a 1: 1 scale.
When the silhouette of the stairs is drawn, you can apply the full-size railing frame for metal balusters. If all contours are drawn proportionally, a balustrade pattern is drawn with chalk inside the frame. Too complex curly elements should be avoided: for a non-professional, their manufacture will be too complicated. Next, you need to measure the length of each element - for this you can use a regular rope. Further work must be done in the following order:
- cut the profile into pieces of the desired length;
- holding each element in a vice, give it a shape using gas key and hammer;
- cut off the excess length of the metal;
- weld a frame for a pattern from a profile;
- gradually, piece by piece, lay out the pattern of the balustrade and weld firmly on both sides, attaching decorative elements;
- install a balustrade on the stairs;
- clean the seams with a grinder;
- prime and paint balusters.
Do-it-yourself installation of metal balusters is possible in two ways: on flanges or by the anti-vandal method. At the same time, fastenings can be made both on the steps and at the end of the stairs.
Wood overview
You can see an overview of wood for the manufacture of balusters in our article. It is recommended to use solid wood, as it is less prone to deformation under stress. The advantage of flat balusters is that they can be placed close to each other, forming additional support and a single pattern.
Instructions for making balusters
- First you need to make a sketch and apply it to pre-prepared wood.
- Cut along the contour.
- Sharpen decorative elements. Make them smooth and symmetrical.
- Glue the balusters.
- Mount the handrail.
- Varnish.

Making wooden balusters with your own hands - great way save about half the cost in the store.
Only registered users can leave comments. Come in, please.


2018 © construction portal
Use of materials is allowed only with prior consent of the owners.
All rights to pictures and texts belong to their authors.
How to prepare drawings and make flat wooden balusters with your own hands
Do-it-yourself flat balusters made of wood, drawings for them, as well as a tool with which you can make similar structural elements of the stairs, are the subject of hunting for lovers of home crafts. The fact is that if you make balusters with your own hands, this will give your staircase an original and memorable appearance that cannot be obtained by other means.
 Baluster fastening scheme.
The concept and types of structural element
Wooden balusters are an architectural element, which are columns of stairs and railings of a ground fence carved from wood. Initially, balusters were installed on the porch of the house, and these were shields made of solid boards. Their main purpose was to protect the porch from the weather. Later they became a decorative element, as a result of which their appearance acquired the familiar shape of a column.
Types of balusters.
In Russia, mainly flat wooden balusters were used, in contrast to products round shape(Such decorative elements are inherent in the countries of Western Europe; you can see them, for example, in Catholic churches). Russian balusters covered with carved ornaments were used both to decorate residential buildings and for household buildings and gazebos at the house. Everything depended on the desire and skill of the owner of a household. The shape of the product favored the most daring design experiments.
Balusters have several varieties, and they are divided into different types depending on:
- forms;
- material;
- the presence of decorative elements;
- method of fastening to other elements of the building structure.
In addition, the most common balusters in our country can be decorated with various types of ornaments:
The scheme of fastening balusters to railings and steps.
- deaf;
- through;
- contour;
- bracketed;
- embossed.
At the same time, studying information on the topic of how to make balusters, it is worthwhile to simultaneously select drawings and decorative carving options. This will allow you to fit these decor elements into the exterior of a building or structure without any problems. An experienced wood carver can create several options for balusters, the combination of which will give originality to the architectural image of the house.
Flat wooden balusters can be decorated with elements of the same shape, placed in random order, their pattern can repeat the pattern of the previous element. The third kind internal thread does not have, and the element is cut according to the given shape.
Choosing the right wood
For the manufacture of wooden balusters, it is necessary to choose the right type of wood.
So, it should not only be durable and functional, but also easy to handle manually.
At the same time, when starting to choose a material for making a wooden baluster with your own hands, it is worth remembering that larch, oak, pine, birch and beech are most often used for this.
Naturally, the tree of each listed type has its advantages and disadvantages, which you should familiarize yourself with even before you start making balusters with your own hands.
If we consider them in detail, we can identify the following properties of various types of wood:
The scheme of fastening balusters to the bowstring.
- Oak is considered the most suitable for creating these elements. made from it wooden elements very durable and practically do not crack under the influence of precipitation and the sun. This is a very valuable quality in the case when the balusters will be installed outside the building.
- Ash takes second place when turning balusters, as it practically does not rot and can withstand significant loads on the “bending”.
- Another durable type of wood is beech. But this tree quickly loses its shape if it dries too much, and as a result, the appearance of the baluster deteriorates.
- If you need an almost "eternal" tree that does not rot and tolerates mechanical stress well, you should use larch for carpentry work.
- The cheapest and easiest wood to process is pine, which perfectly tolerates sudden temperature changes and is resistant to fungus. However, due to its porous structure, it does not paint well.
All these features of various types of wood used in the construction of flights of stairs should be taken into account when making balusters on their own. Wood must be selected for the manufacture of balusters, taking into account the method of processing and the method of finishing the surface of the finished product.
Product development process
The manufacture of wooden balusters begins with the creation of drawings and sketches of the future product. This will allow you to get an idea in advance of how the balusters will look in the "tree". At the same time, if all elements are uniform, only one can be depicted on paper, and later it will be replicated in a tree. A complex pattern of balusters will require the creation of several drawings of the elements of this product.
Wooden planar stairwells are usually sawn from boards, while maintaining symmetry and maximum smoothness for the edges that are processed. After one blank is cut, it is connected to another with glue. Before this, the surface of both parts is carefully cleaned and degreased.
When gluing a baluster, try to use the sketches of the product so as not to confuse the ornament and glue it incorrectly. In addition, the manufacture of these wood products with your own hands in a similar way requires compliance with the drying technology. In the event that you neglect this rule, you risk getting a crumbled product even before the end of its standard service life.
An interesting video in which you can clearly see the whole process of manufacturing a flat baluster on a CNC machine.
After all the parts are glued together, the balusters can be put in place and covered with a railing. As a result of the work, a beautiful, but unstable structure comes out, which makes sense to further strengthen. This can be done using metal corners or additional wooden structures.
Separately, it is worth talking about the installation of balusters on wooden stairs. So, for example, it is always necessary to use only the wood from which flights of stairs are made. This will avoid distortions and deformation of the structure, and will also make it possible to create a single design ensemble of the staircase structure.
Video about the rules for installing balusters and handrails on the stairs.
In addition, the installation of balusters on stairs is significantly different from the installation of these products on other elements of the building, so if you do not have experience in this type of work, it makes sense to invite a professional for this. And yet, you can learn how to make flat balusters and install them on stairs yourself, the main thing is to carefully study the information available on this subject and gain skills in working with wood.
Do-it-yourself flat wooden balusters: drawings and mold for making
Do-it-yourself flat balusters made of wood, drawings for them, as well as a tool with which you can make similar structural elements of the stairs, are the subject of hunting for lovers of home crafts.
Drawings of stair railings
Decorative elements of the interior determine the stylistic orientation of the room being designed. Drawings of balusters will help to give the staircase a finished look, whether it be the simplicity and reliability of stone, playful ornate metal structures, the strict nobility of wooden marches or the innovation and practicality of plastic and polymer fittings.

The role of stair railings
Supporting columns help to actualize structural elements (stair leaves, railings) and interiors, focusing the observer's attention on small details and decor. It is the properties of the material that dictate the scope and possible shape of the fences. Allowable load calculations, safety rules, the required distance from one post to another and the peculiarities of the manufacture of ladder elements reduce the number options execution, outputting some general rules, valid for columns of any type.
The distance between the balusters should be selected so that the staircase looks harmonious. To do this, you need to take into account the size, shape and material of the columns, as well as the style of the room.

The gaps between the balusters must comply with the norms
preliminary calculations
The staircase is primarily a functional structure, and the aesthetic aspect is always secondary. Movement should be comfortable, for which all parameters are calculated for each element separately.
Baluster height for stairs
The handrail located 800-900 mm from the floor is considered the most convenient. Such a height is possessed by typical fittings cast in molds. The allowable range lies within 650-1500 mm and is dictated by personal preferences so that it is convenient to lean on the railing, but at the same time the design would not be unnecessarily bulky.
Distance between balusters
This value can be determined only by calculating the total number of columns and their size. For balusters with a thickness of 40-80 mm, a distance of 120-150 mm will be normal. If there are children in the house, it is recommended to install balusters no further than 80-100 mm from each other for safety reasons.
Preparation of sketches and templates

Schematic representation of the dimensions of a turned baluster
When talking about drawings and templates for stairs, wooden structures are often meant. It is wood that provides a lot of possible design options for marches and fences, while other materials only give a choice between several typical forms.
The drawing of stair balusters can be made on the basis of ready-made options, but it can also be really unique, you just need to keep in mind the average distance between the balusters. Fences are characterized by the following parameters:
- shape (flat, cylindrical, conical, combined);
- number of faces;
- manner of execution (chiseled, carved, artistic);
- type of wood (beech, ash, pine);
- the presence of additional materials;
- type of fastening (to the handrail and to the steps).
Before proceeding with the preparation or selection of the finished drawing, it is recommended to sketch out a sketch of future elements indicating the approximate dimensions and height.

A pre-designed template will help to competently complete all the components of the columns. It is especially useful for models that cannot be realized with a lathe alone. These include columns of complex shape (polyhedra) and carved elements. Next, the workpiece is fixed on the machine, markings are applied to it according to the drawing, indicating the distance between the various parts and their sizes.
Tip: When making columns with your own hands, you can designate the tools on the drawing with which its individual sections will be processed.
Flat Column Design

Flat balusters: the void between them creates a pattern
Along with voluminous balusters of various shapes and carved elements, flat elements of stair railings are gaining more and more popularity. They can be the same or different in size, and the best visual expressiveness is achieved precisely by combining and composing various sequences of flat elements.
Such strips can be located at an unequal distance between themselves, creating an asymmetric composition. Newfangled architectural trends leave their mark on balusters. The dimensions of the elements, their height, thickness and slope are all just tools for creating stylized designs.
Flat balusters are much easier to make with your own hands, they require slightly different tools, but in general the workflow remains the same:
- selection of ornament or stencil;
- drawing a pattern on the workpiece with a jigsaw;
- final processing of the part with cutters to give maximum surface smoothness and clarity to the pattern.

Scheme of a flight of stairs
Production of parts according to the sketch
If you have basic skills in working with a lathe, you can carve racks according to your own template. A few simple tips can help you with this:
- Ideally, the columns are machined from the same material as the rest of the stairs. In this case, attention should be paid to coniferous wood. The wood should not be old, too wet or too dry to avoid cracking or excessive fibrous surface.
- For primary processing, you can use an ax, and then a small mounting hole is made in the end part of the workpiece.
- It is recommended to start work by cutting out simple shapes (cone, cylinder, circle, square), the combination of which later forms a complex shape.
- For rough and finish turning, a reyer is ideal, when working with which it is important to maintain a certain angle and prevent vibrations.
A variety of architectural styles and interior solutions makes it necessary to approach the design of the premises in a complex manner. Everything is taken into account: structural elements, steps for stairs, decorative details and even the distance between the baluster figures and their height. The above material was created in order to help determine the choice of decorative and functional elements and independently produce the required parts. Comments and reviews about the article will definitely help other users to create a unique interior on their own.

I have been looking for drawings of a stair railing for a long time. This article describes everything in detail, now you can do it. A convenient sketch that can be printed, all dimensions are well read. I will buy the material and I will make something similar.
Baluster drawings: the ratio of the distance between the railings, the height and size of the stairs
Baluster drawings are necessary in order to make a correct and safe staircase. Learn how to calculate all design parameters.
How to make drawings and properly assemble flat wooden balusters with your own hands

There are many design ideas for flat balusters.
DIY flat wooden balusters
Not everyone can make wooden balusters with their own hands. For their implementation, a person must have minimal technical skills. To create a flawless product, you must have the structural data of the part and be able to read the drawings. Flat balusters are made of wood and differ only in the way the part is processed.

Various forms of flat balusters.
What are balusters
Balusters are the main parts that make up the stair railing. They are figured columns supporting the railing. They consist of three main parts:
- Base. The lowest part of the part, with which the entire structure is attached to the steps or directly to the floor.
- Body. It is this middle part that is decorated with carvings and various figured components.
- Base part. Helps to securely fasten the railing, serves as a kind of emphasis.

Balusters are attached to the base of the steps with bolts.
Usually, the shape of the base and the support part has the same configuration. The ancient Assyrians began to use such constructions, this fact is evidenced by the data of archaeological excavations. Then, wooden balusters began to be widely used by architects to protect the porch from wind and bad weather.

Ethnic porch style with flat balusters.
These elements were made from wide boards without gaps and lined up in one continuous row. Subsequently, the porch began to be decorated with flat wooden balusters, decorated with intricate carvings. Balusters have many modifications and varieties, but for Russian architectural style flat models made of wood are characteristic.

Wide shape of flat balusters.
Manufacturing process
Every owner dreams of making something with his own hands. After all, this process will not only help to reveal your creative potential, but also show you a real master. But one dream is not enough, so you will have to thoroughly familiarize yourself with all the nuances of carpentry if you want to really decorate your home.

The veranda is decorated with flat balusters.
First of all, you need to decide on the type of carving that will decorate your future flat wood balusters. To date, there are several types of thread:


Thanks to various techniques processing, you can pick up balusters for every taste. To make it easier to imagine the future product, draw a preliminary drawing or make a test copy with your own hands. A variety of choices allows you to choose the right balusters for absolutely any stylistic interior solution. You can buy ready-made balusters or show your imagination and make them yourself.

Due to the fact that flat elements are easily installed in close proximity to each other, you have the opportunity to create an original ornament or even a panel. Having developed a drawing with your own hands, you will save your house from stamps.

Beautiful design of flat balusters.
With a little effort and showing your imagination, you will make the railing of your dreams. Balusters are widely used in the construction of gazebos, and when decorating a porch or veranda. Don't fill your home with stereotypical items, make something special.
Production of wooden balusters.
The choice of a wooden base for the manufacture of flat balusters
You can make figured elements using various types of wood. Before making a choice in favor of one or another variety, think about durability and functionality. And only last of all appearance finished product. It is highly recommended to do so professional craftsmen. The most commonly used wood species, which are characterized by increased strength . So that you can make the right choice, we will give brief description the main list of tree species:
- Oak. The undisputed leader in strength among all other types of wood used in the manufacture of flat balusters. Parts made from it are practically not amenable to deformation and cracks.

Flat balusters are made of oak.

Flat balusters are made of Larch.

Flat balusters are made of ash.

Flat balusters made of beech.
The process of making balusters
Process preparatory work for making a product with your own hands includes the creation of your own drawing. If you decide to use a ready-made sketch, we recommend that you first make it larger. Independent execution of complex parts requires a preliminary study of the drawing. Carefully delve into all the nuances, and mentally imagine its implementation. Only after that start work.

Sketches of flat wooden balusters.
A painstaking analysis of the drawing will help to better imagine the future design and save you from unnecessary errors.
Prepare in advance an antiseptic, tape measure, electric jigsaw, wooden planks, varnish, brush and sandpaper. Carefully transfer the drawing to a wooden base and start cutting. This process is not fast, so be patient.

Check the material you have chosen for defects.
Using sandpaper, carefully work the edges until you achieve absolute smoothness. Carefully monitor the symmetry of the balusters, because it will depend on general form designs. Before assembling the parts together, degrease the fields to be joined. Only then can the gluing process begin. Let the parts dry well, and you can proceed with the installation.

Perfectly crafted flat wood balusters.
Forget about standards, give free rein to your imagination and creativity. Decorate your home on your own, it will give your home a unique zest and genuine comfort. Any handmade thing will bring creative energy and a positive attitude into your life.